Custom dashboards
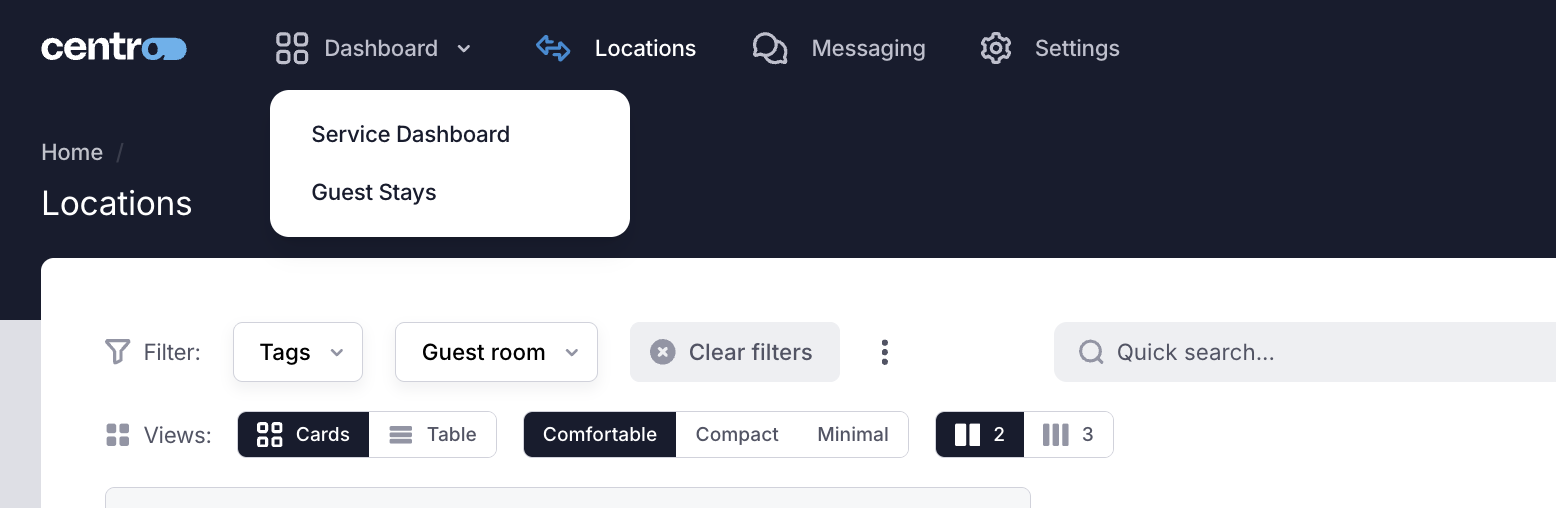
The default Centro Dashboard gives everyone the same view of your network. Custom dashboards let you add further dashboards alongside it and decide which user roles can see each one. Use them to give different teams a view that suits them — one dashboard for reception, another for facilities, another for a specific site.
Each custom dashboard has its own name, web address (its slug), optional description and tags, and a list of roles that are allowed to open it. Custom dashboards belong to your workspace, so they are shared across everyone in your workspace who has access.
Who can manage them
Managing custom dashboards needs the Custom Dashboards permission, granted through user roles under General Settings → User Management. Administrators have this permission by default.
Anyone with a role that can view a dashboard will see it in their navigation, whether or not they can manage dashboards.
Creating a custom dashboard
-
Go to General Settings → Customisation → Custom dashboards. You can also open this page from the dashboard dropdown in the top navigation by selecting Manage Dashboards.
-
Select Add new.
-
Complete the form:
Field Description Name The dashboard's display name. This is what users see in the dashboard dropdown. Required. Slug The dashboard's web address, used in the link /dashboard/{slug}. Must be unique within your workspace. Required.Description An optional note describing what the dashboard is for. Tags Optional labels for the dashboard. Tags appear beneath the dashboard name in the navigation dropdown and help users tell dashboards apart. Enabled Controls whether the dashboard is live. Enabled by default. Clear it to hide the dashboard from everyone without deleting it. Roles The user roles allowed to open this dashboard. Add or remove roles with the role picker. -
Select Create.
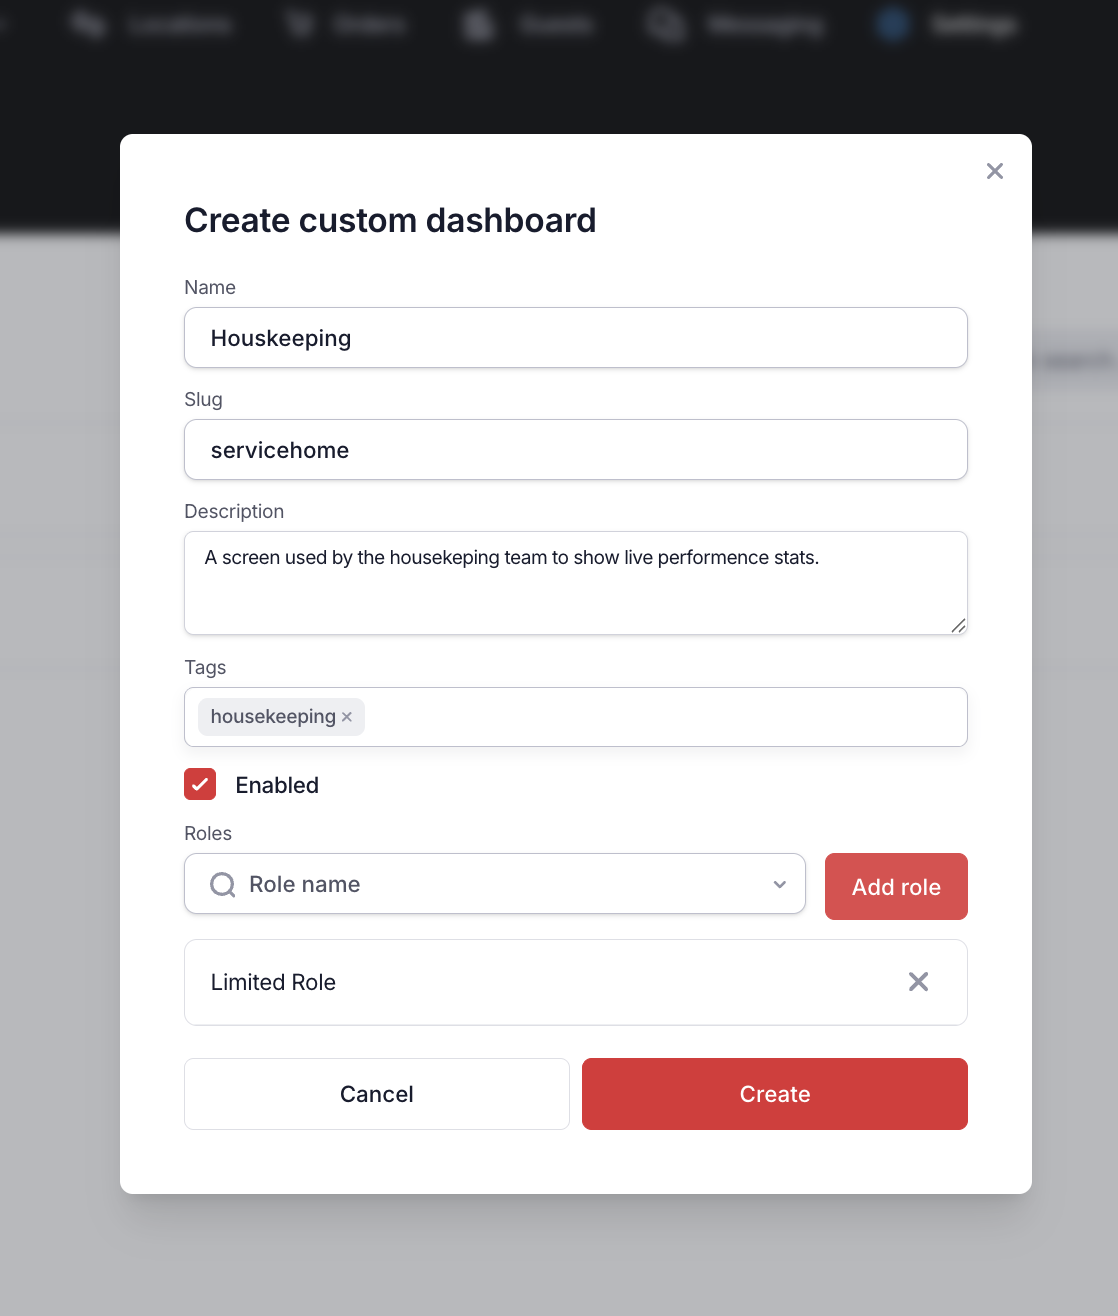
Each slug must be unique within your workspace. If you enter one that is already in use, Centro flags Slug already exists and you'll need to choose another.
Administrator and root roles (the highest-level roles) can see every dashboard in the workspace, regardless of the roles assigned to each one. The Roles list controls visibility for everyone else.
Editing and deleting
On the Custom dashboards list, each dashboard shows its name, slug, an Enabled or Disabled badge, and any tags.
- To change a dashboard, select Edit and update its details, then Save.
- To remove a dashboard, open the options menu (⋯) and select Delete, then confirm.
Deleting a custom dashboard cannot be undone. To take a dashboard out of use without losing it, edit it and clear Enabled instead.
How users find their dashboards
Users open their dashboards from the dashboard menu in the top navigation, on both desktop and mobile:
- Selecting the dashboard name always opens the default /dashboard.
- The dropdown lists the custom dashboards available to the user's role, with any tags shown beneath each name. Selecting one opens it at its own address,
/dashboard/{slug}. - Users who can manage dashboards also see a Manage Dashboards shortcut at the bottom of the dropdown.
For most roles, only enabled dashboards assigned to the user's role appear in their menu. Administrators see every dashboard in the workspace, as noted above.
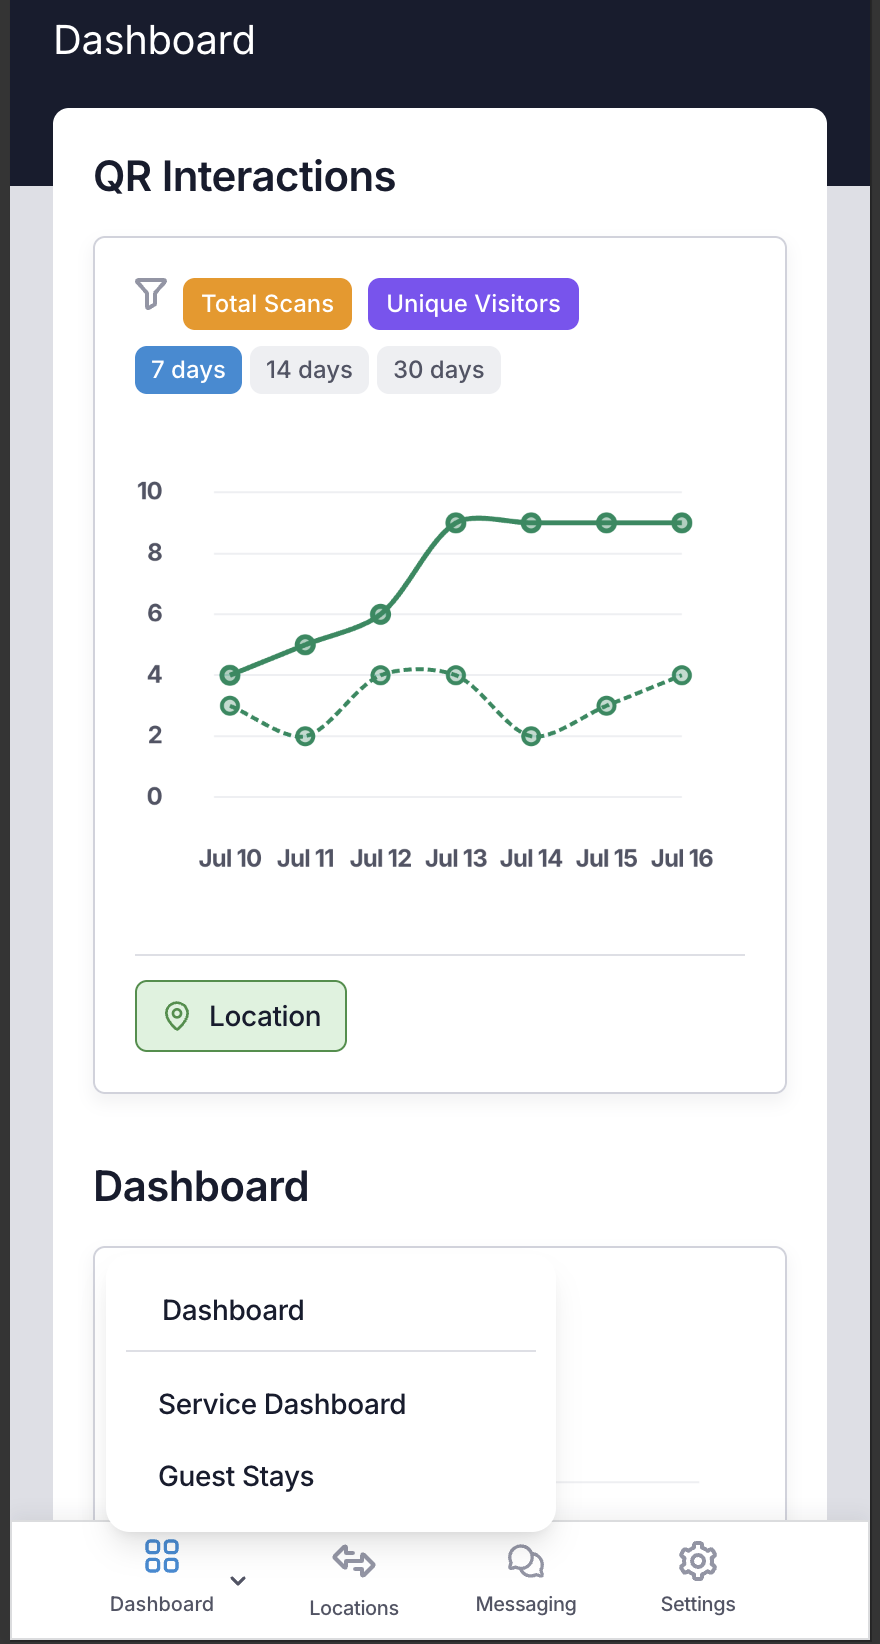
Creating a dashboard here makes it available in the navigation, but a newly created dashboard opens empty until its layout has been configured. See Building Dashboard Content for how to add widgets, charts and tables.