Flexipass


FLEXIPASS Webkeys Integration
Key Capabilities
-
Mobile key provisioning Issue, manage, and revoke digital keys programmatically via the FLEXIPASS Webkeys API.
-
Time-bound and device-bound access Keys can be restricted by validity window and tied to a specific device.
-
Operational workflows Automate access for guests, staff, and operations based on bookings, roles, or schedules.
-
Instant revocation Remove access immediately to maintain security and control.
Centro integrates with the FLEXIPASS Webkeys API to provide secure, mobile-based access control across a wide range of supported door lock systems. This integration allows Centro to issue, manage, and revoke digital keys programmatically, without requiring direct lock vendor integrations within customer environments.
The FLEXIPASS integration supports use cases including guest access, staff access, and operational workflows, enabling keys to be provisioned dynamically based on bookings, roles, schedules, or other system events. Keys can be time-bound, device-bound, and revoked instantly, improving both security and operational control.
By using FLEXIPASS as an access abstraction layer, Centro supports multiple lock manufacturers through a single, consistent interface. This reduces integration complexity and allows deployments to scale across properties with mixed hardware estates.
The integration is certified and live, supporting leading access control platforms including SALTO, ASSA ABLOY, Dormakaba, Omnitec, Iseo, Hotek, and TTLock-based systems, with additional vendors being added over time.
This approach aligns with Centro’s broader integration philosophy: secure by design, hardware-agnostic, and fully API-driven.
Welcome to this Flexipass integration walkthrough. In this session, you'll learn how to set up and manage door access within the Centro system.
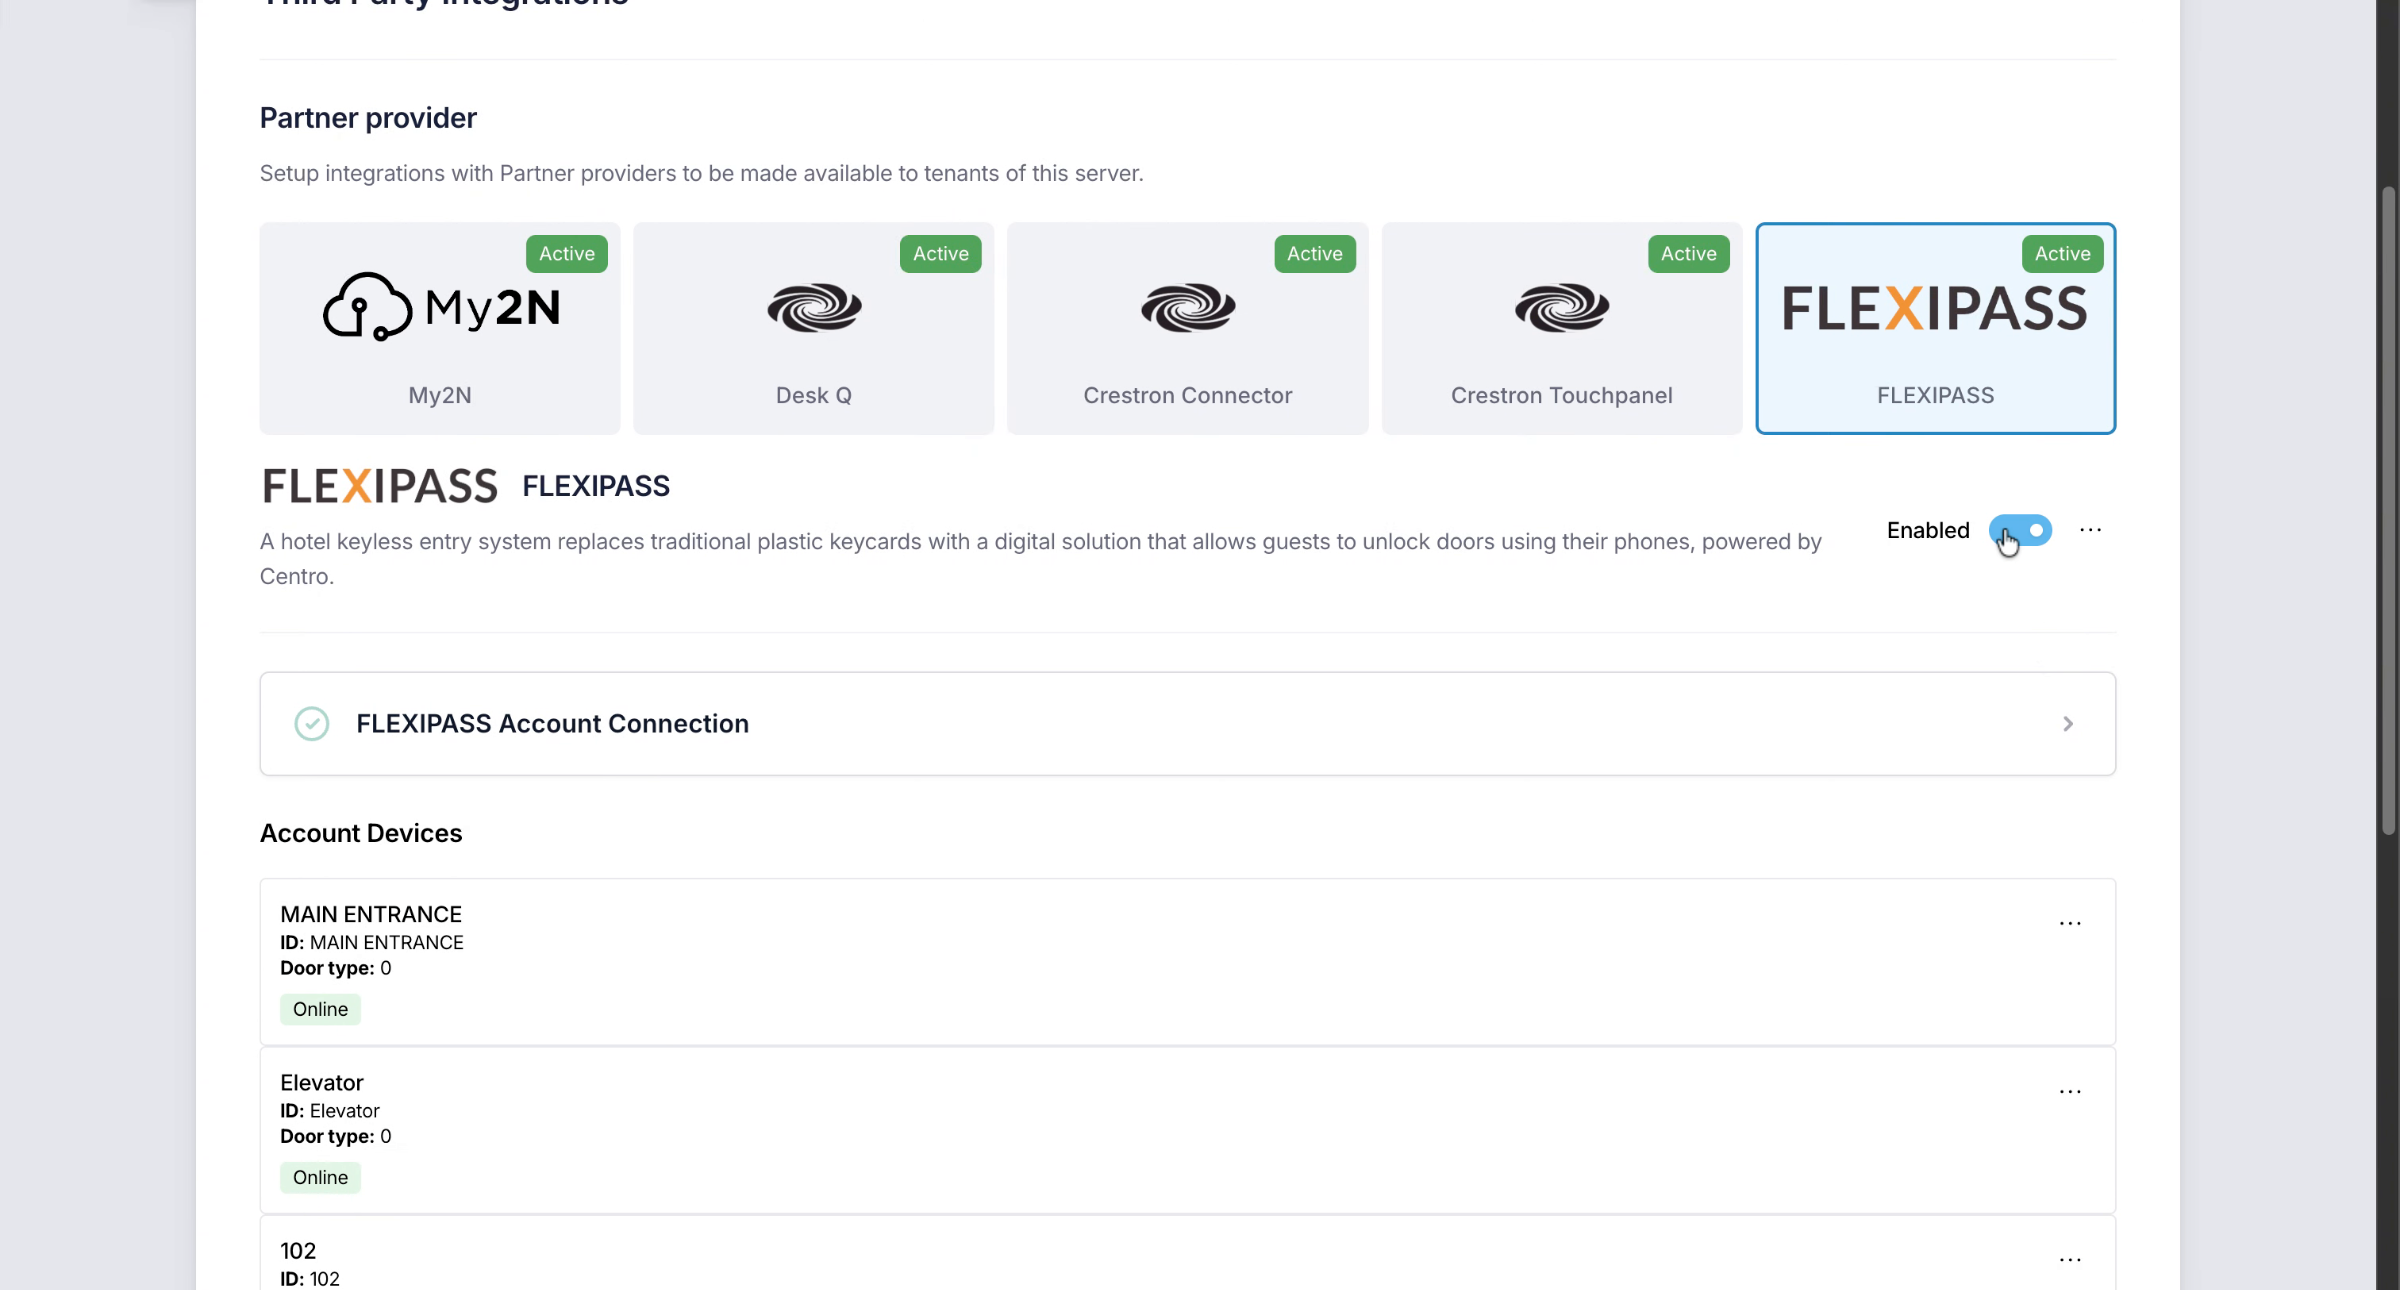
1. Enable Flexipass Integration
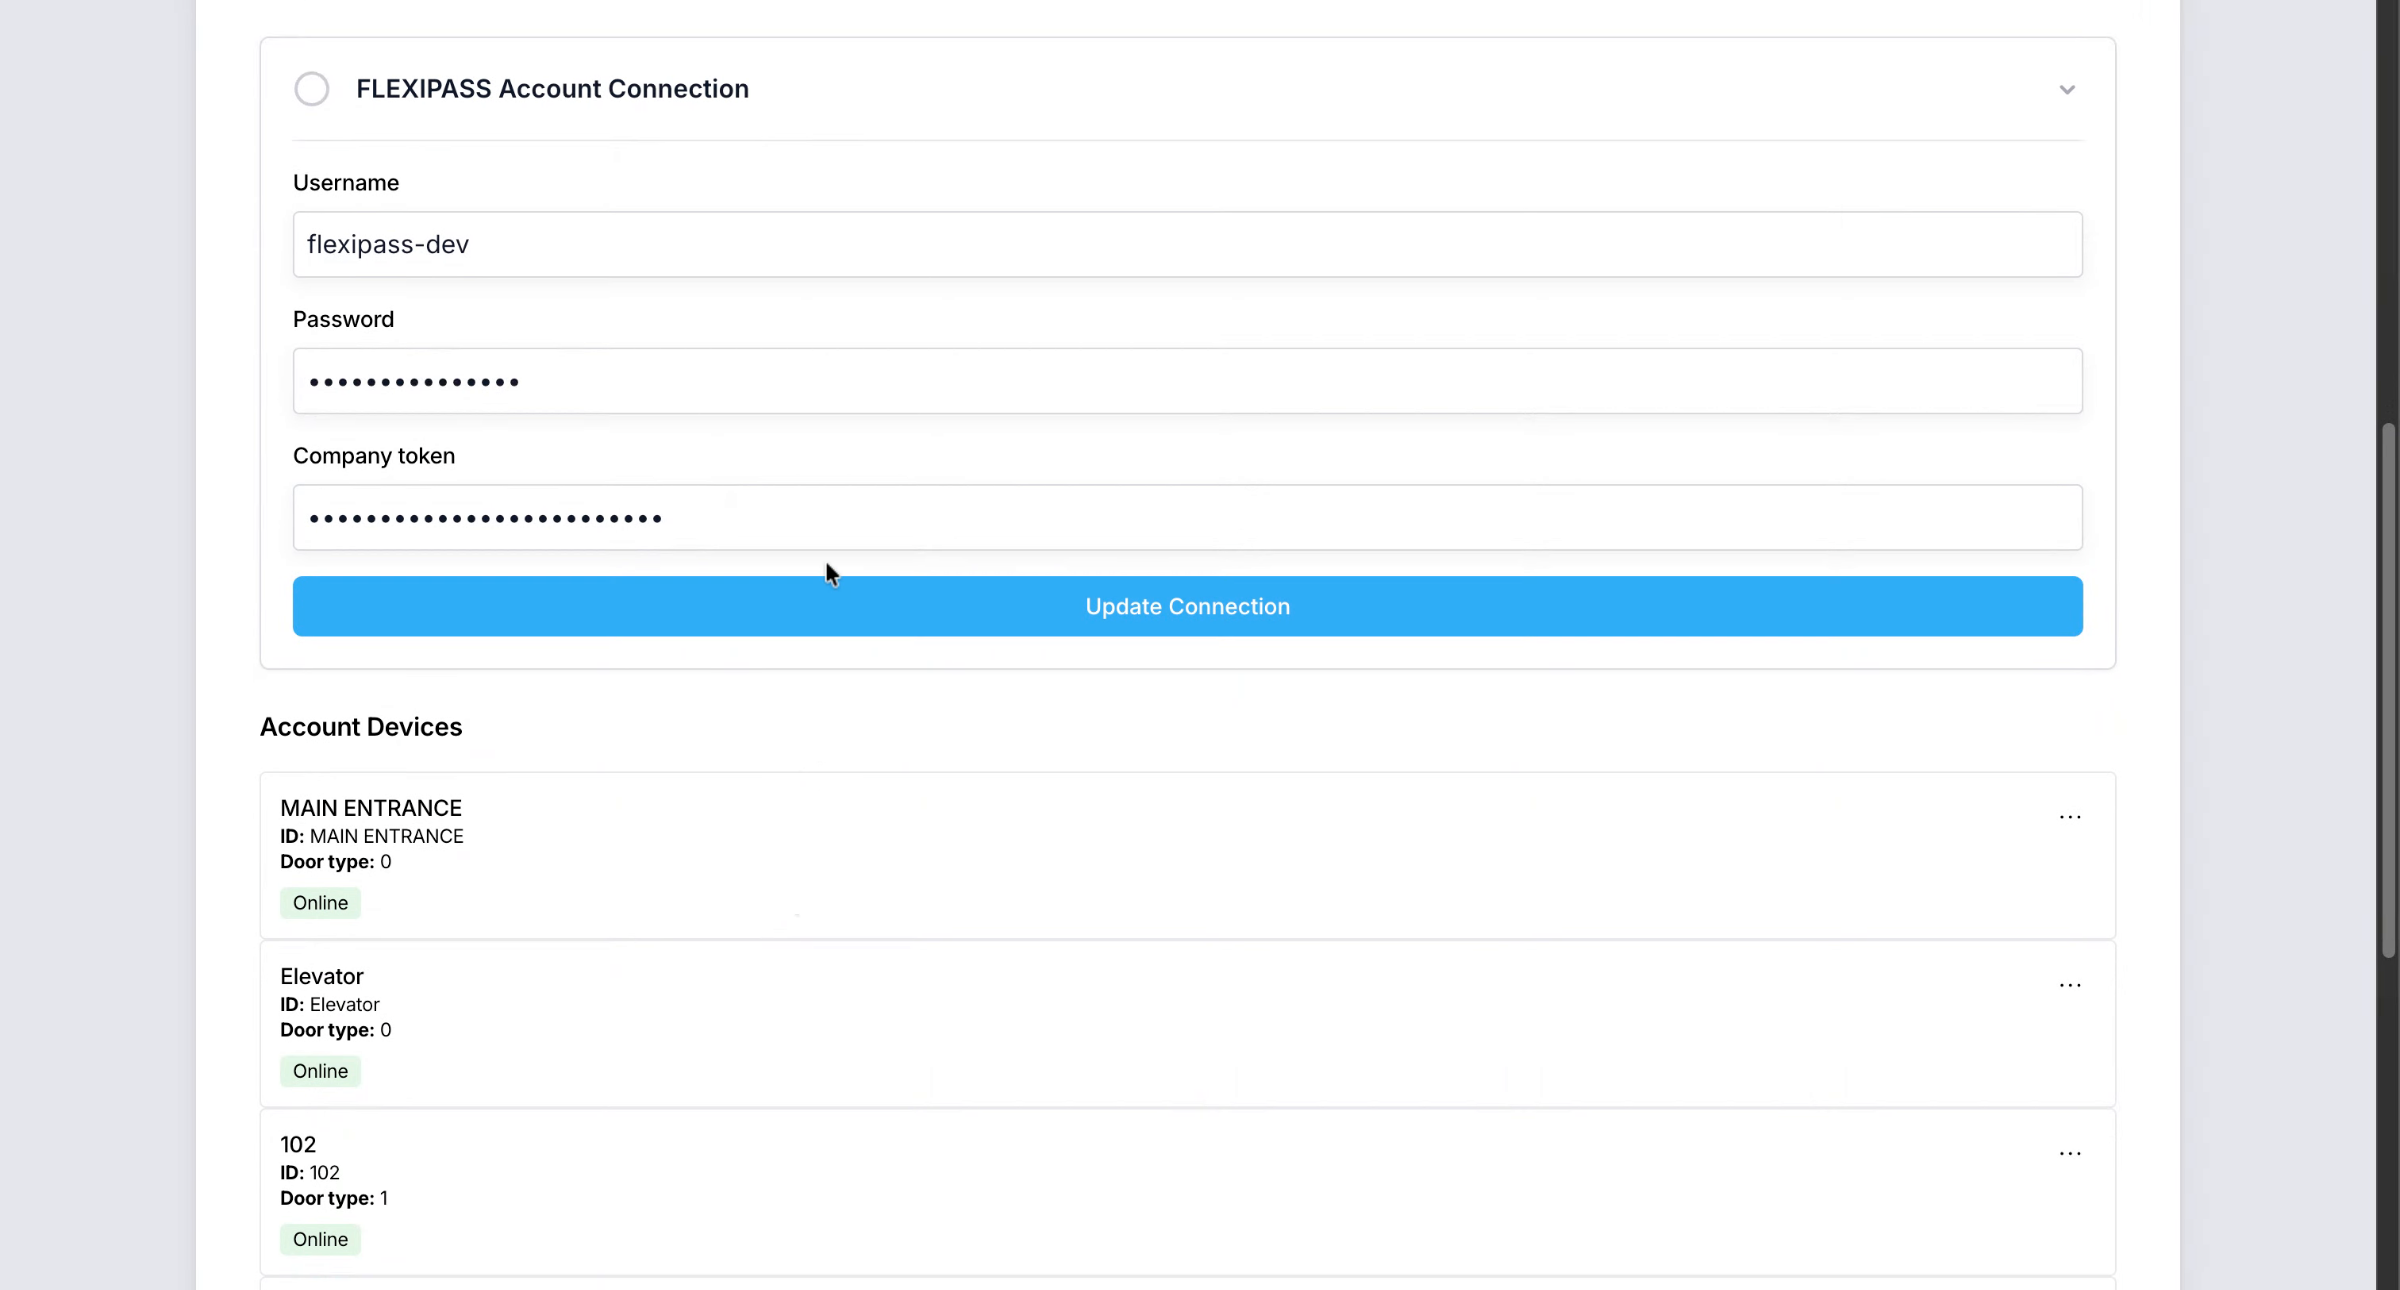
Enable the flexi pass integration and enter your username, password and Company token
2. Segment
These credentials are setup during the onboarding with the Centro team.
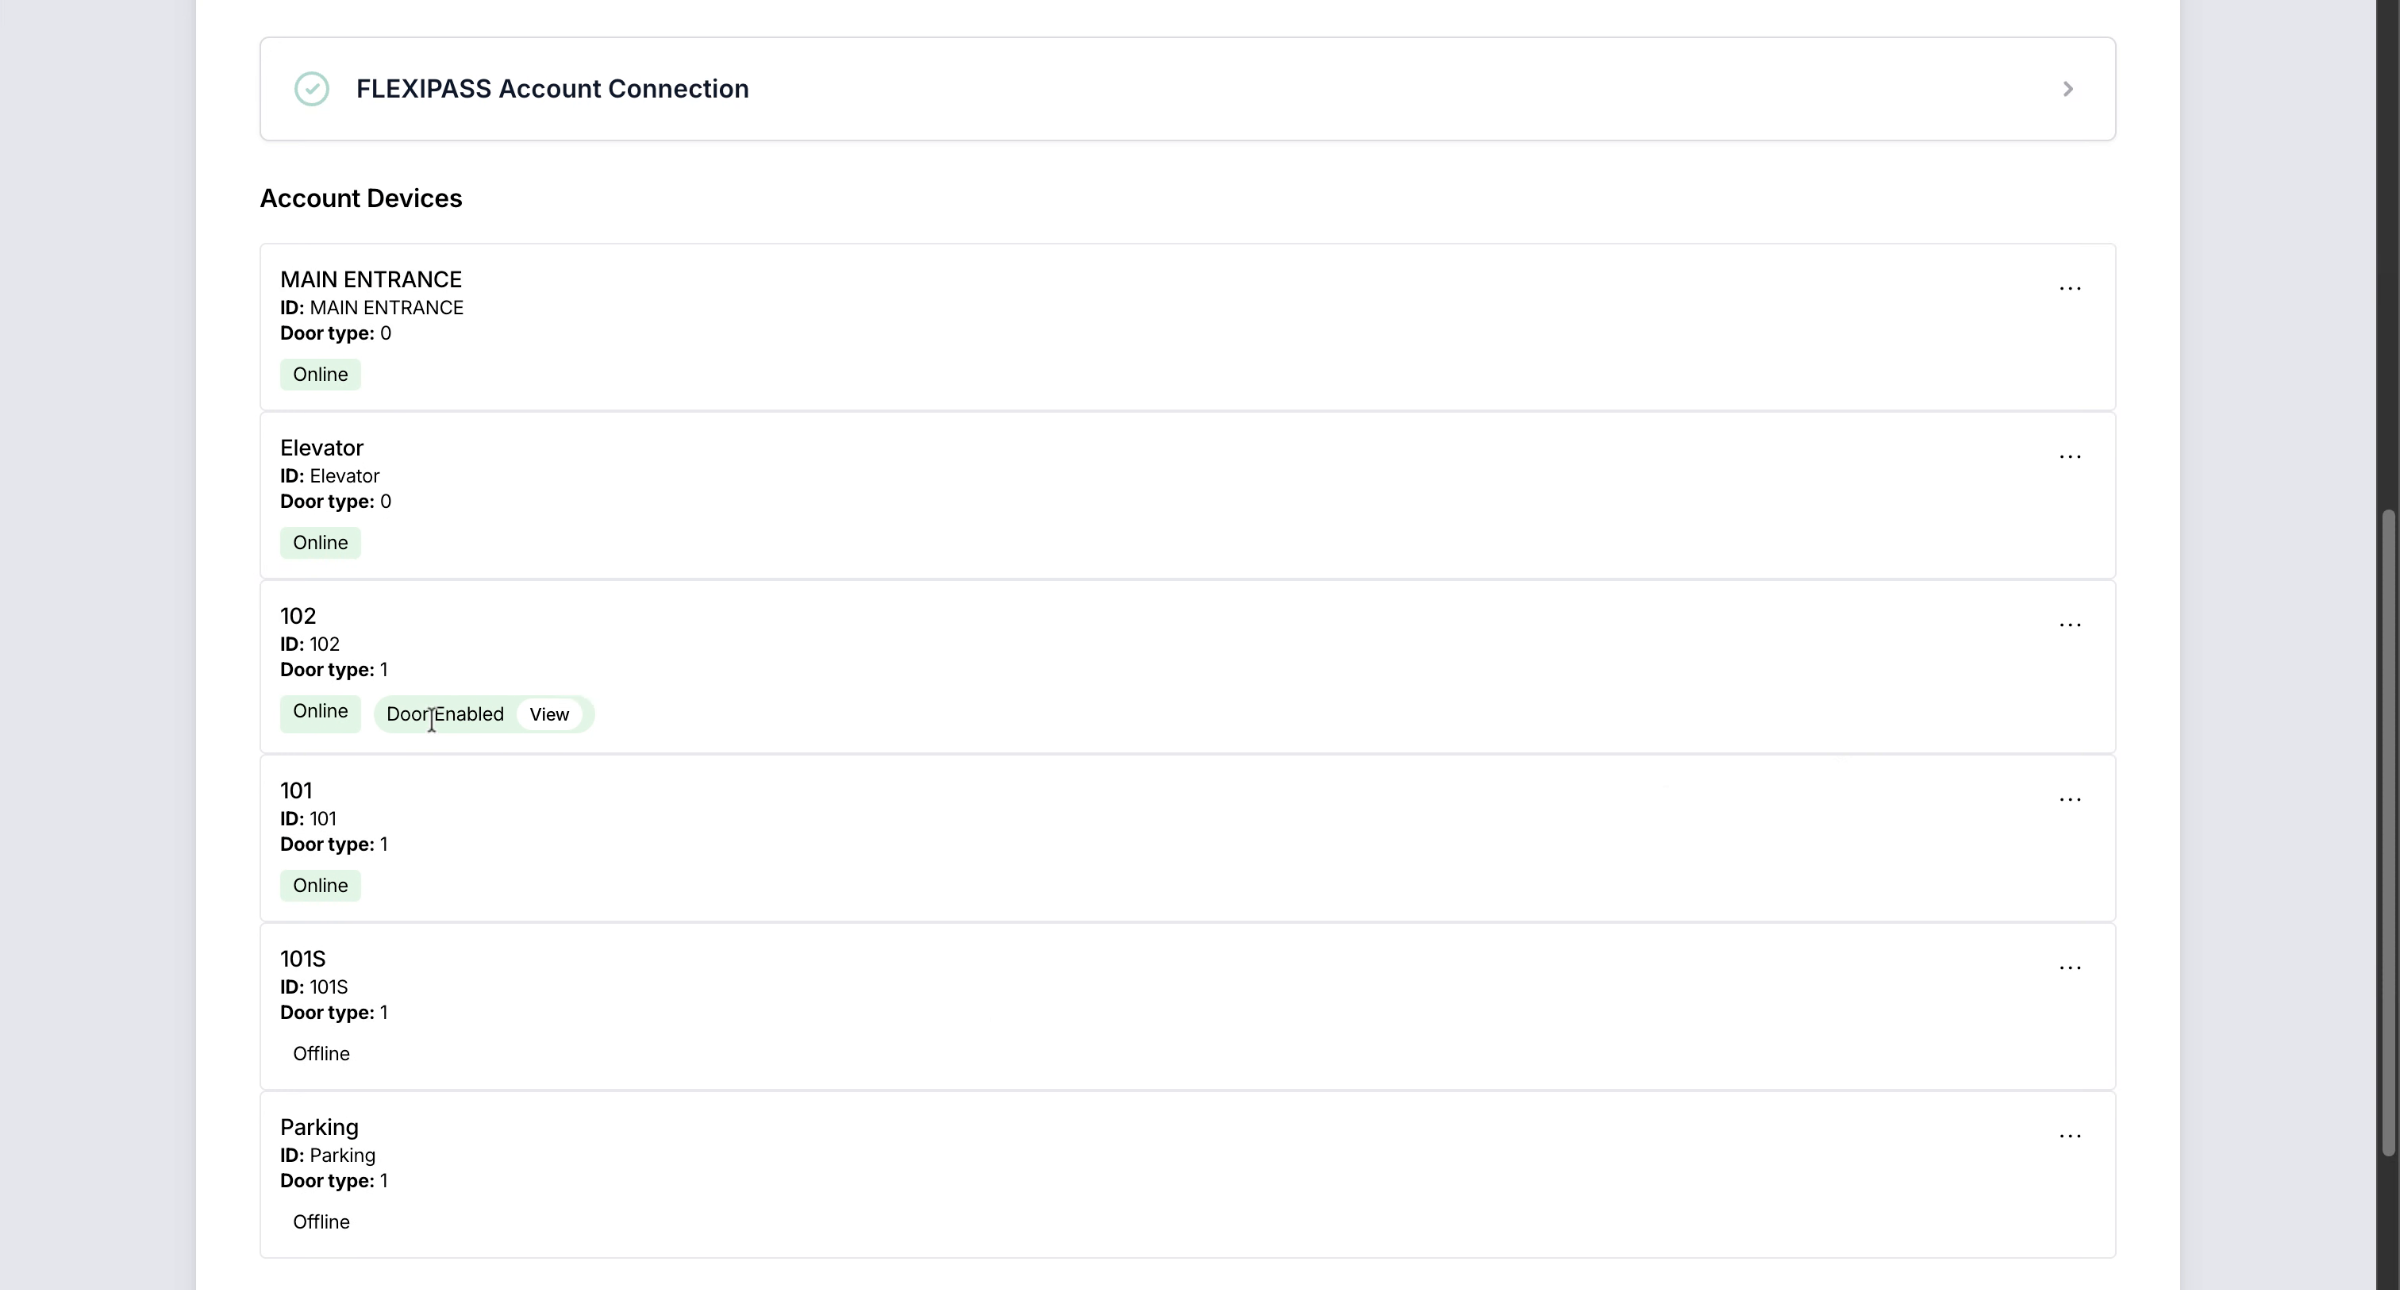
3. View Available Doors List
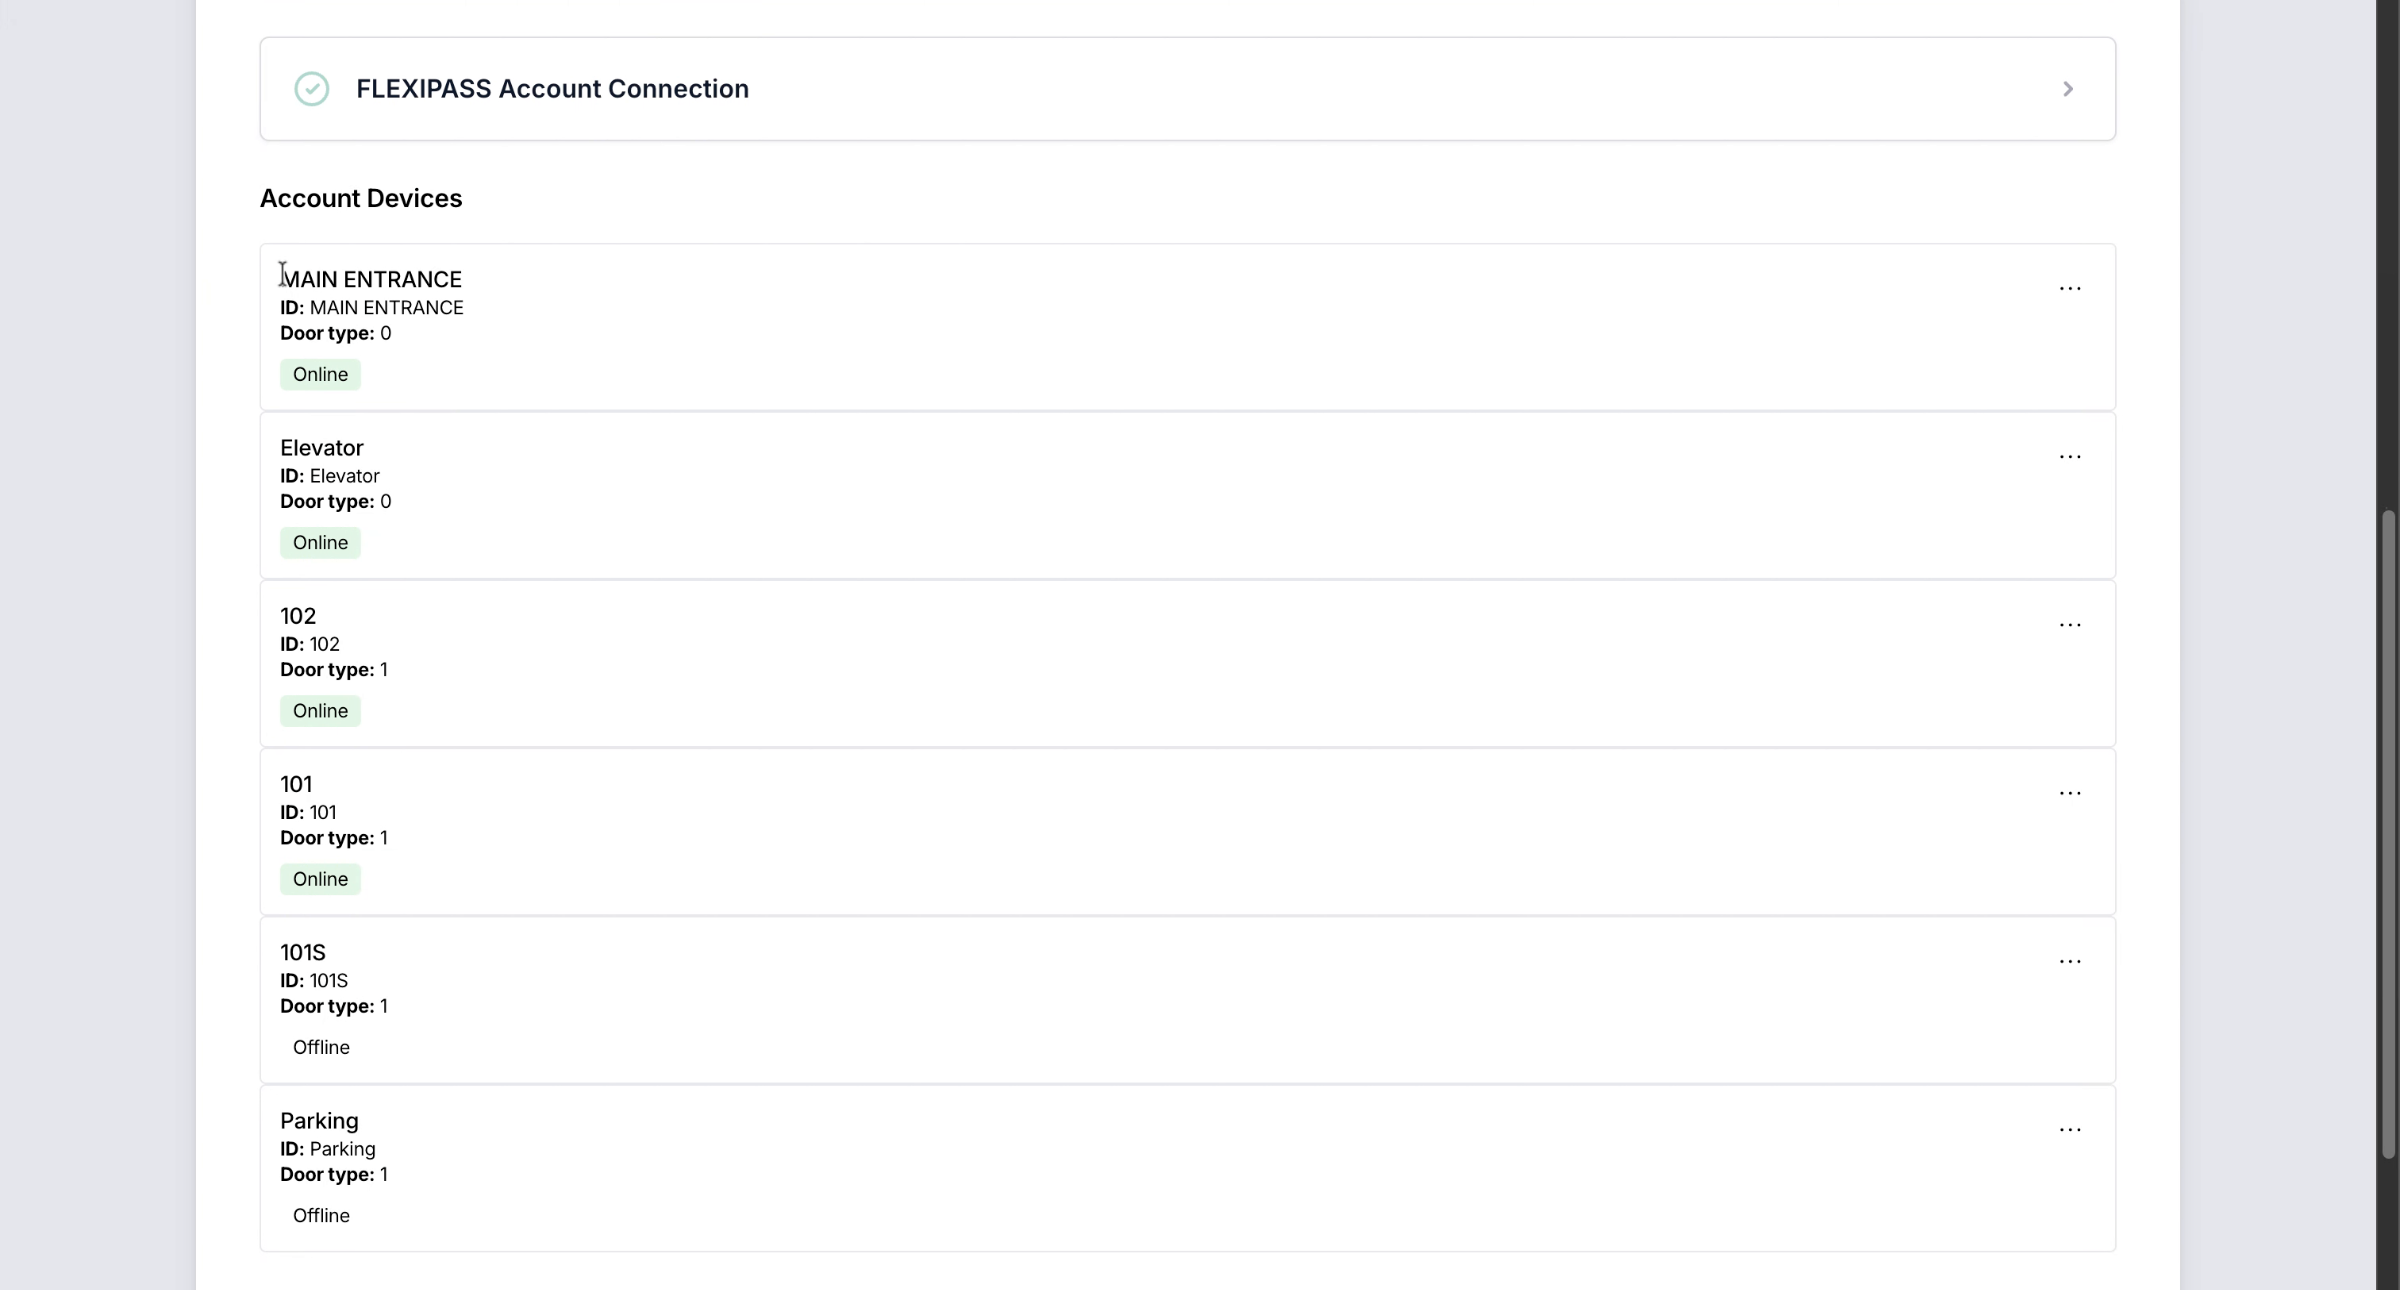
On a successful connection you will see a list of doors that can be enabled for the system. I can create a door for use within my centro system based on the connected Flexipass door locks.
4. Segment
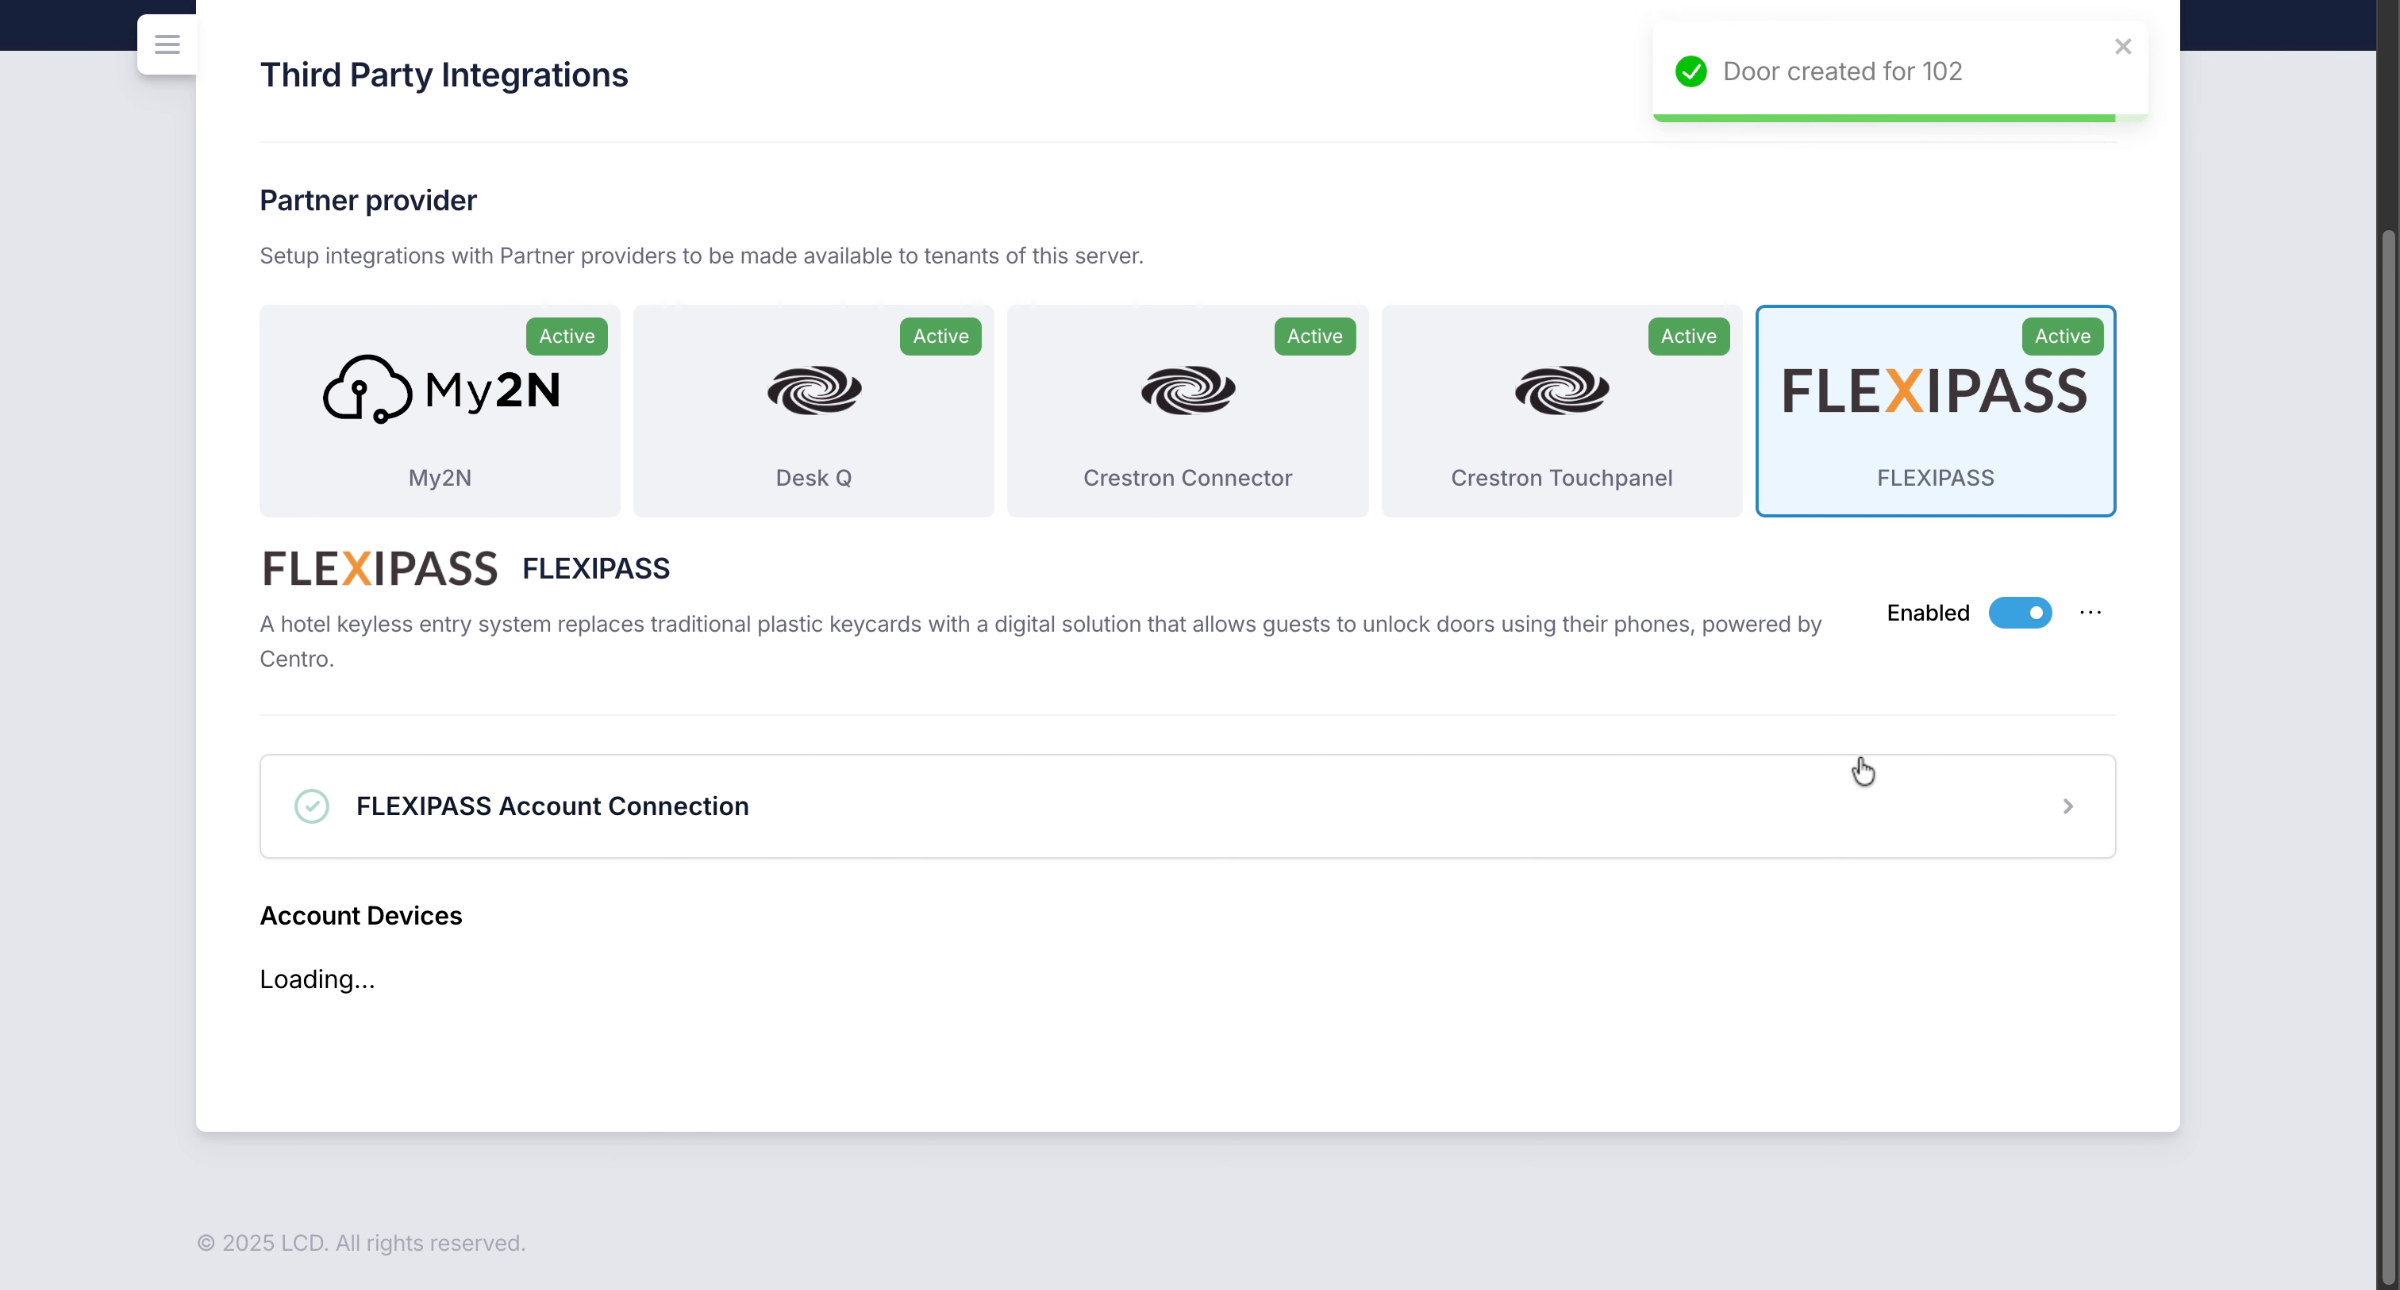
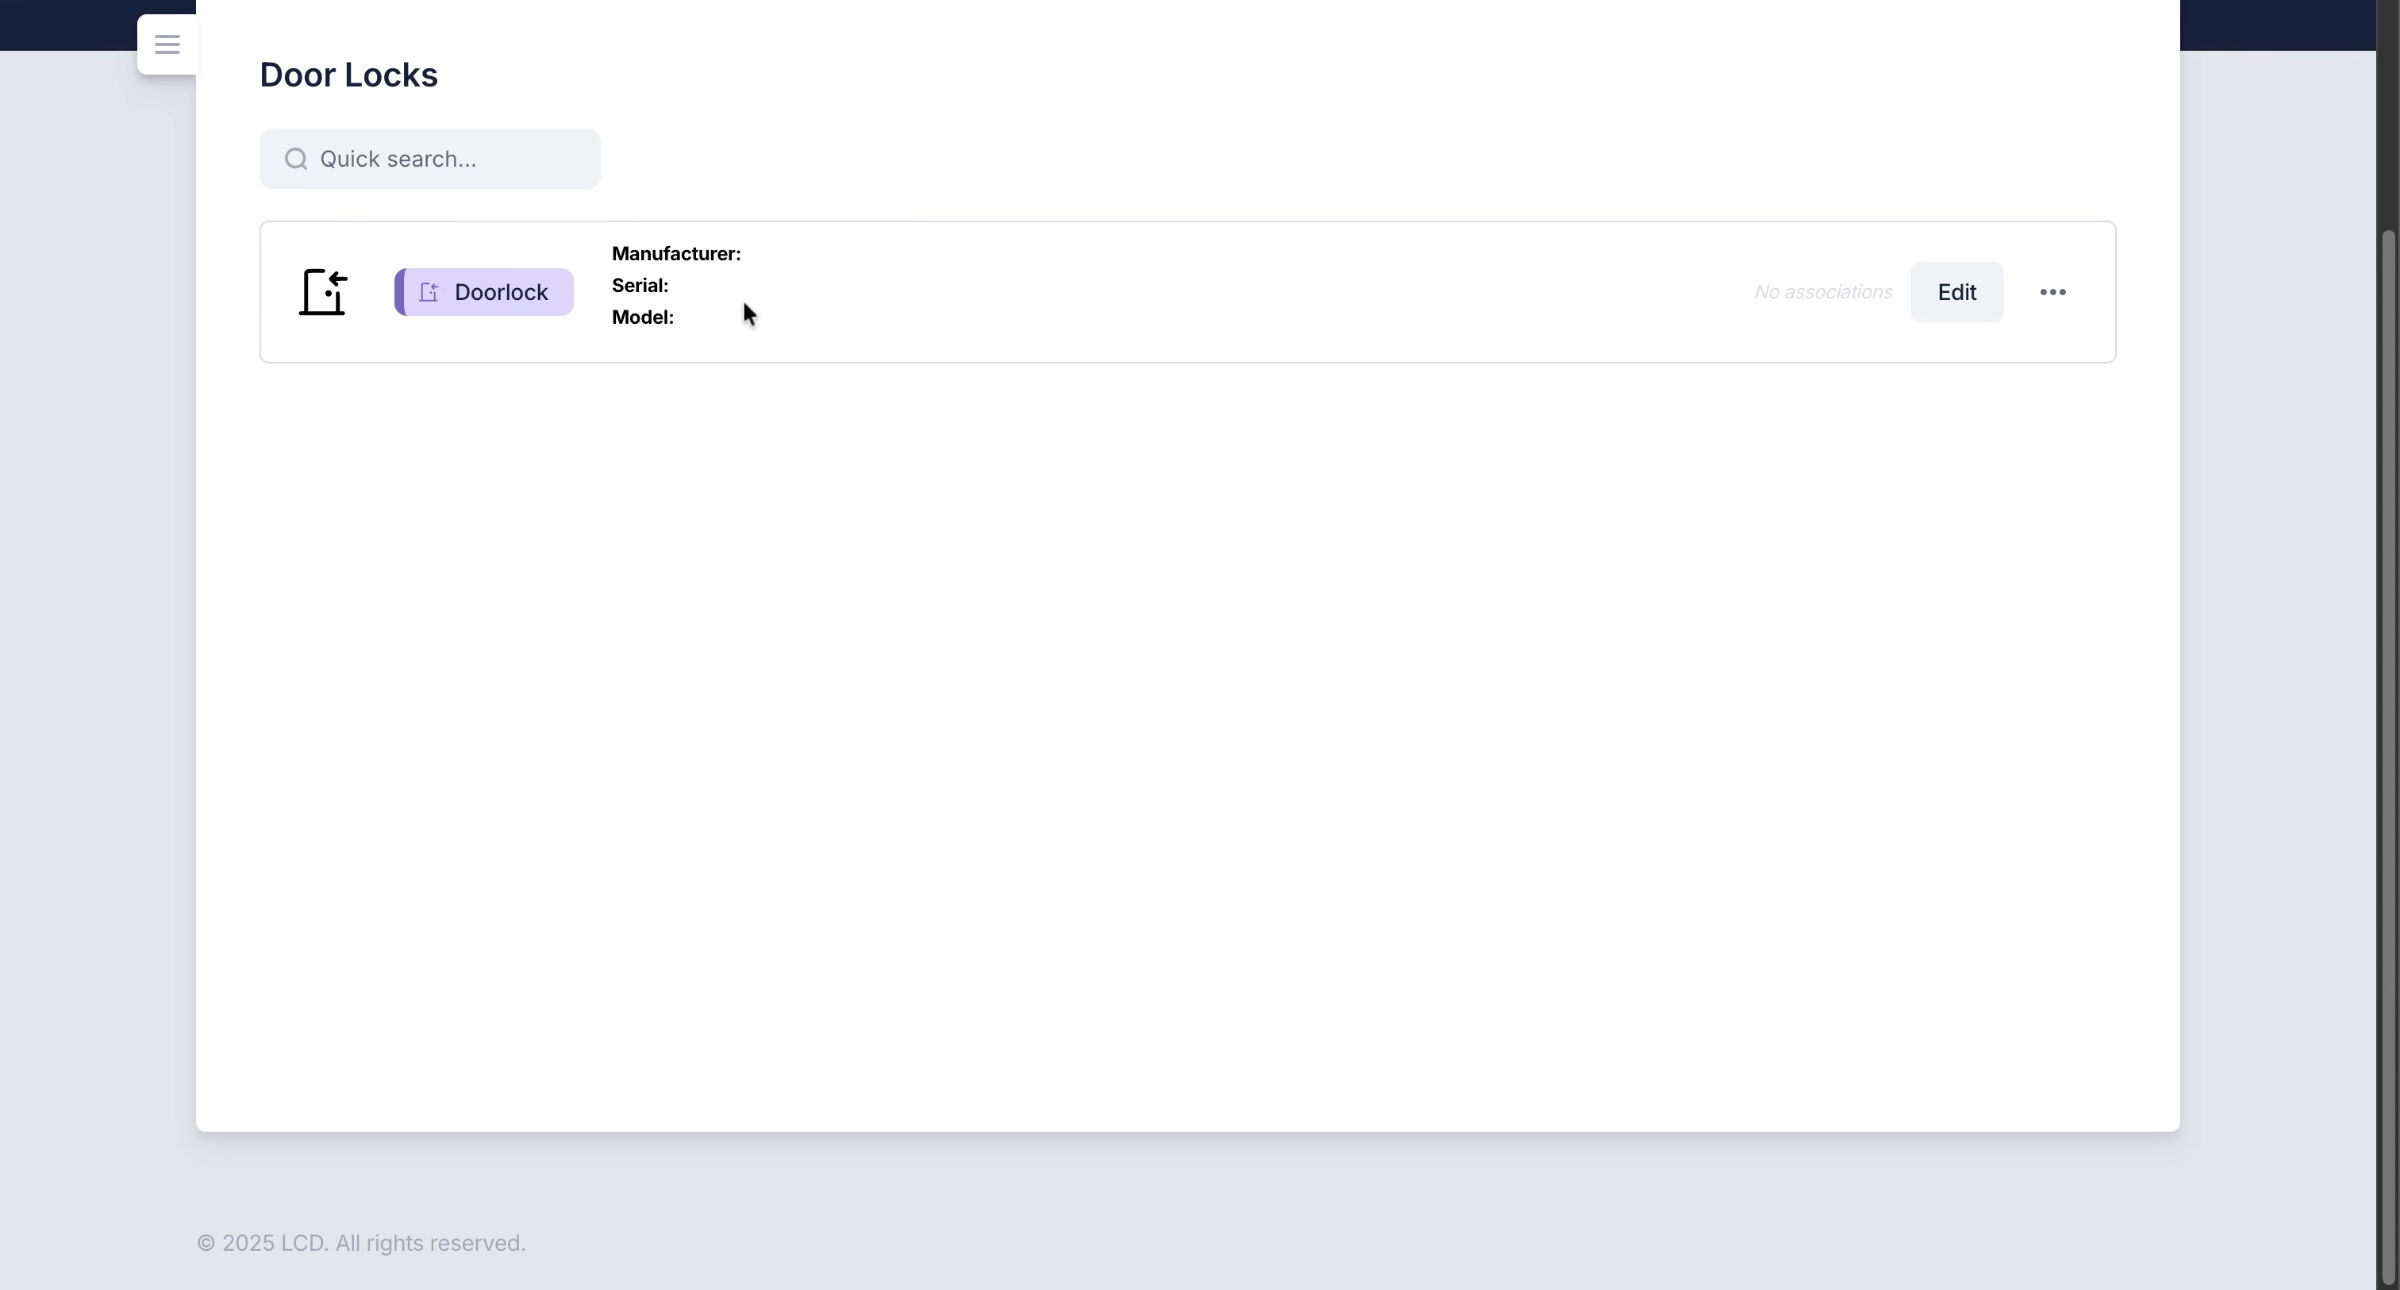
5. Create Door and Assign Name
The door will be created. on the centro system and I can then navigate to this door and I can give it a friendly name.
6. Segment
Depending on the type of integration other fields are populated automaticall

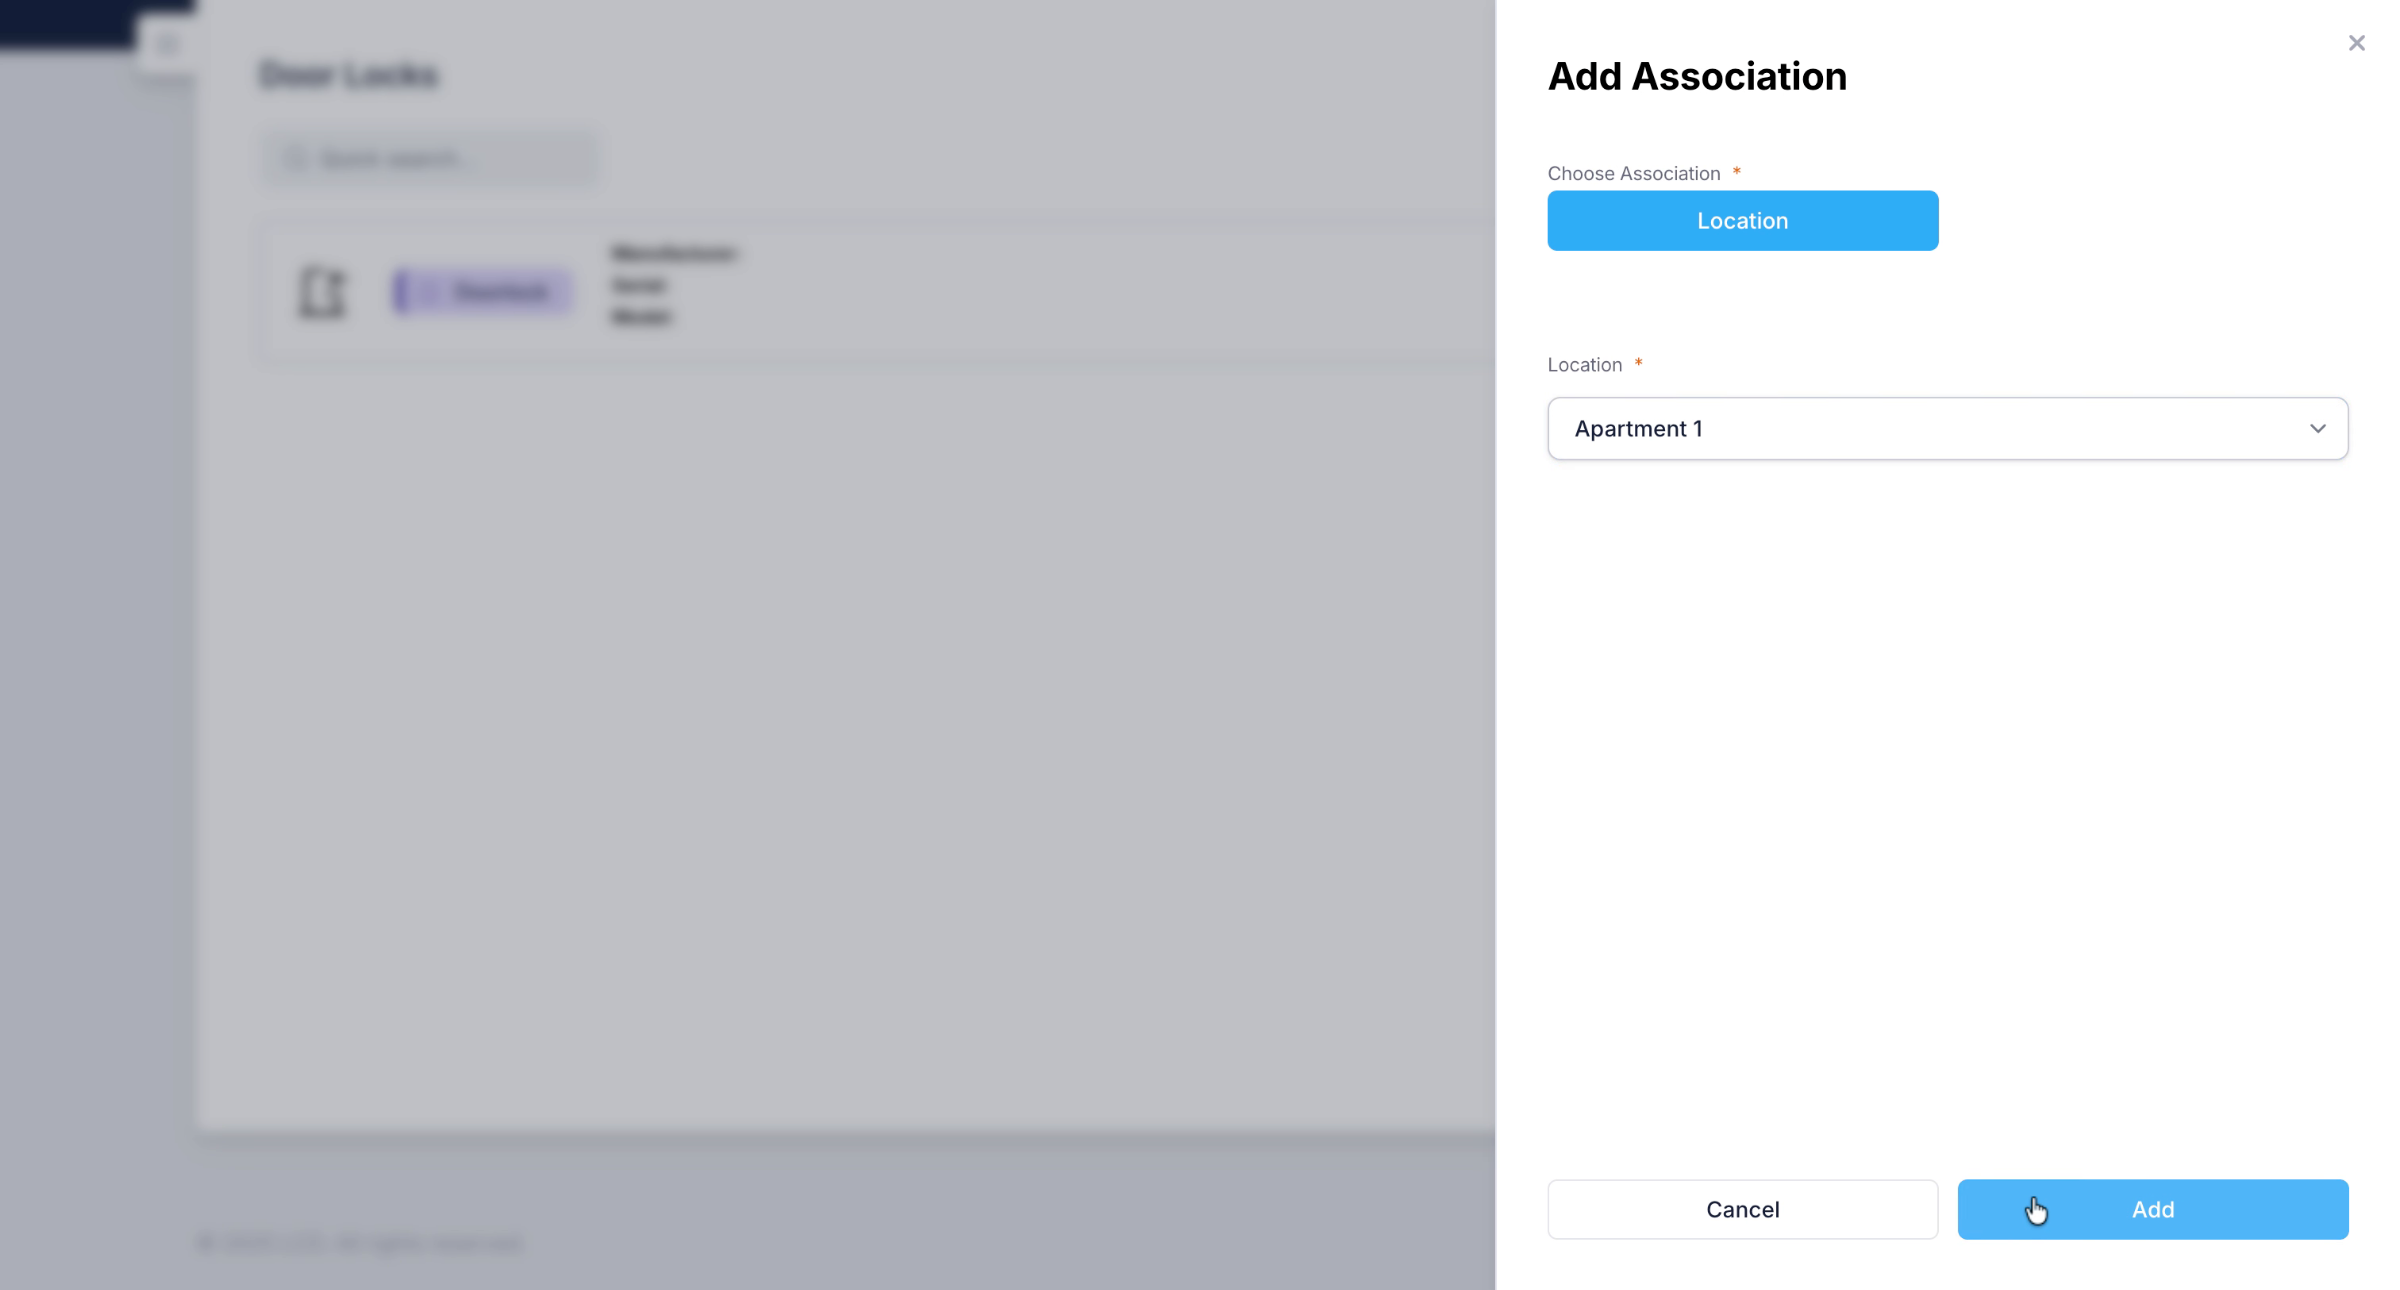
7. Add Location Association to Door
The door lock is shown in my list of system door locks. I can add an Association of a location to this.
8. Segment
I'm going to add it to apartment 1. Which means this lock will be displayed to authenticated users and guests of that location.
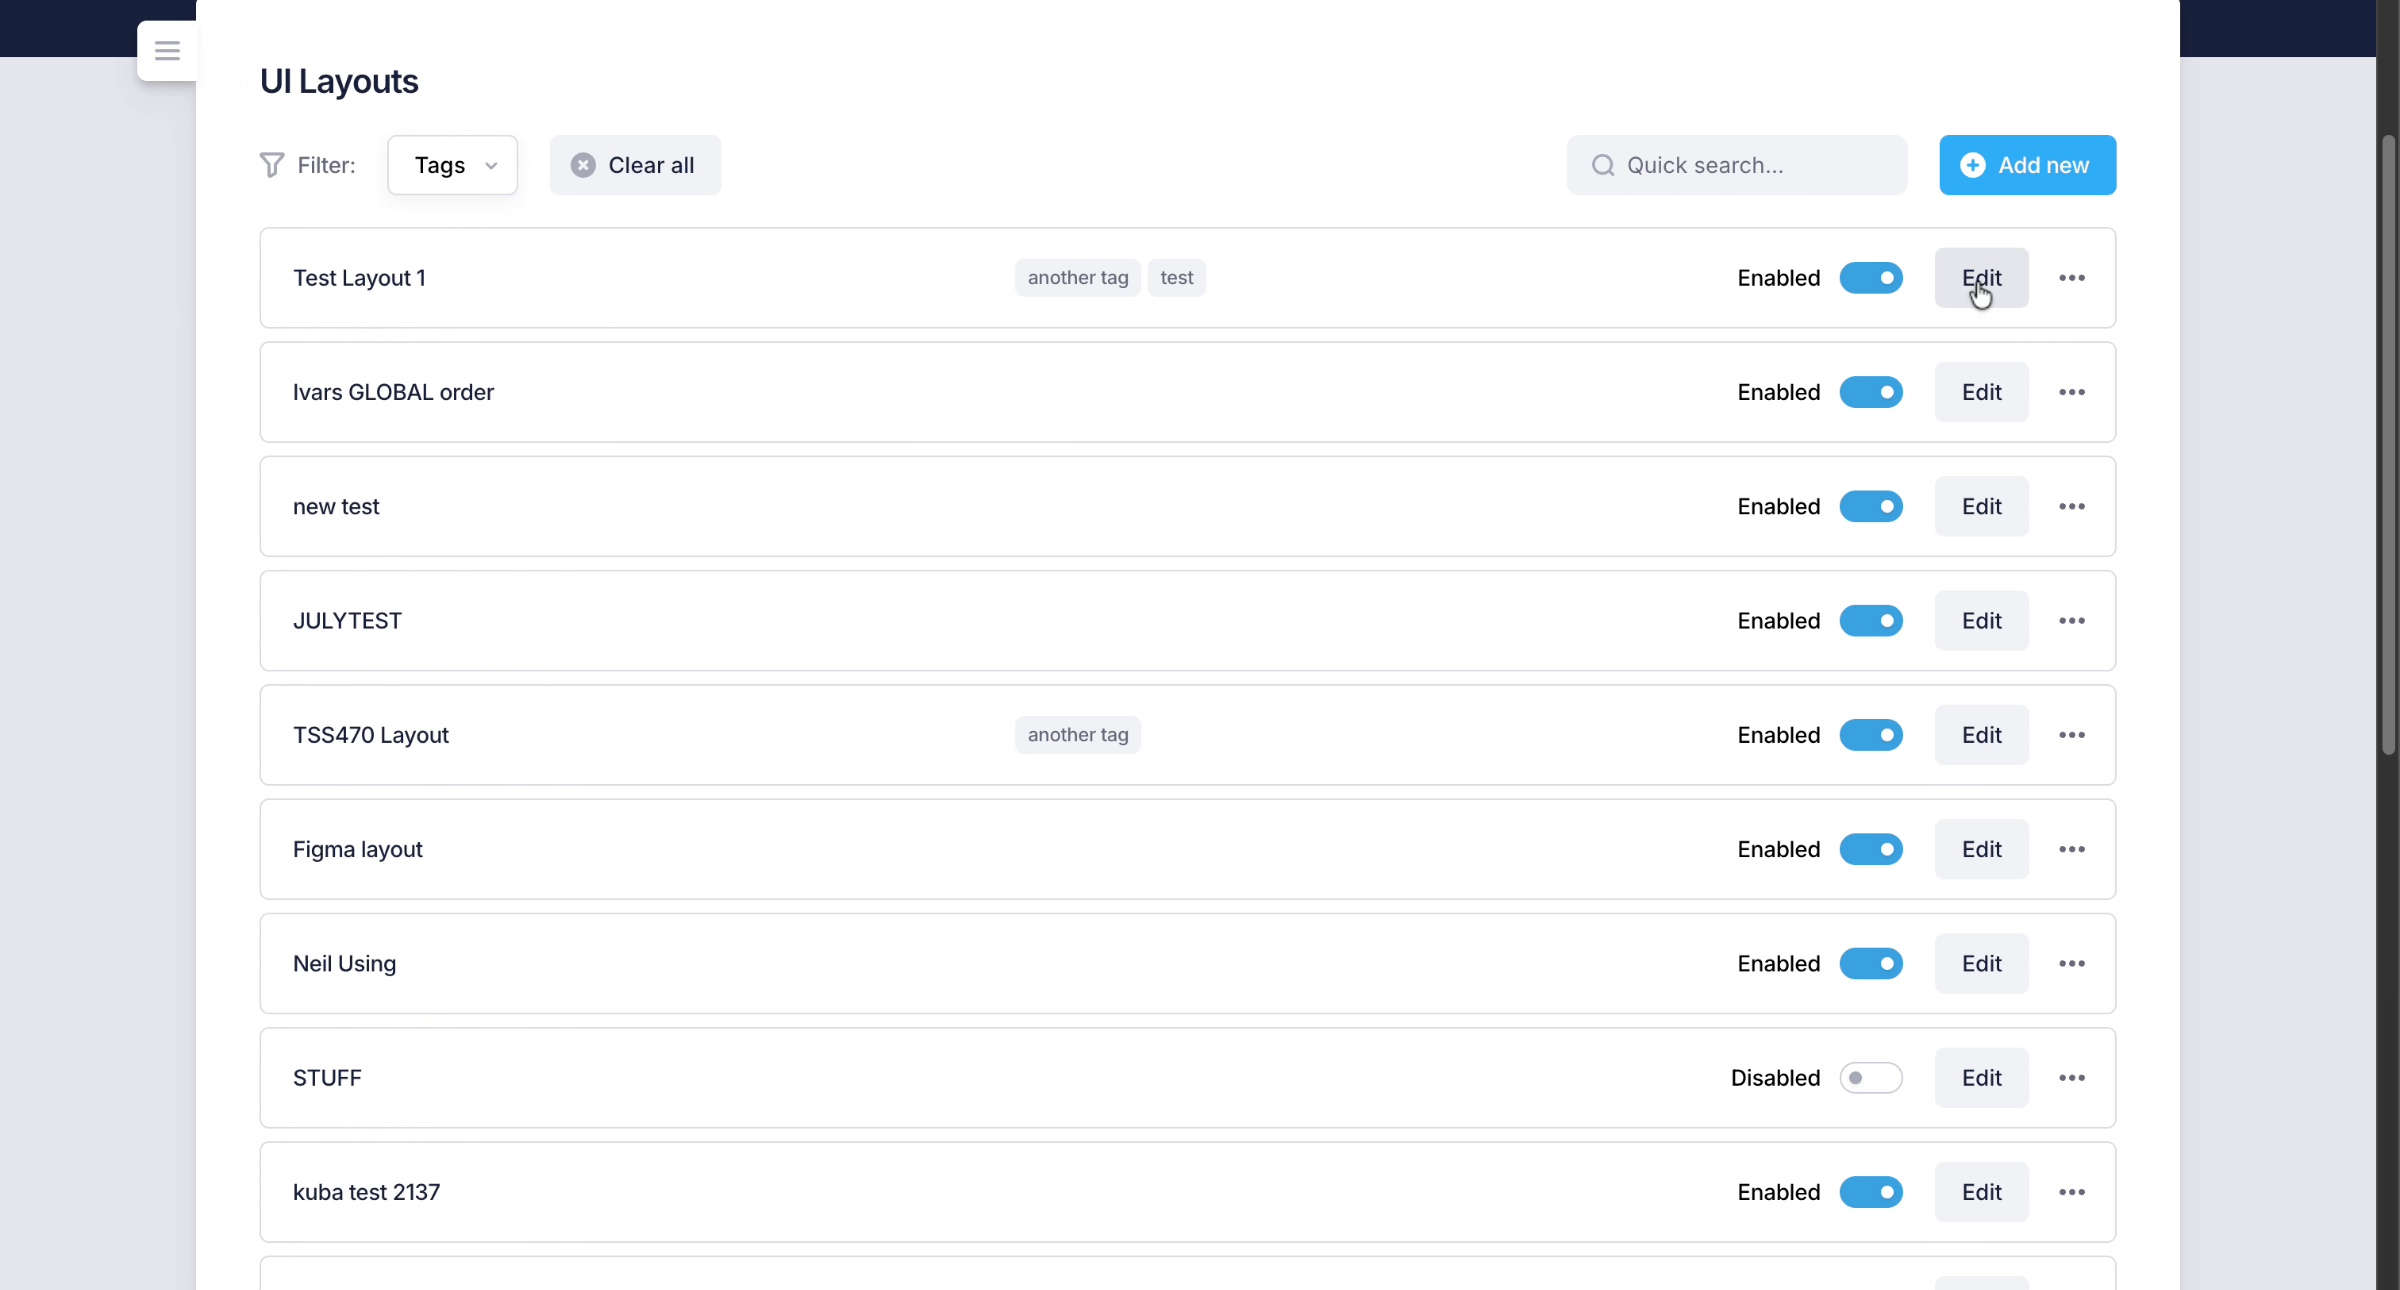
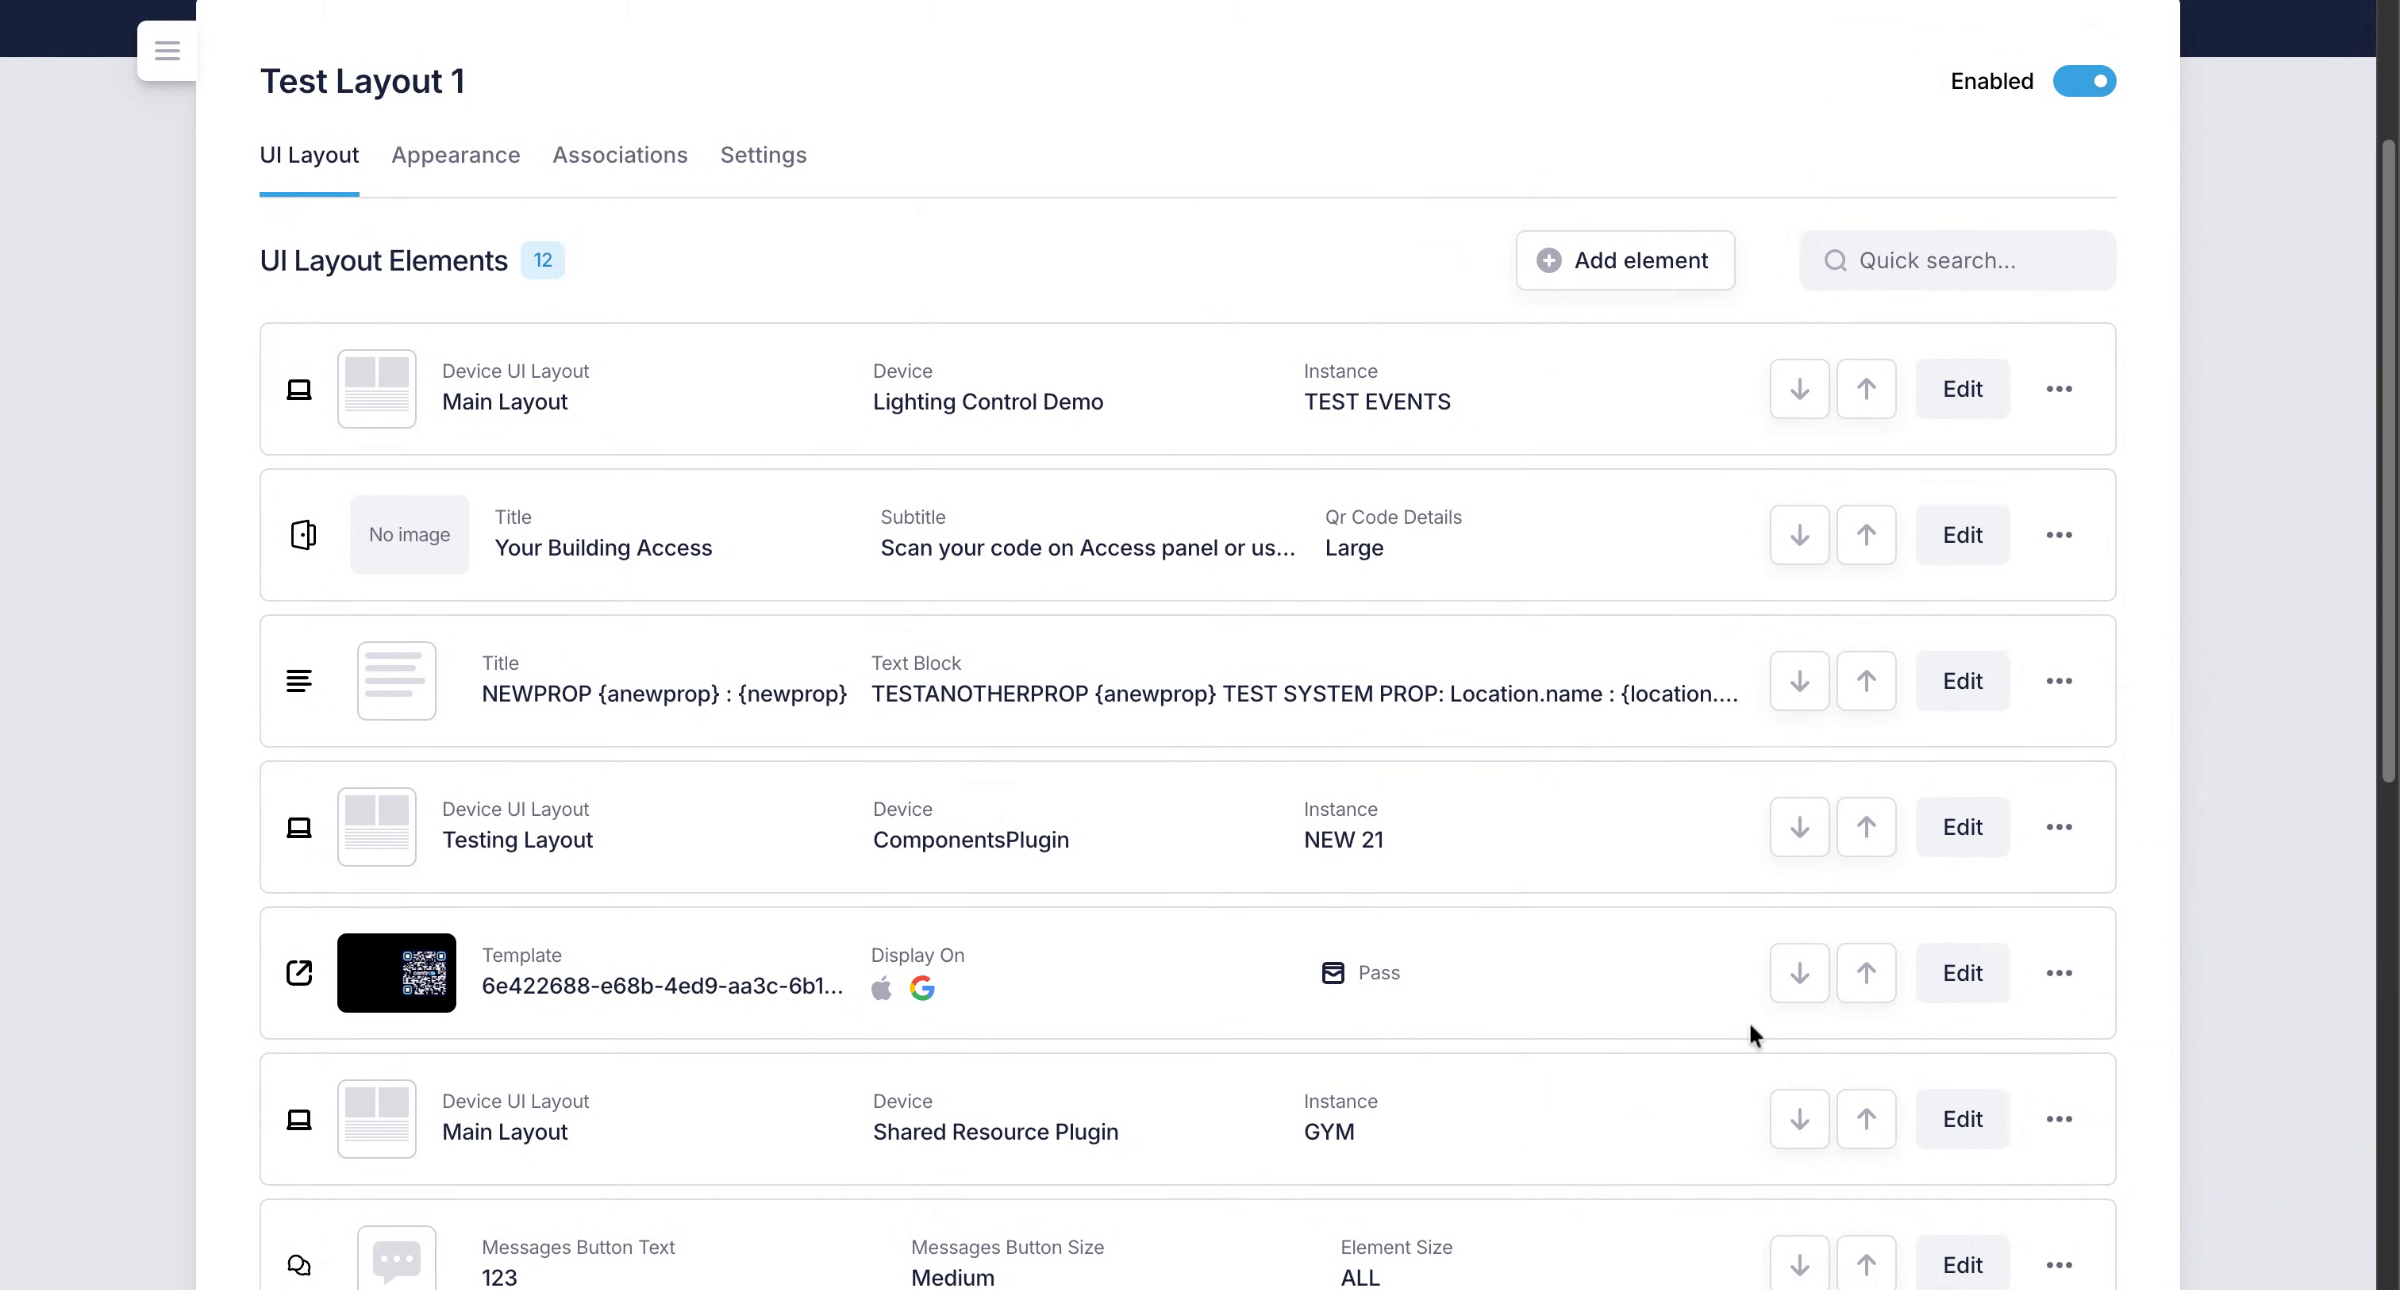
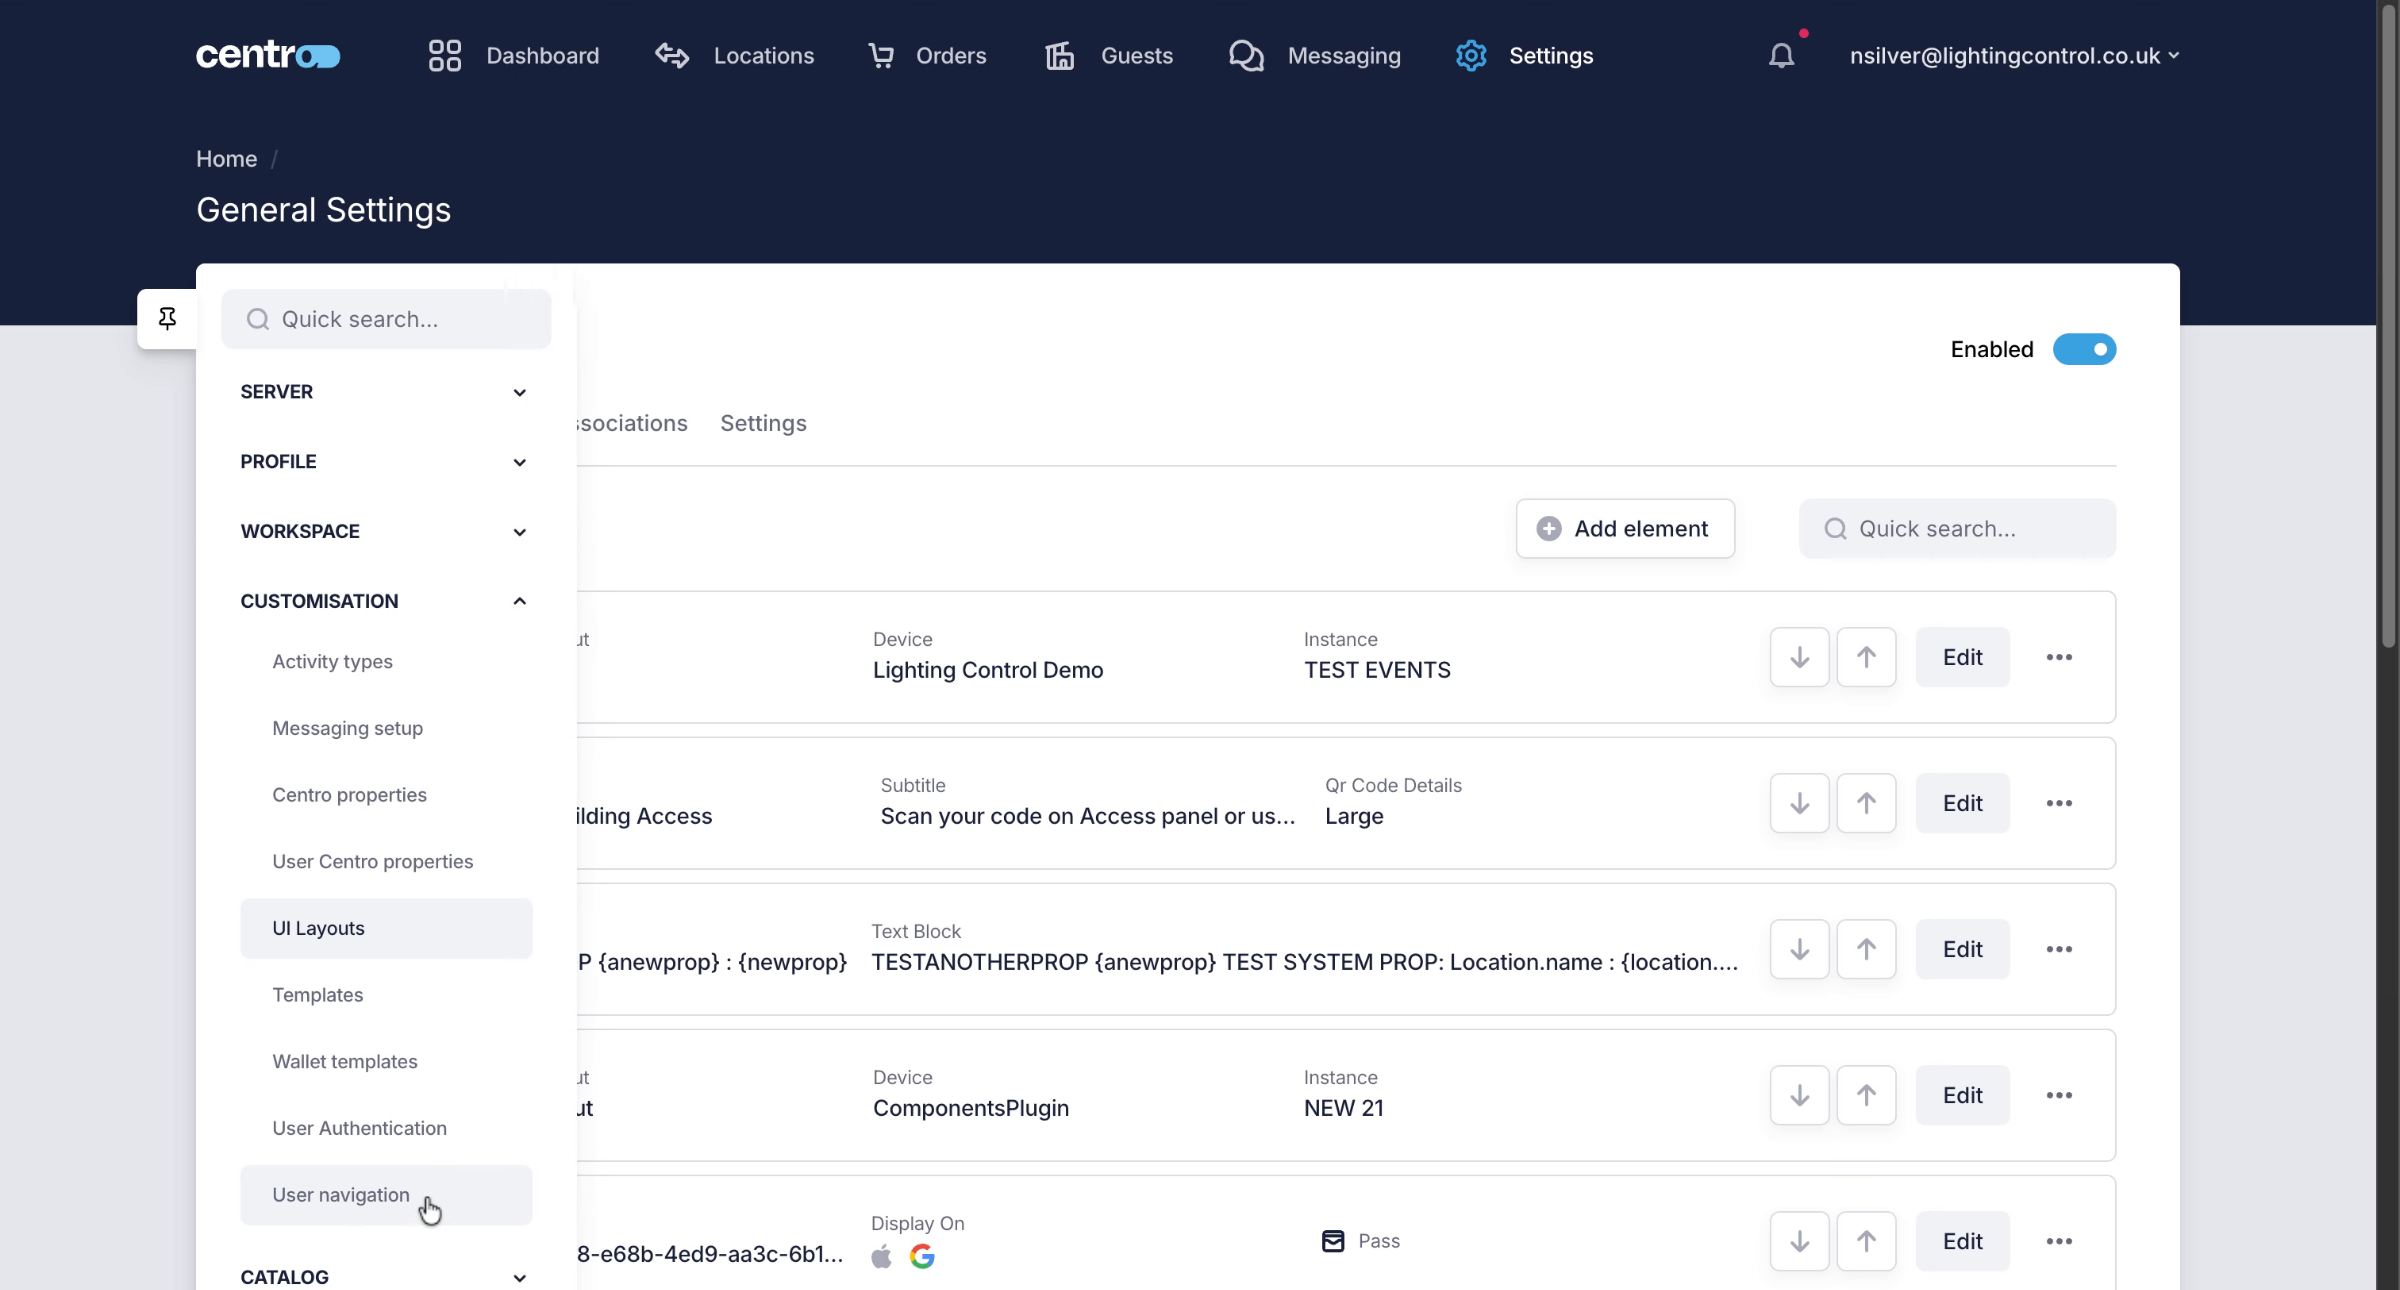
9. Access UI Layout Settings
On the UI layout. That I'm using.

10. Segment
I need to add a DoorLock Element to make these controls visible to a user.
11. Segment

12. Configure Display Settings
I can configure the element to exactly how i want to display it on the user interface. We have an inline option or two types of modals.
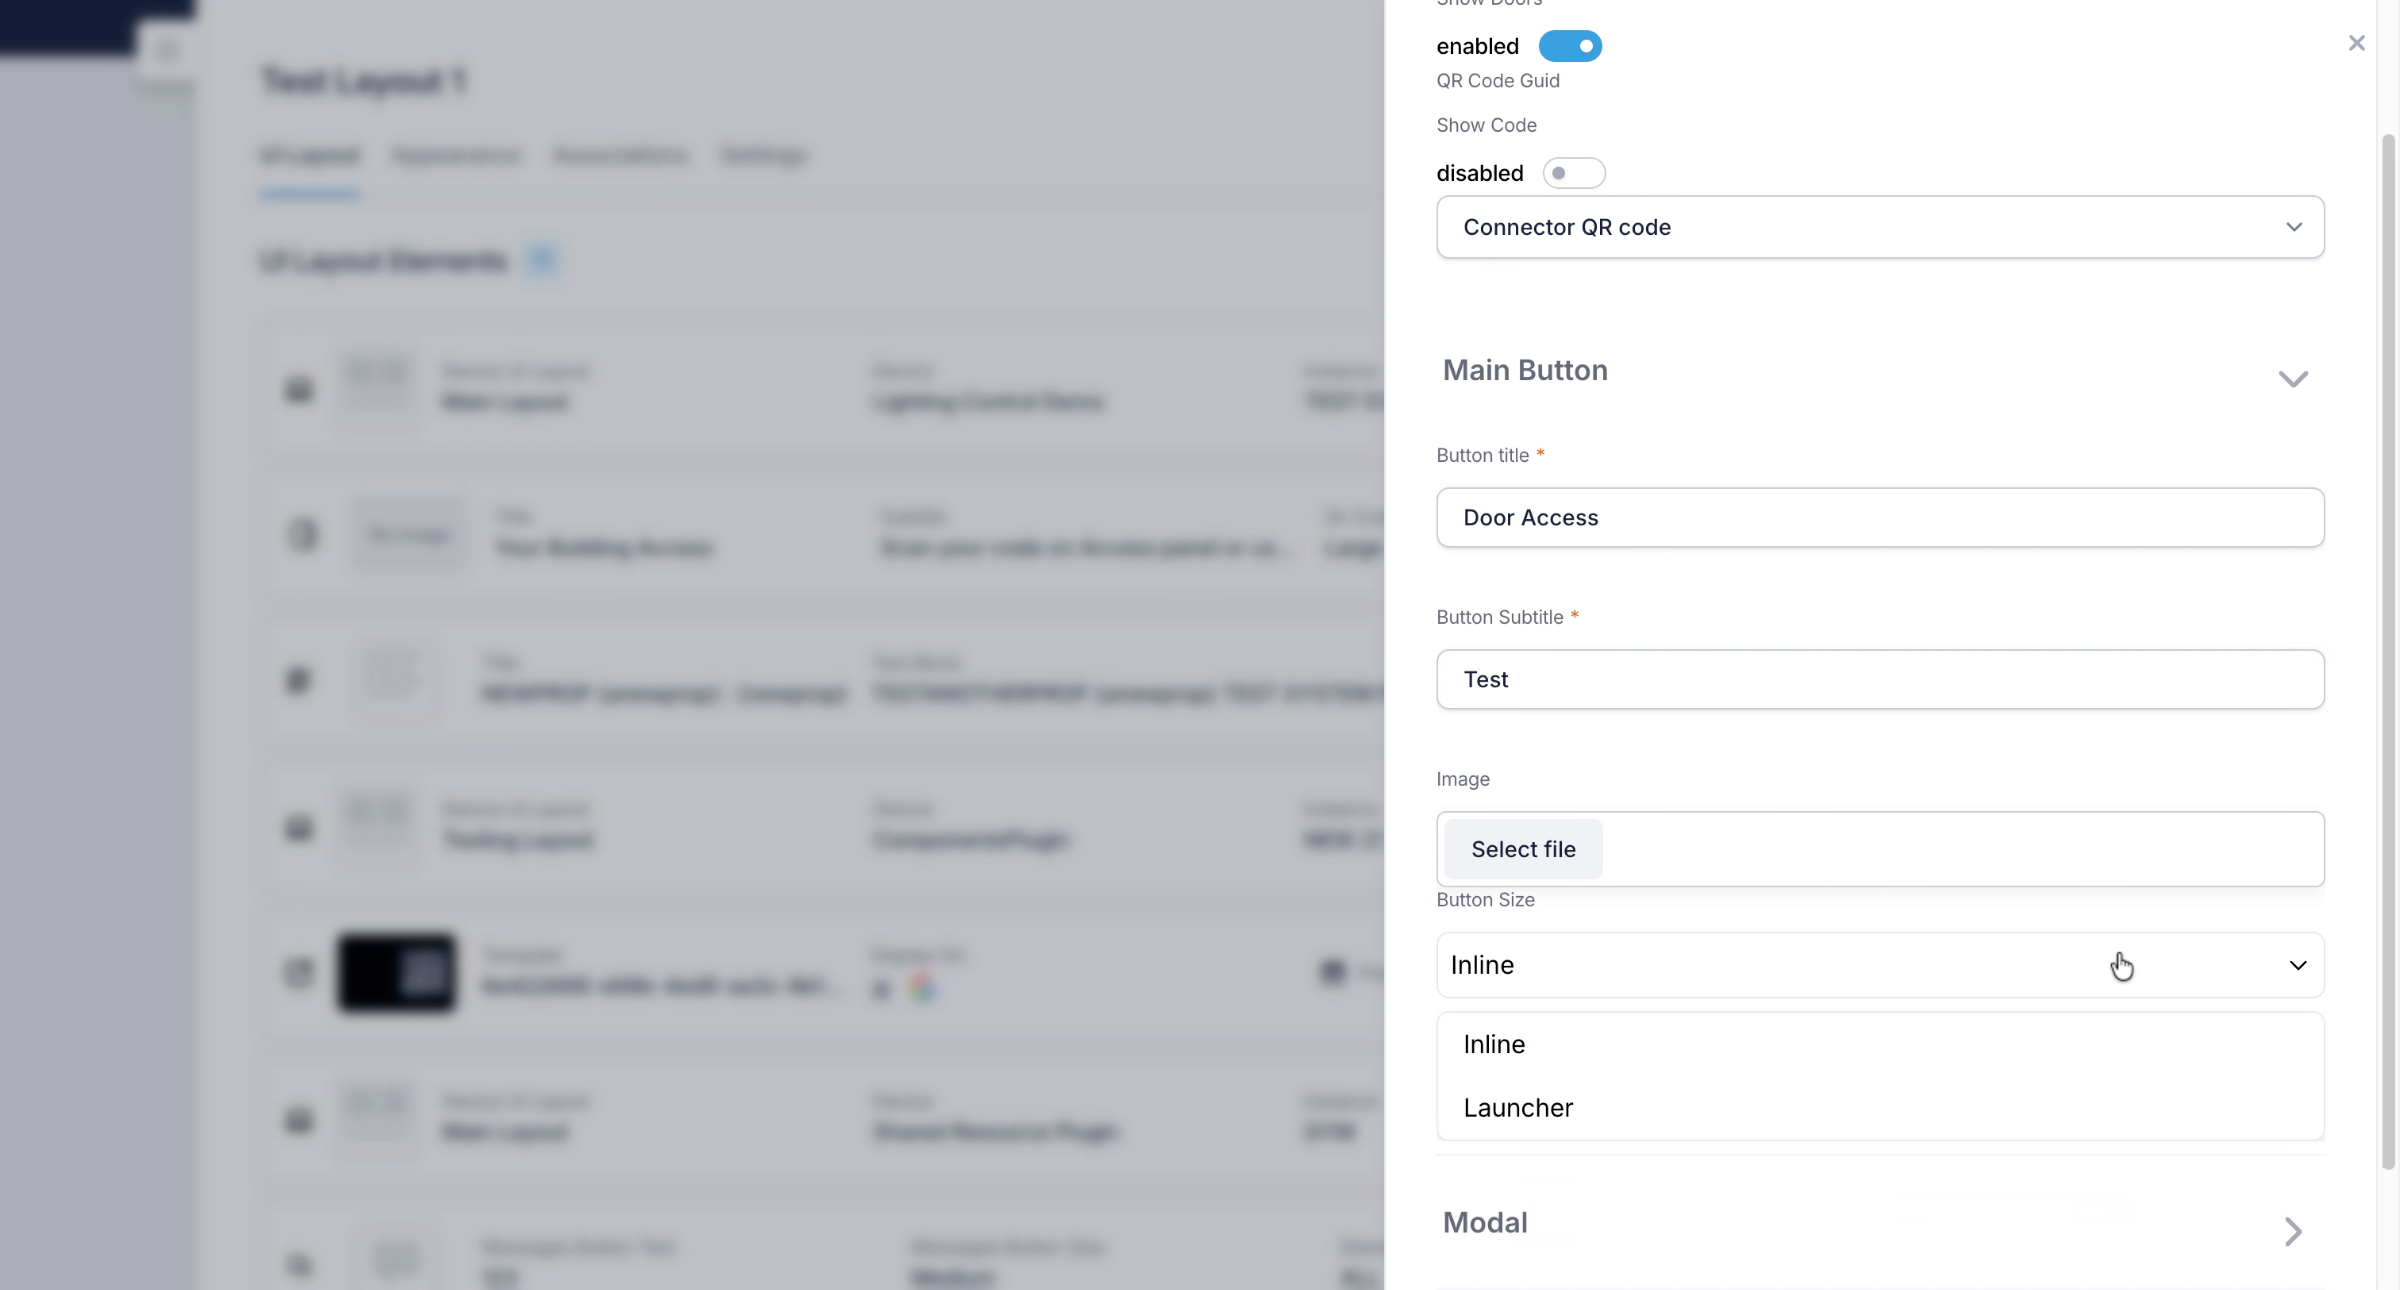
13. Segment

14. Set Up Model Image
15. Navigate to Users Location
Once i have added the element to my user UI I will launch the user application to take a look.
16. Segment
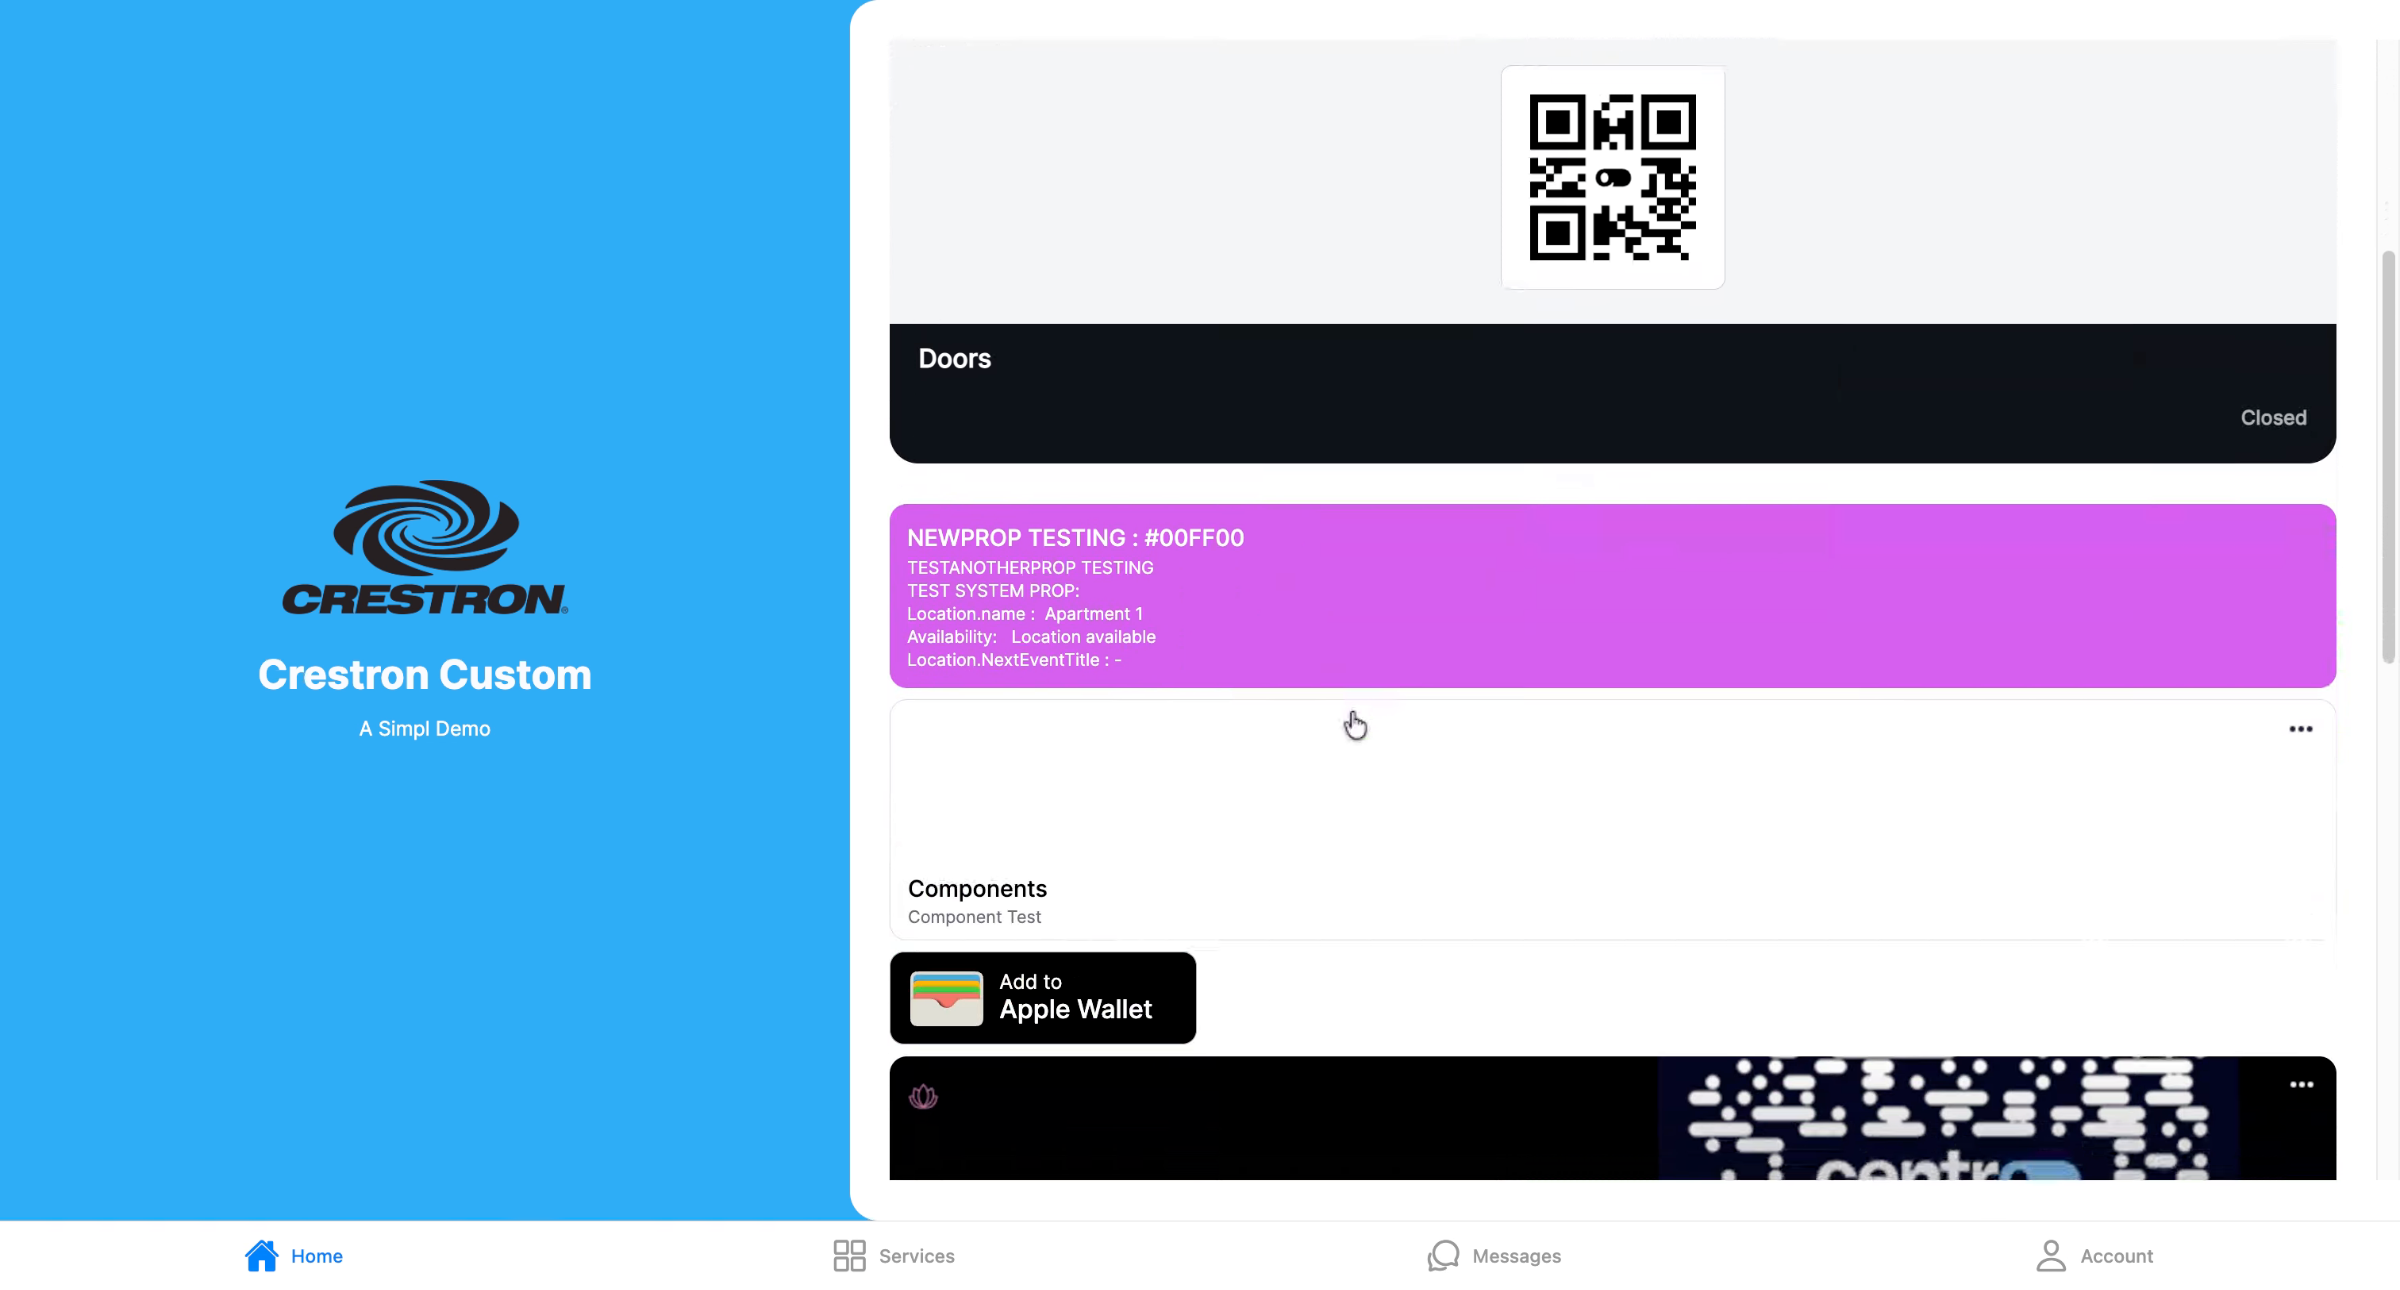
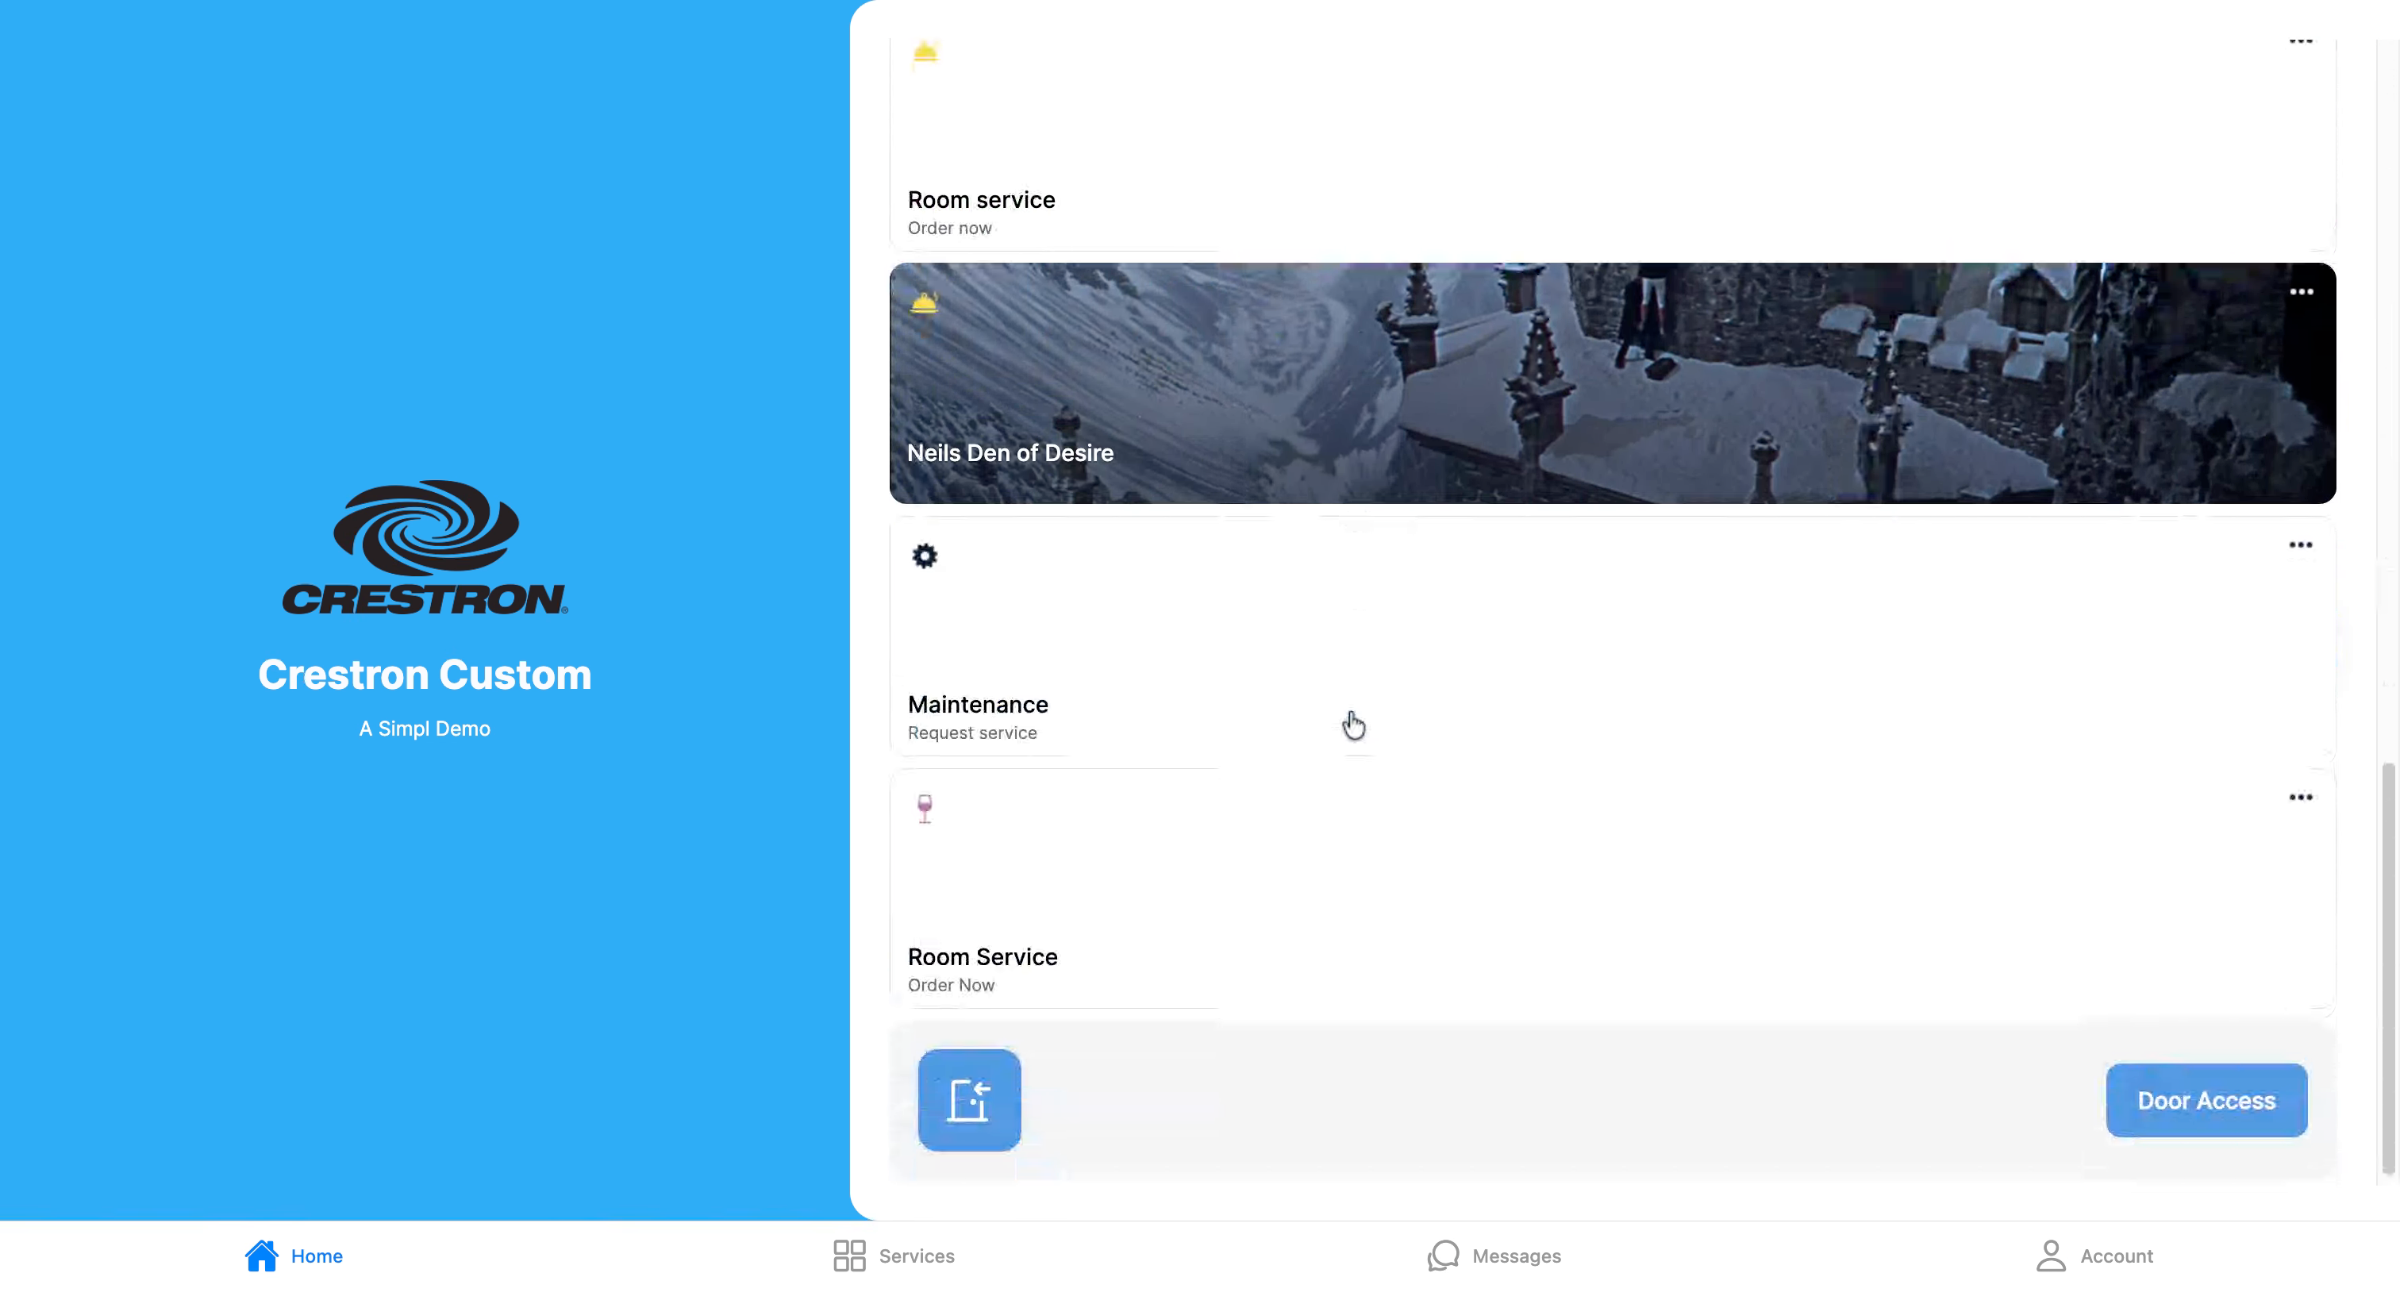
17. View Door Access Element
I can see we now have the door element showing in the user interface at the bottom. When I click on door access I am shown a bottom up door access modal showing my associated doors. We can add images to the element and the modal to create the custom UI branded to your requirements.
This guide demonstrated how to integrate Flexipass with Centro, create and configure door access elements, and navigate the system layout effectively.