Managing Locations
Managing locations
This is the administrator side of locations — configuring them. Administrators set locations up here; service managers then use them day to day from the Working with locations view.
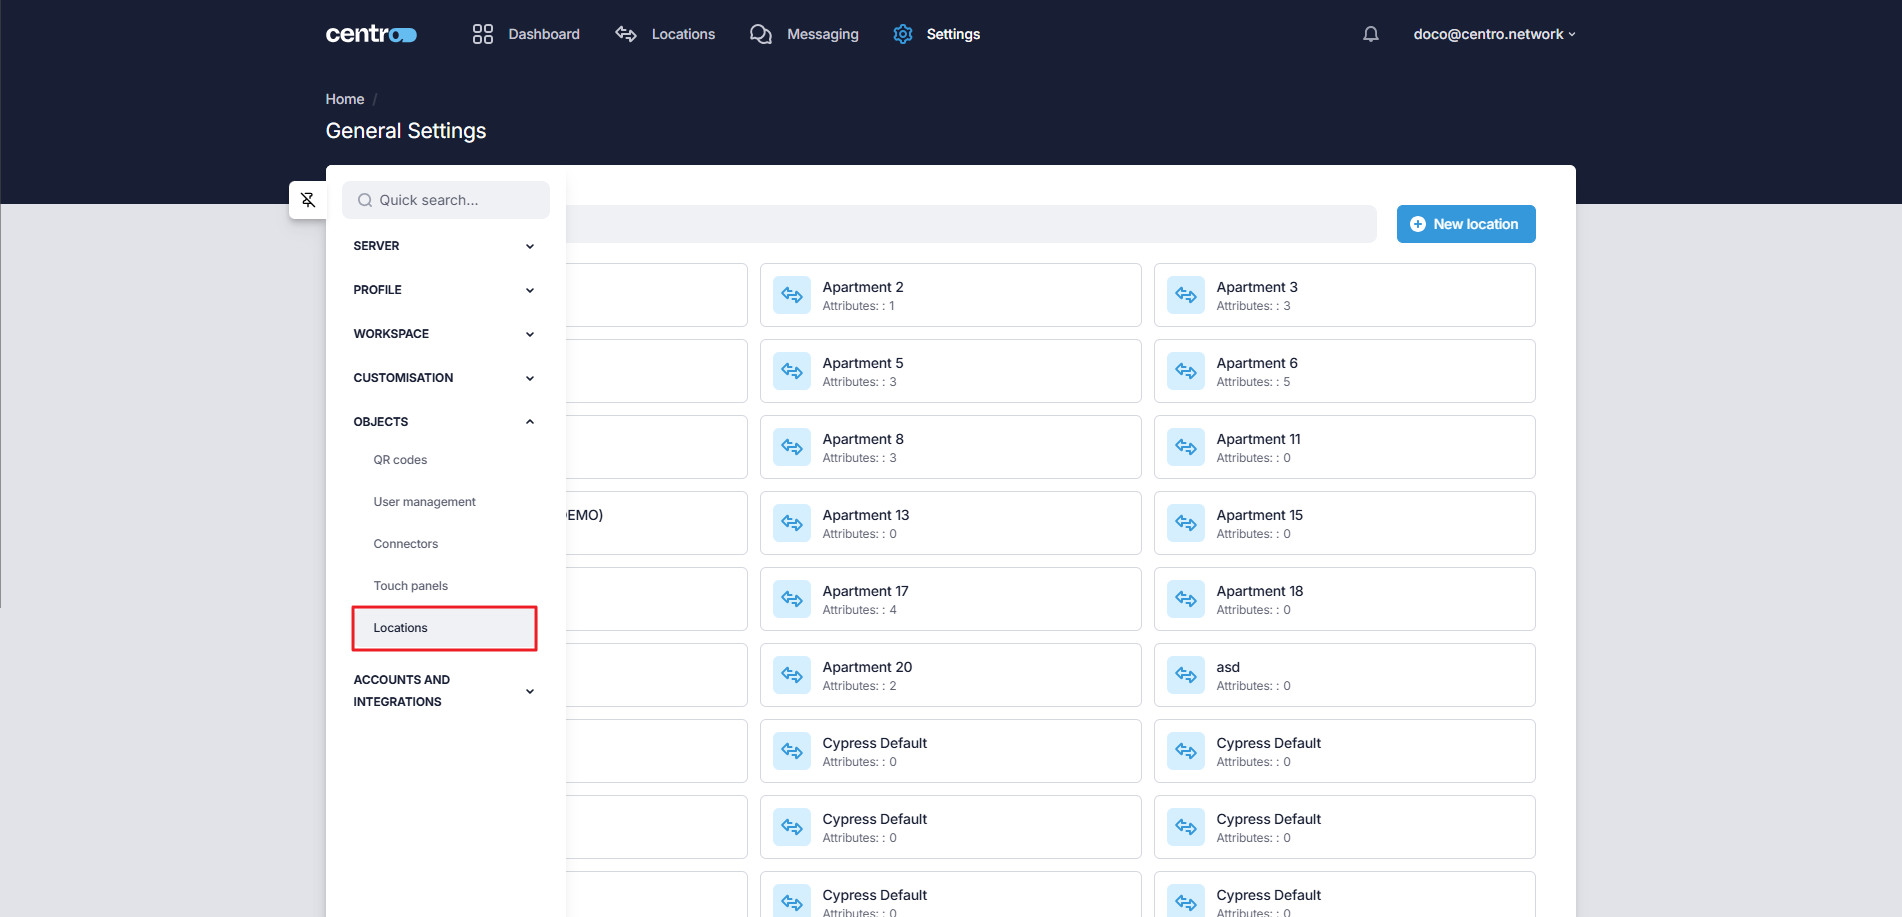
Configuring a location is done under General Settings → Objects → Locations — everything under General Settings is administrator configuration. The Locations tab lets you add and manage the locations in your tenant — any discrete space in your building, for example:
- a public space,
- a bookable space (a tennis court, a roof garden),
- an owner's private apartment,
- a bookable apartment, or
- a guest hotel suite.
Each location has its own discrete values for any Centro properties set up on the tenant, and its own values for the device settings of the devices used in the location. A location also has a dedicated layout that can be linked to a UI Layout, and its own QR code.
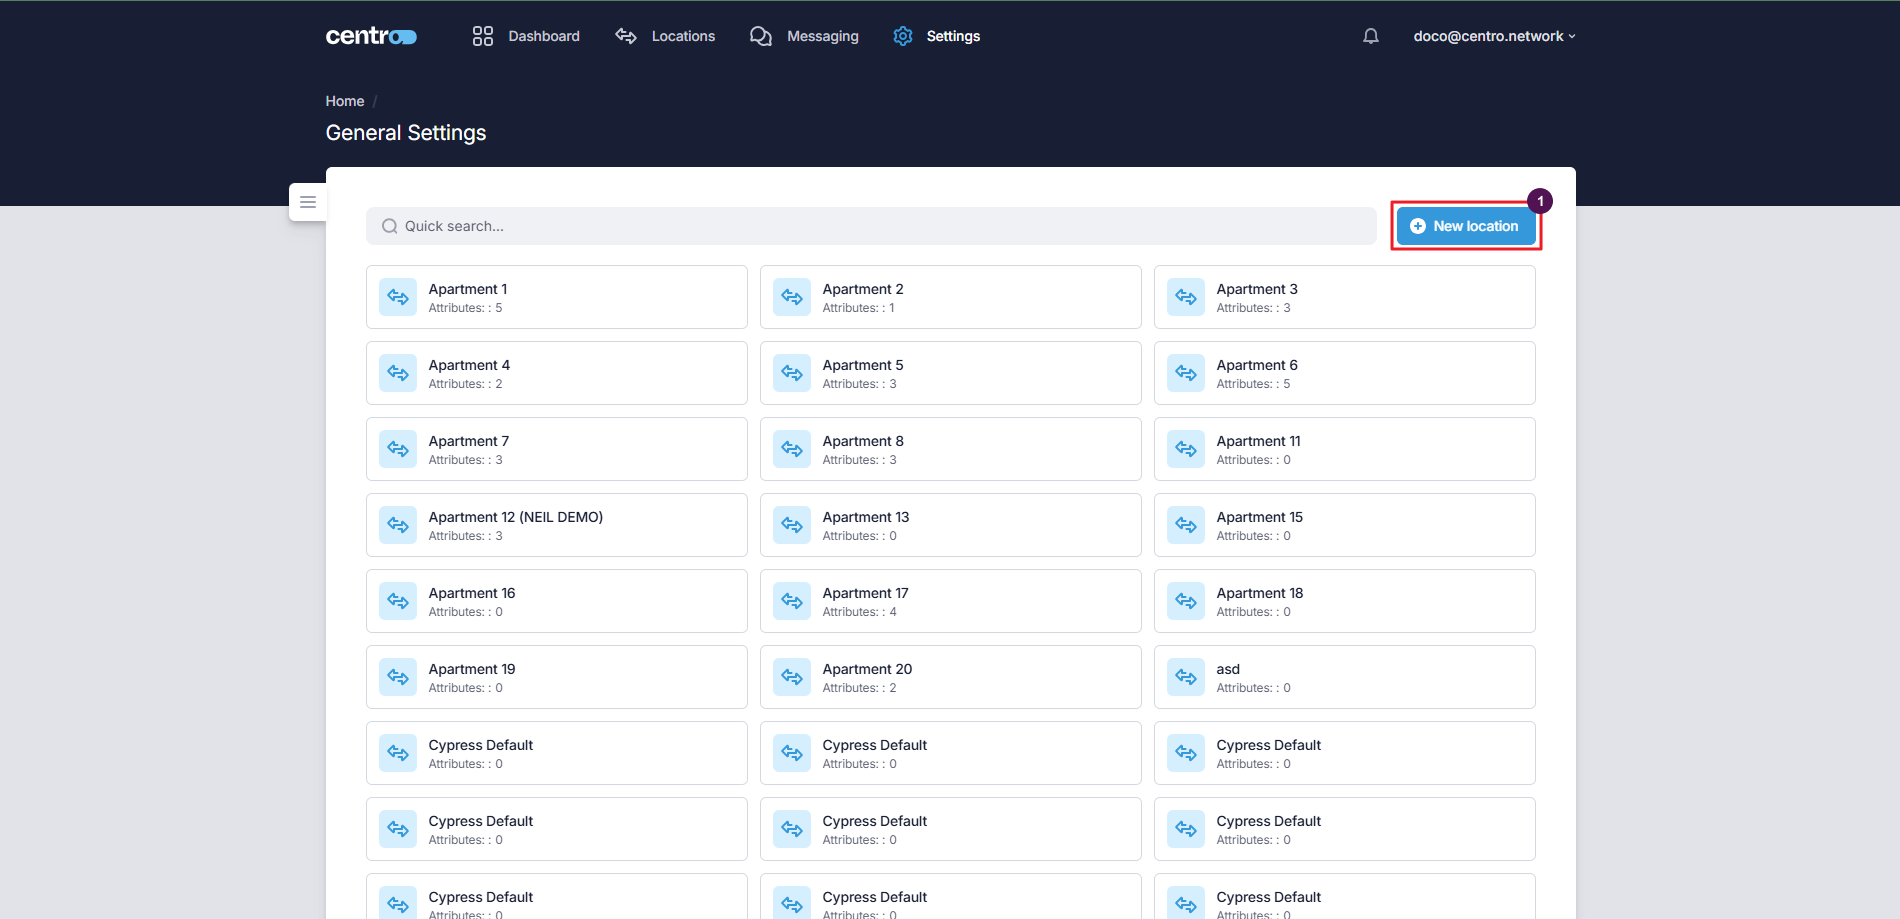
Add a new location
-
Select New Location.
-
Enter the location name.
-
Add tags.
-
Select Add Location.
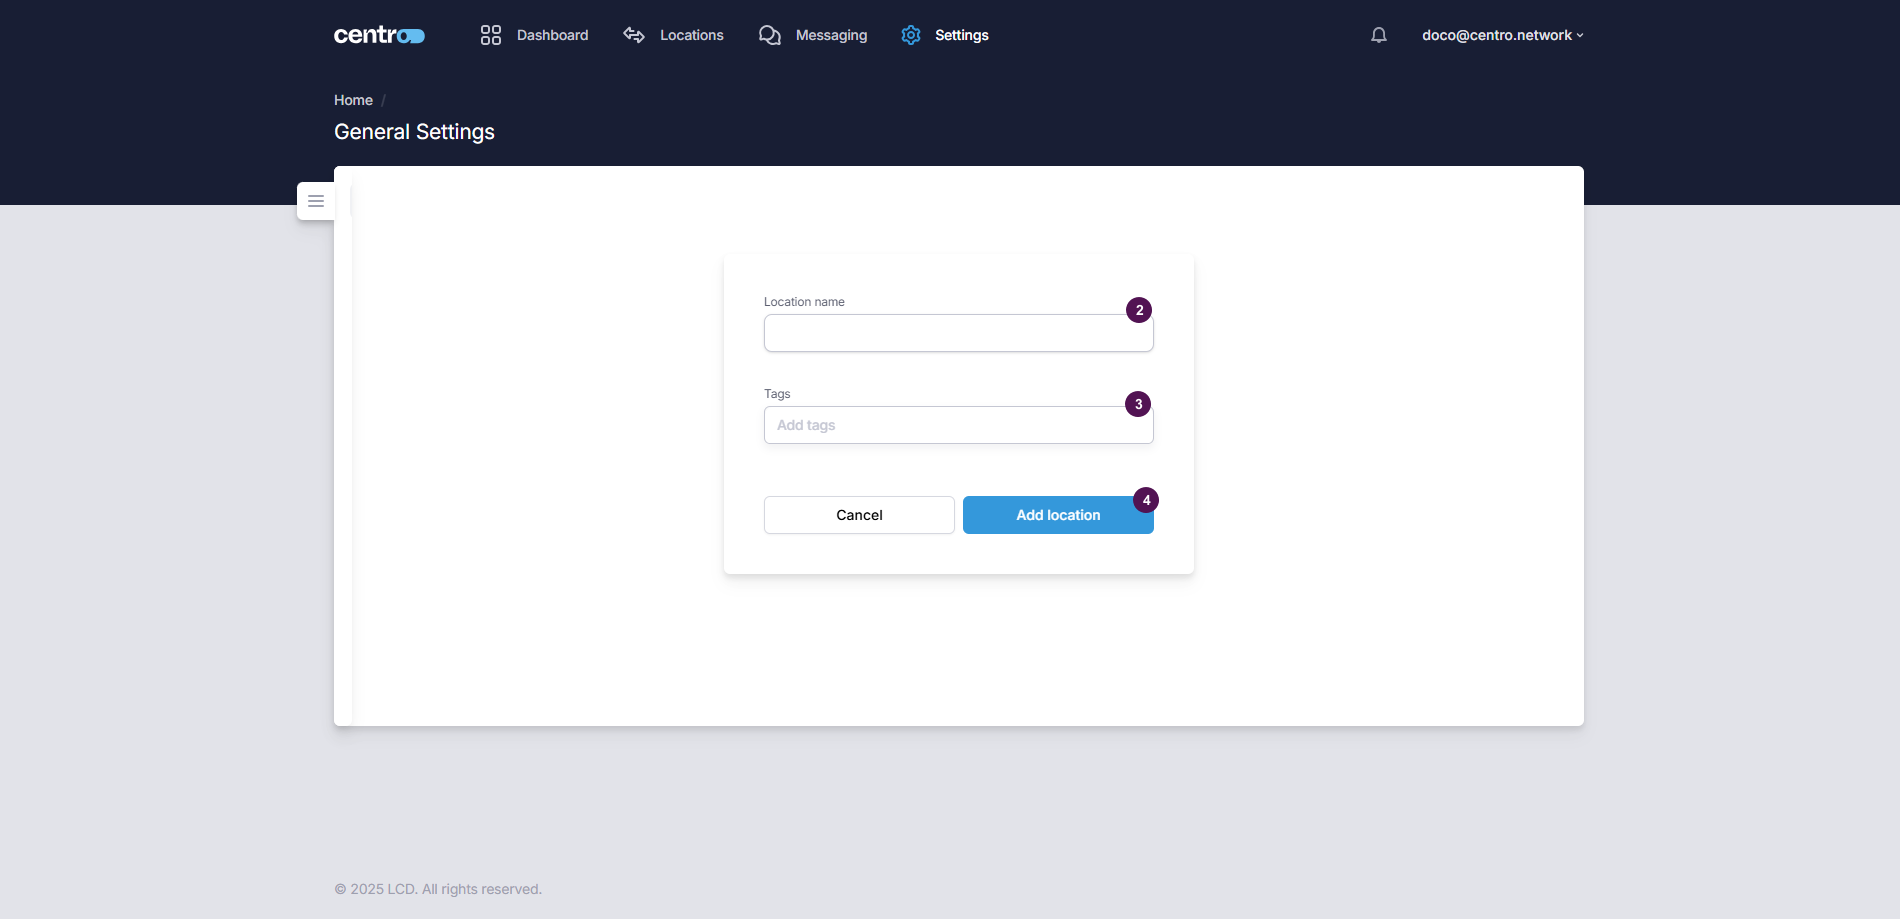
Tags (for example Floor 3, Suite, or Spa) are how you group and target locations — there's no
parent/child nesting. Dashboards, properties and content are pointed at locations by tag, so it's worth
tagging consistently as you go.
Edit an existing location
Select the location to open it.
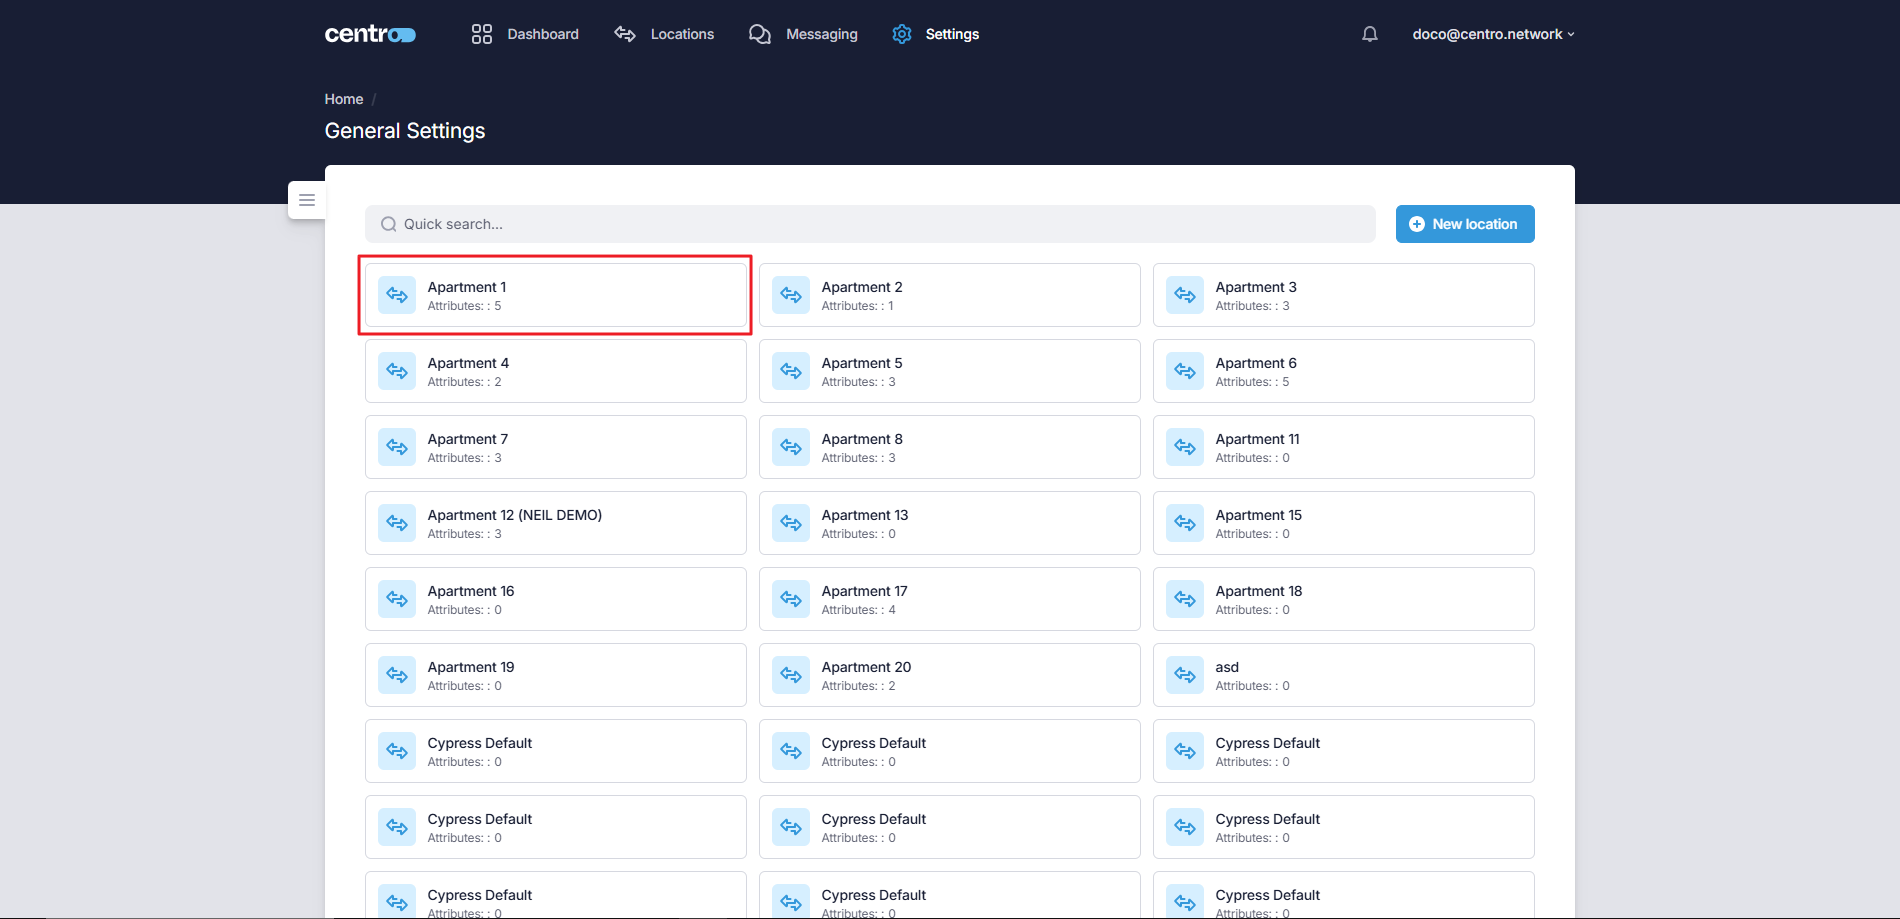
A location opens on a set of tabs — Location, Device Attributes, Location Layout and Associations.
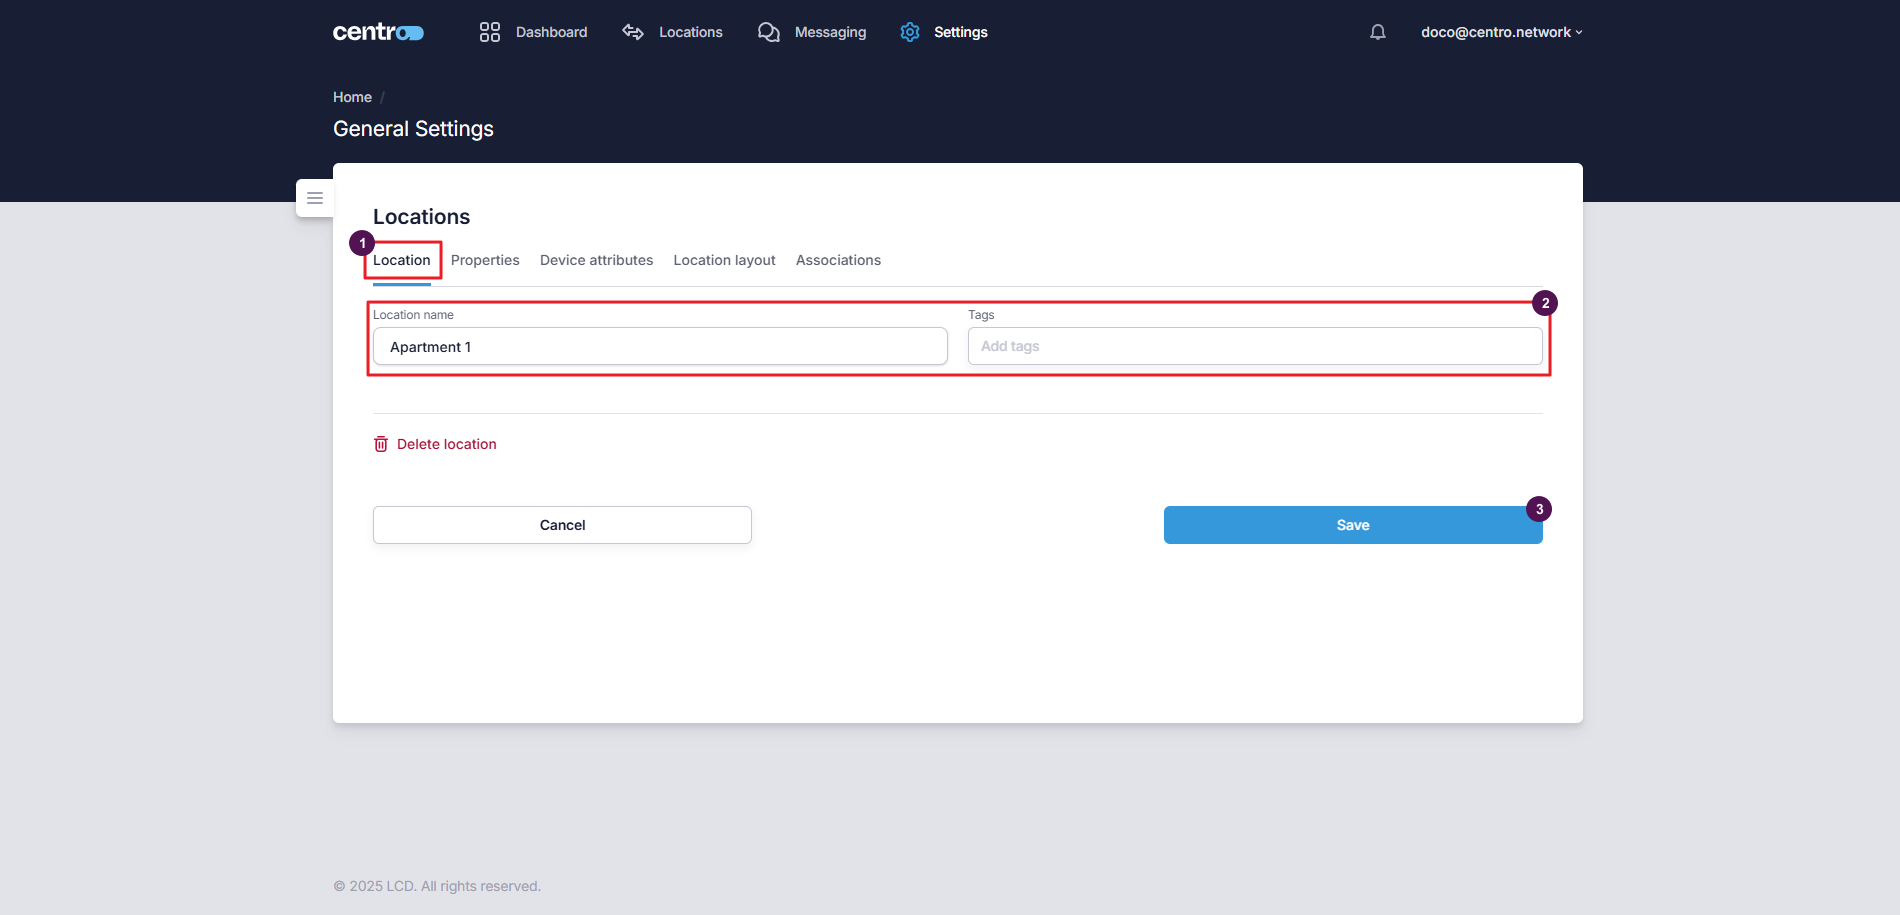
Location information
-
Go to the Location tab.
-
Make your changes.
-
Select Save.
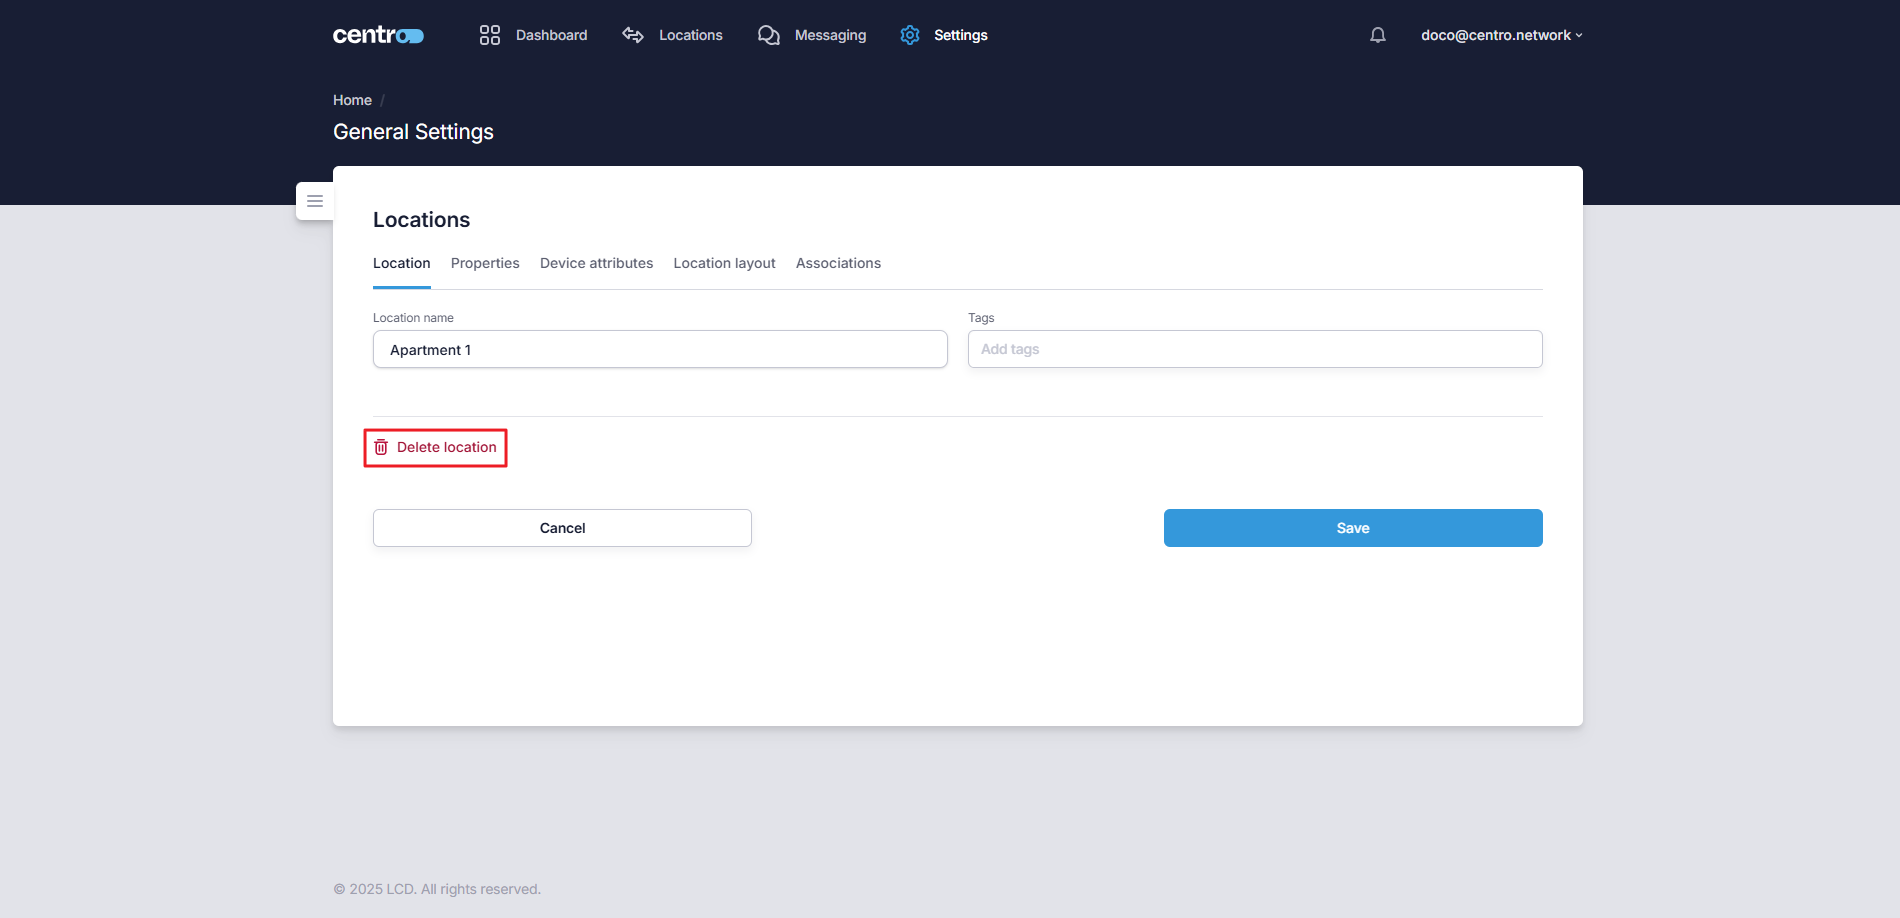
To remove a location, select the Delete location link. Deleting a location also removes its associations.
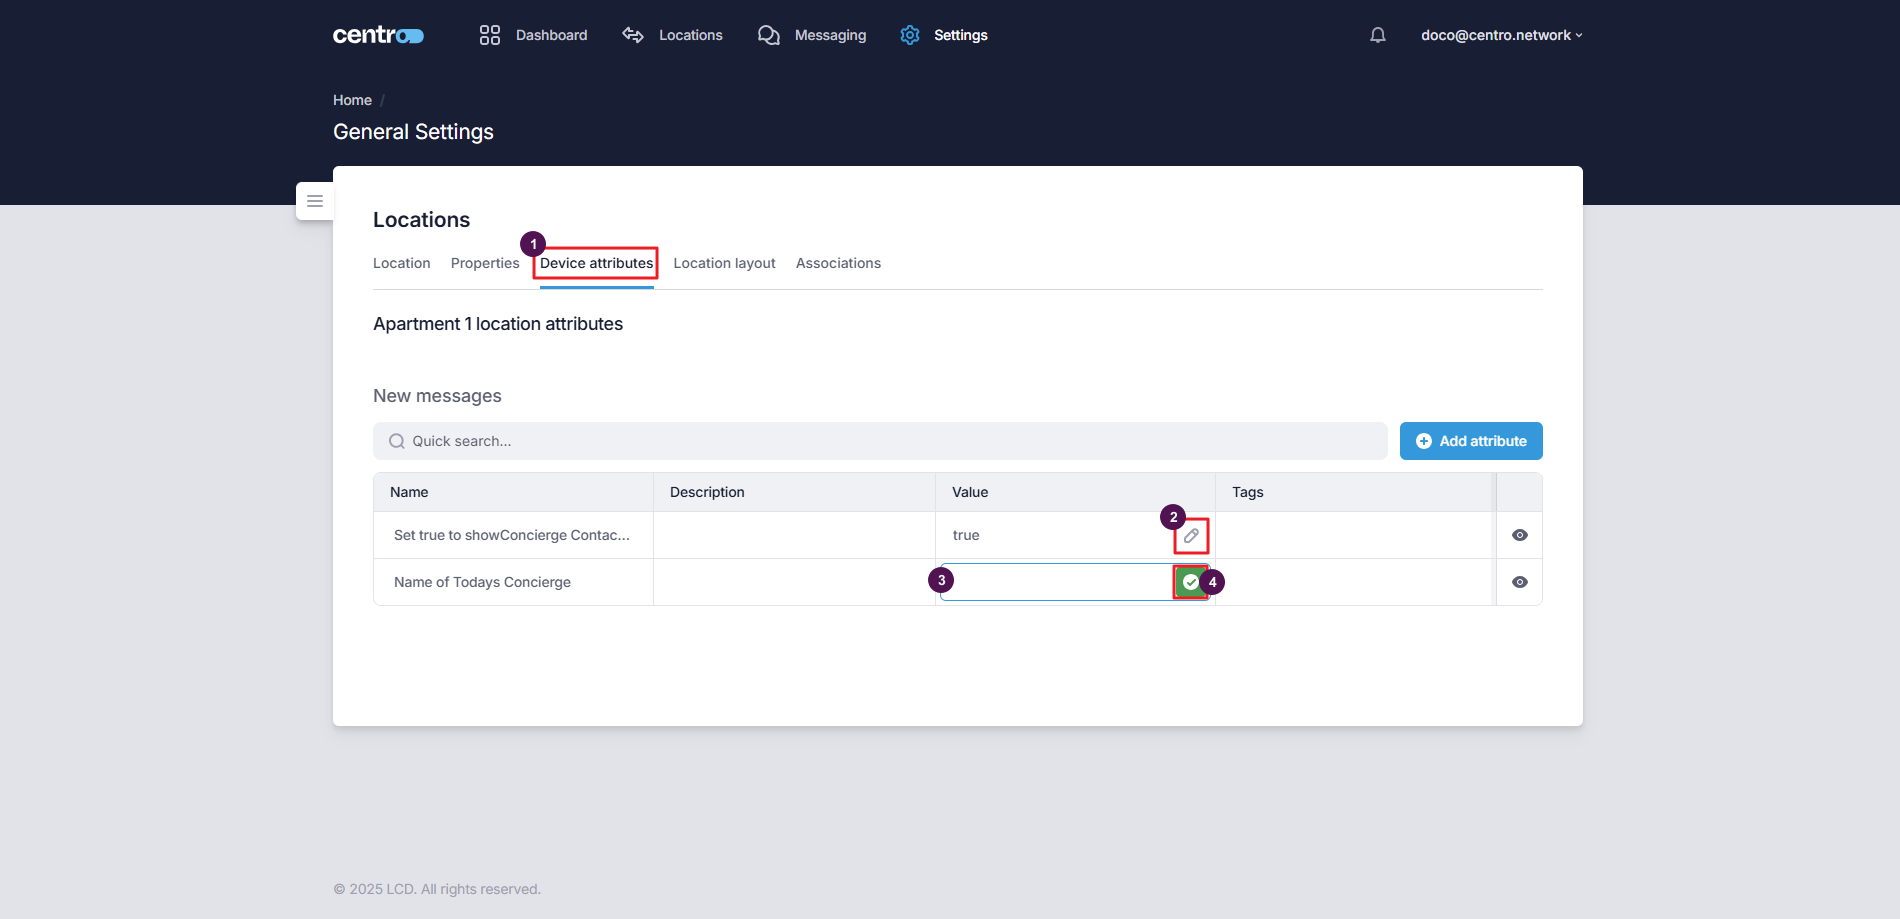
Device attributes
Device attributes are the per-location values of a device's settings — so the same device template can behave differently in each space.
Add an attribute
-
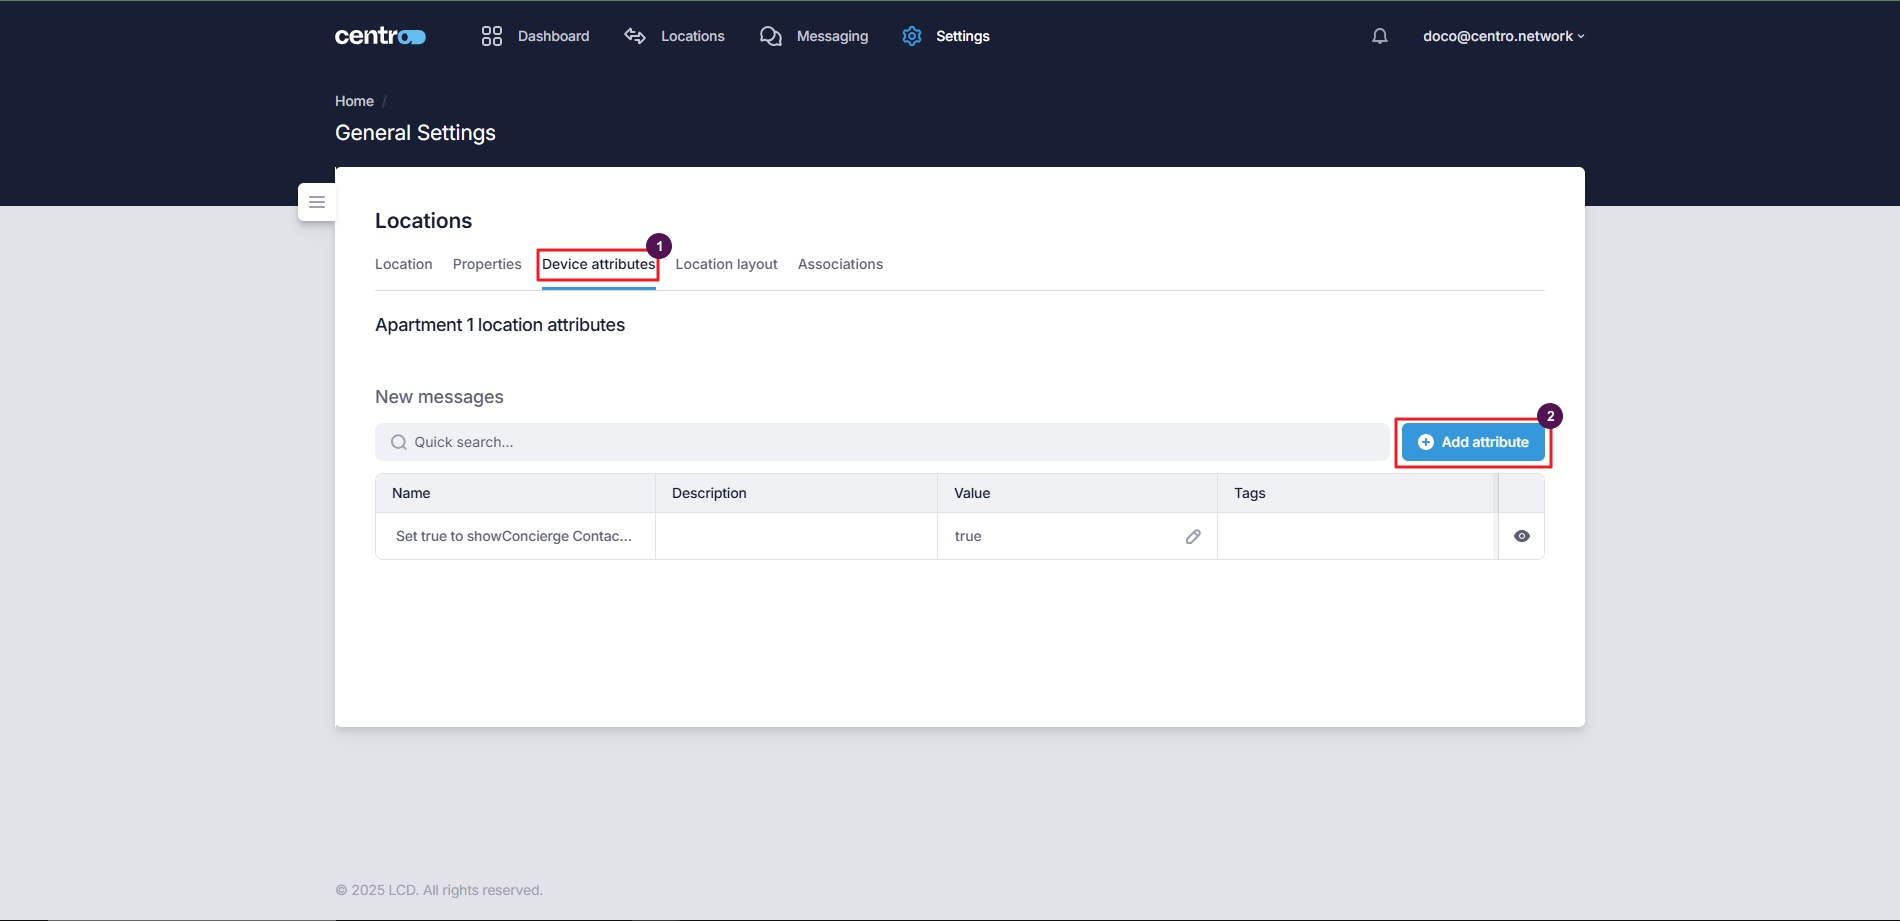
Go to the Device Attributes tab.
-
Select Add Attribute.
-
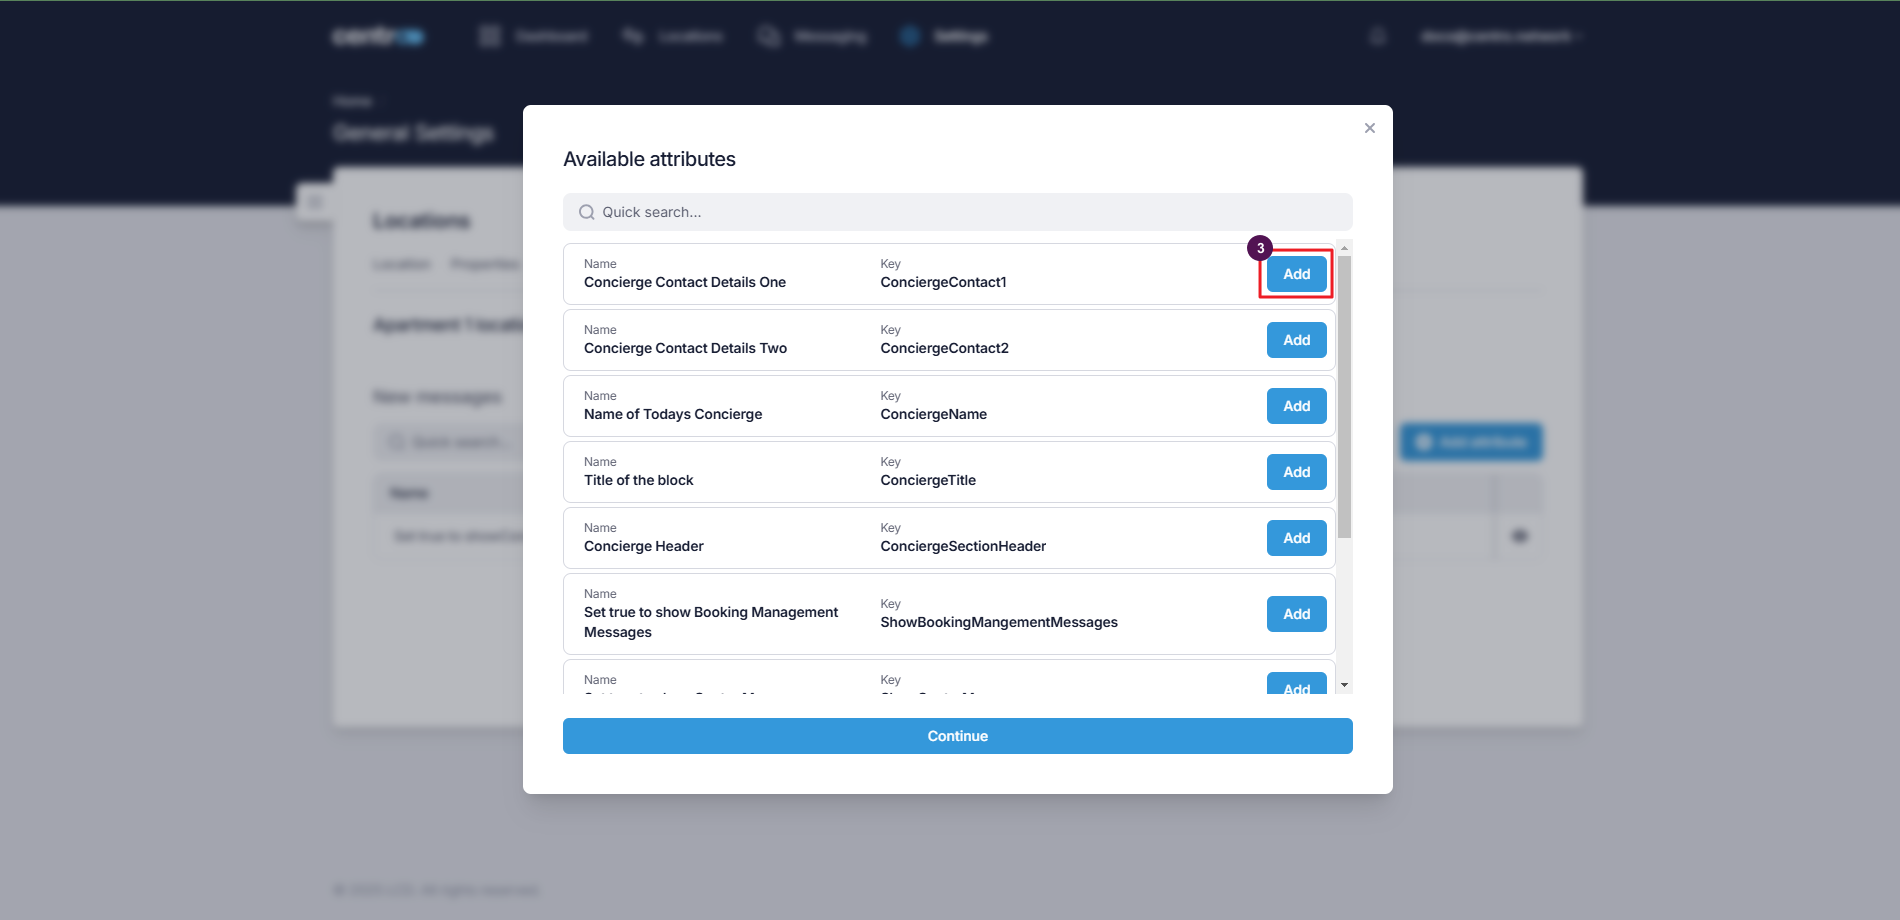
Select Add to add the attribute to the location.
Edit an attribute value
-
On the Device Attributes tab, select the pencil icon.
-
Enter the new value.
-
Select the green tick to save.
Location layout
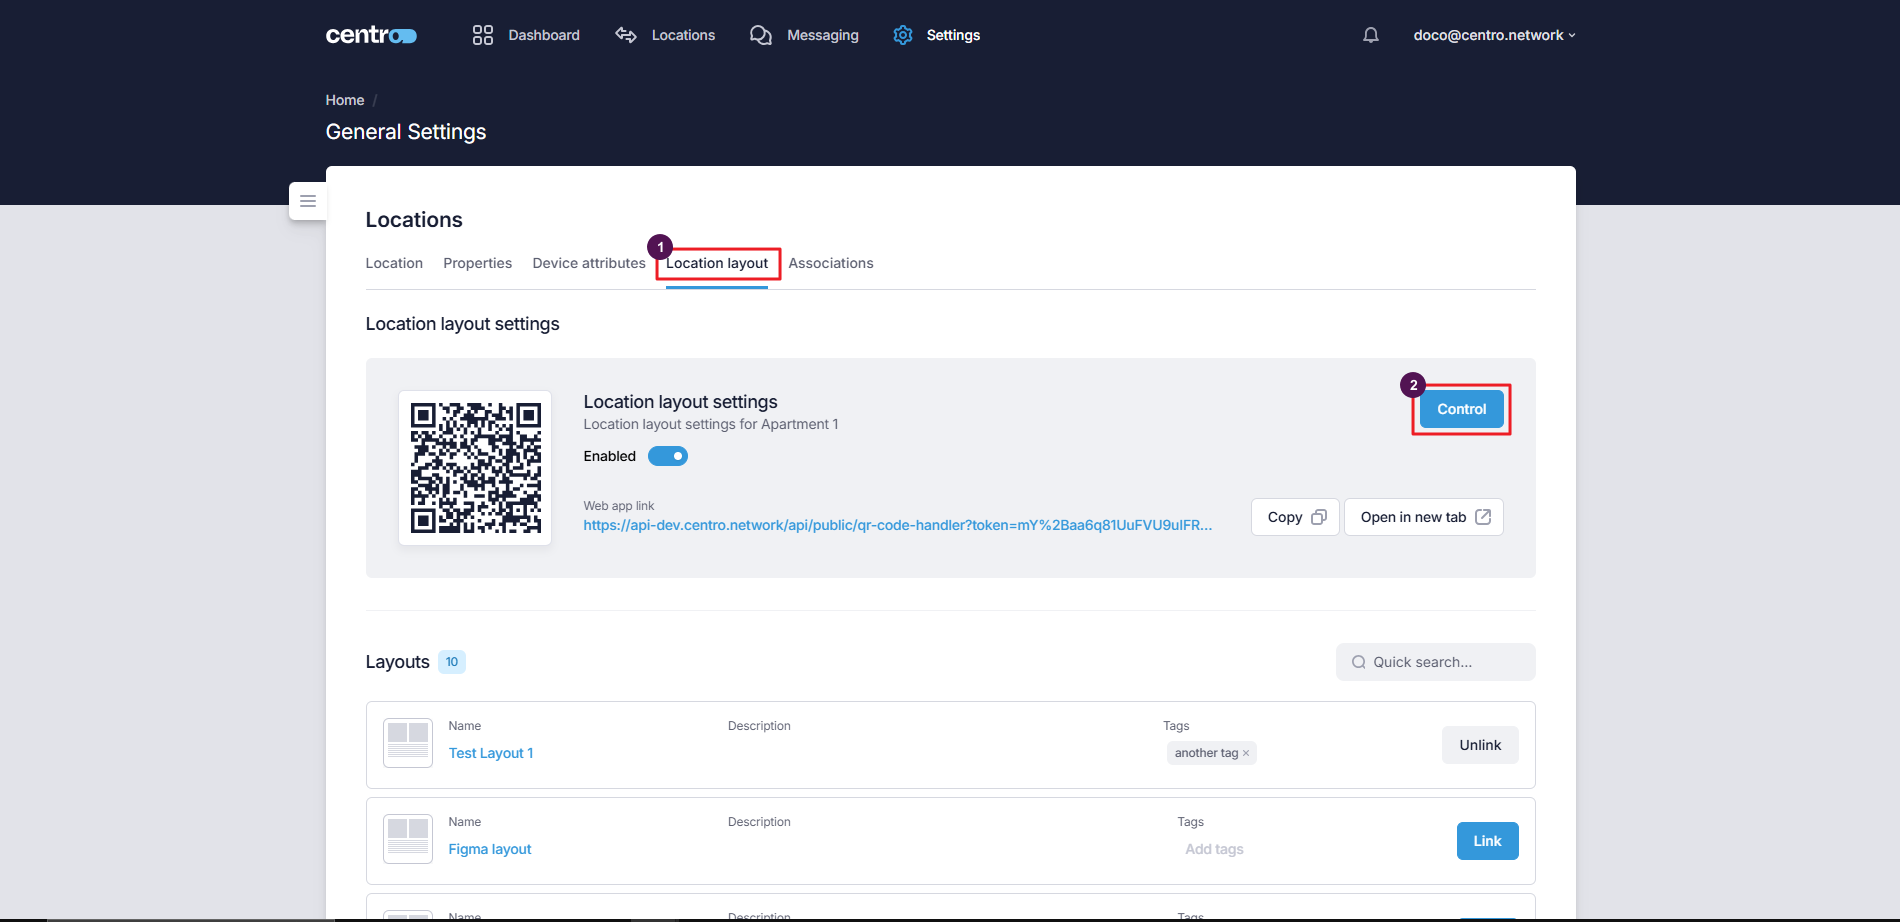
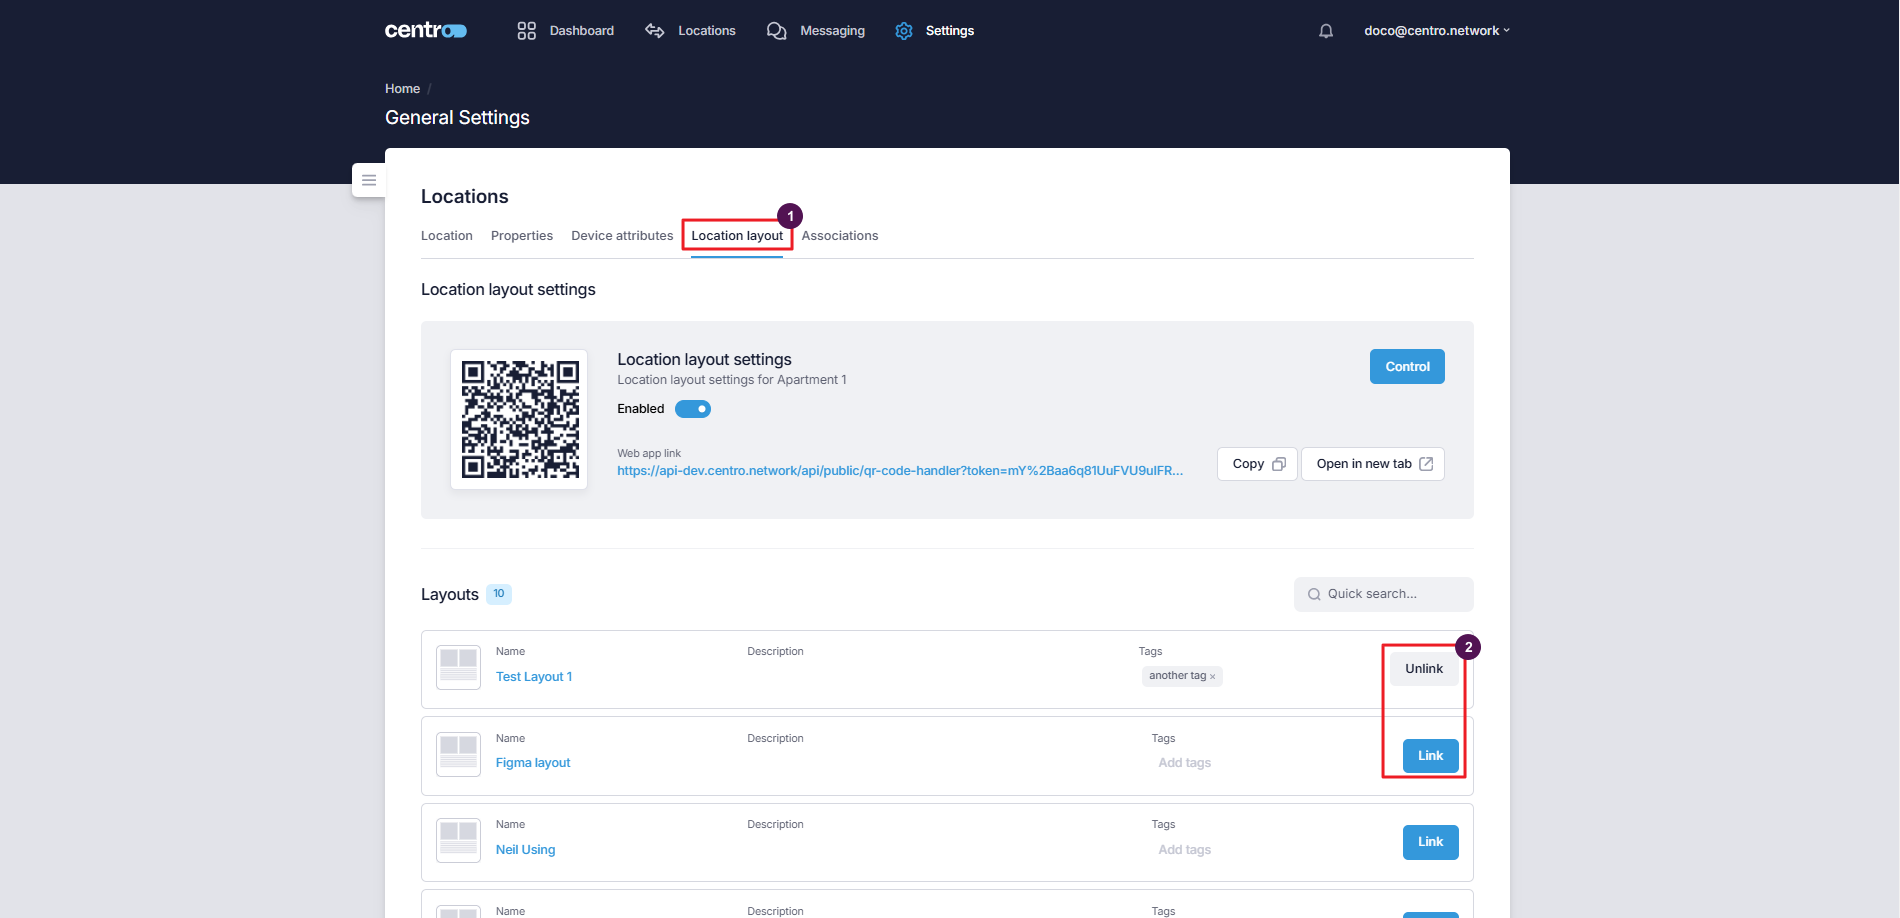
The Location Layout tab is where you link the UI layout a user sees for this location.
-
Select Control to preview the layout in mobile view.
-
Select Link / Unlink to attach or detach a UI layout.
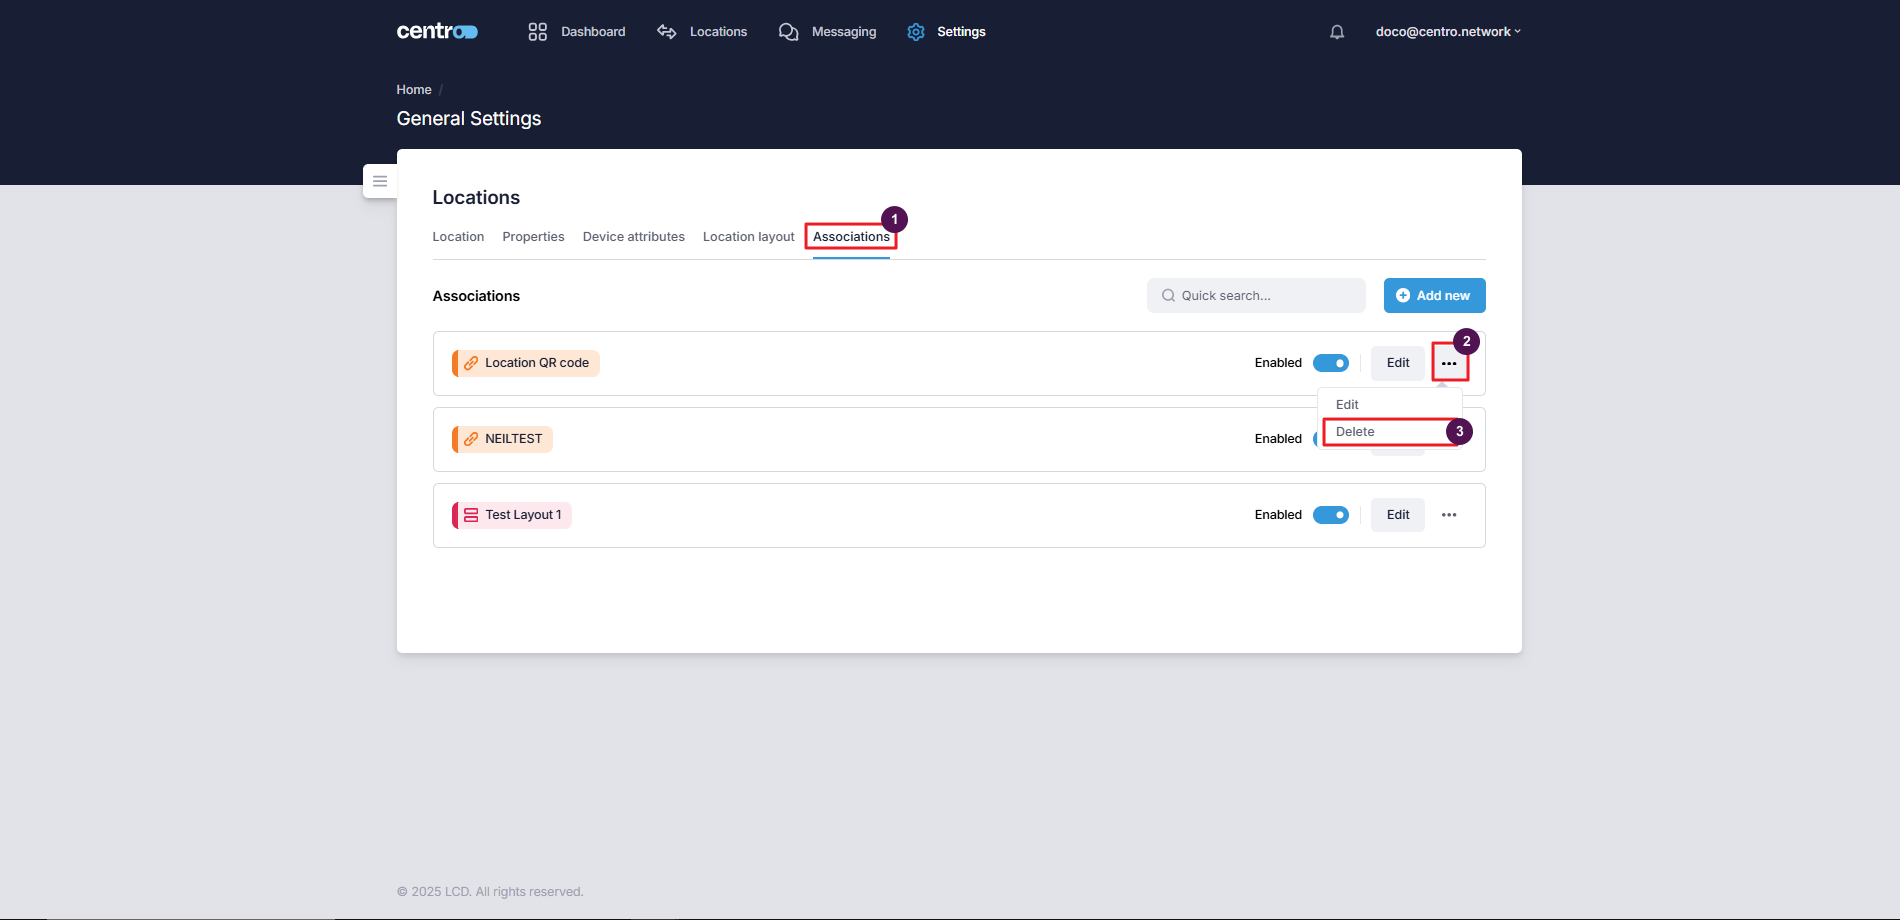
Associations
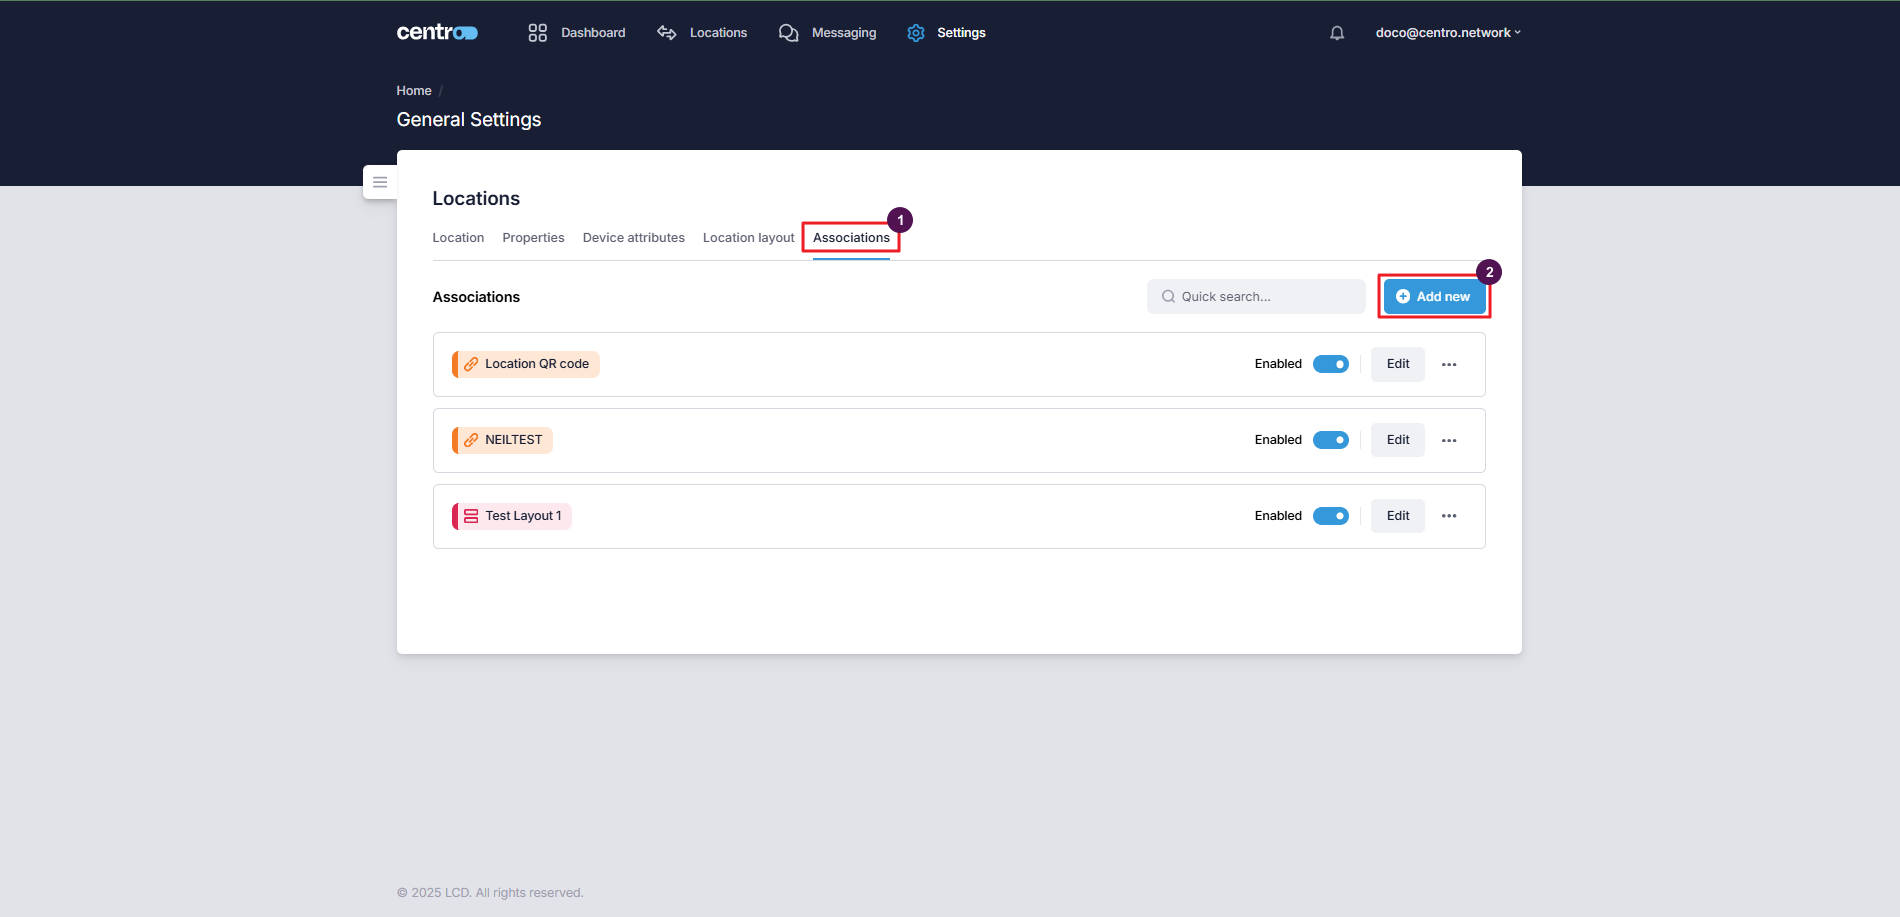
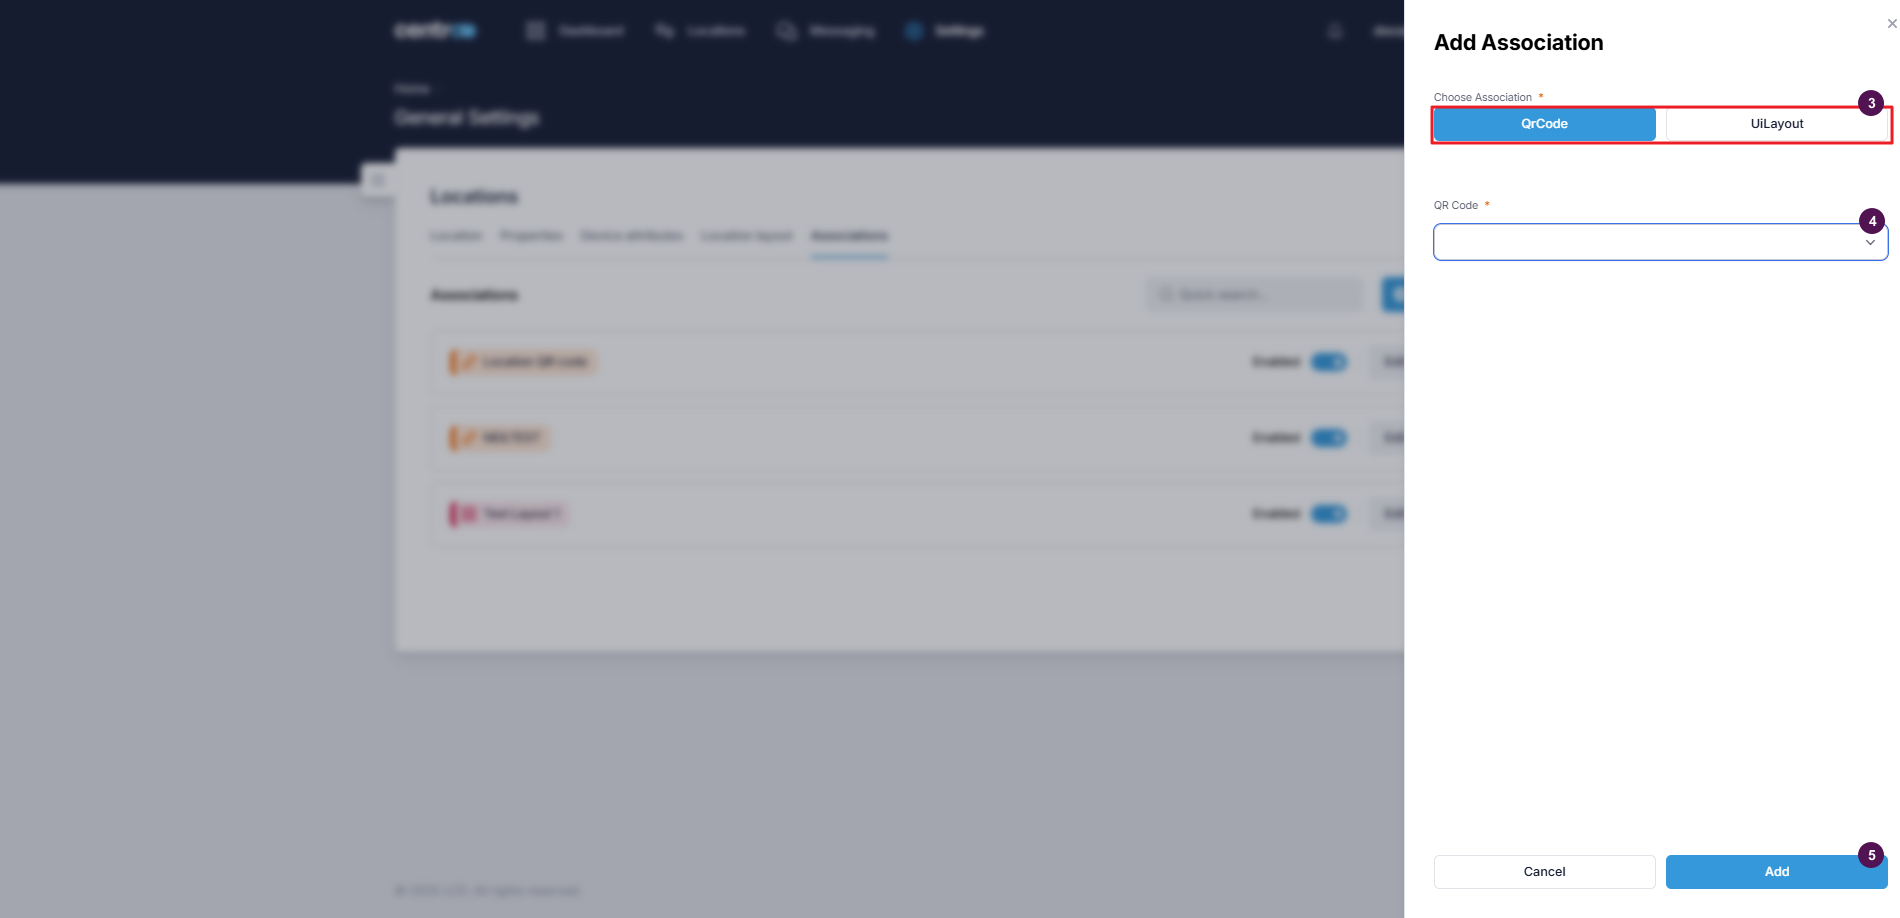
The Associations tab is where you link a location to the objects that serve it — its door lock or Flexipass key, its 2N intercom, its touchpanel / connector, a PMS resource, a QR code, and more. This is how a room gets the devices and access that belong to it.
Add an association
-
Go to the Associations tab.
-
Select Add New.
-
Select an association type.
-
Choose the association.
-
Select Add.
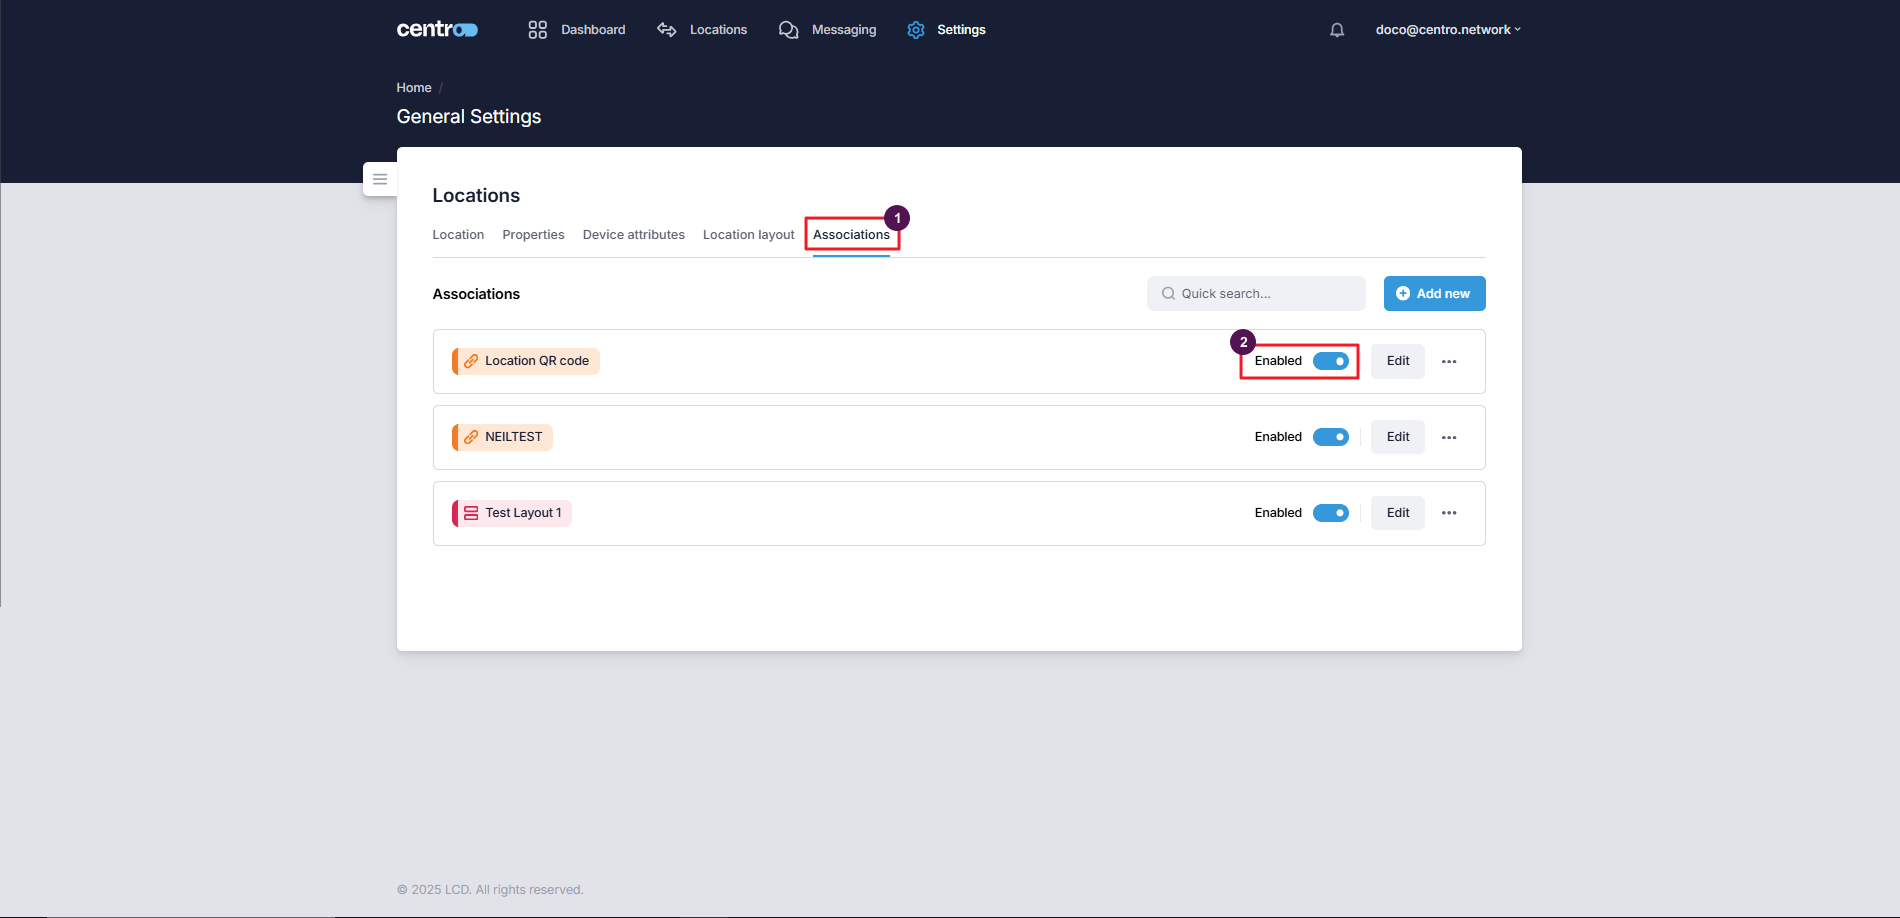
Enable or disable an association
On the Associations tab, toggle the switch to enable or disable an association — useful for turning a link on or off without removing it.
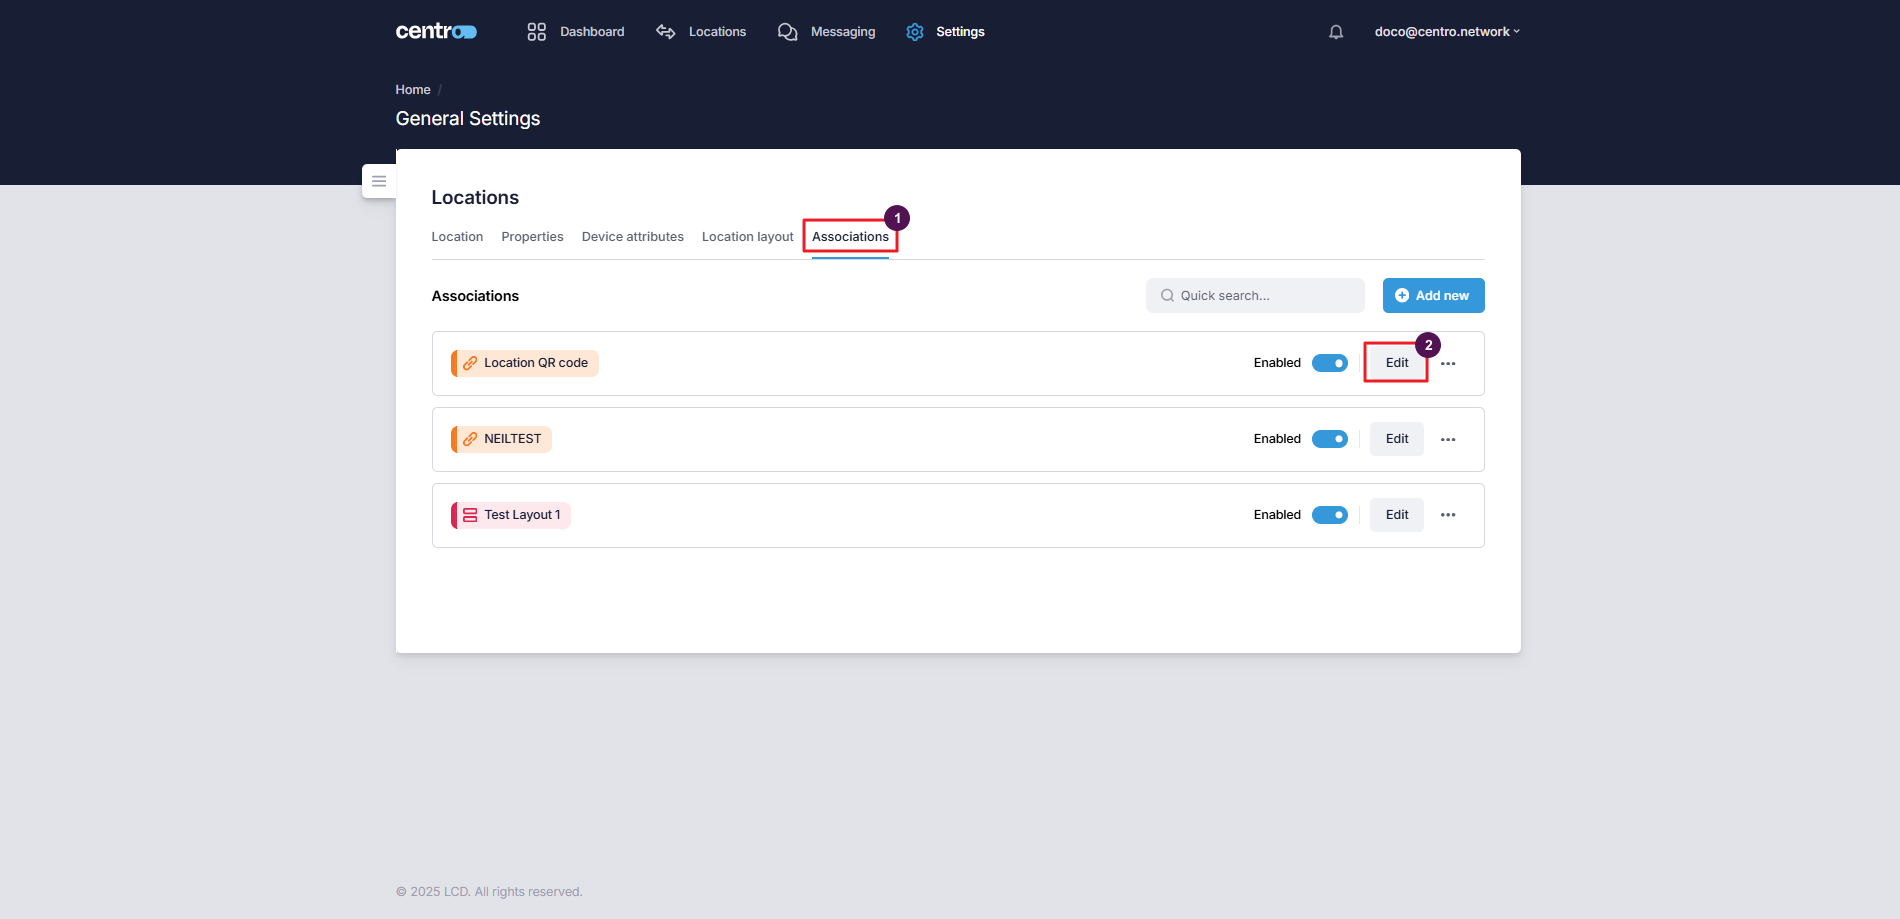
Edit an association
-
On the Associations tab, select Edit.
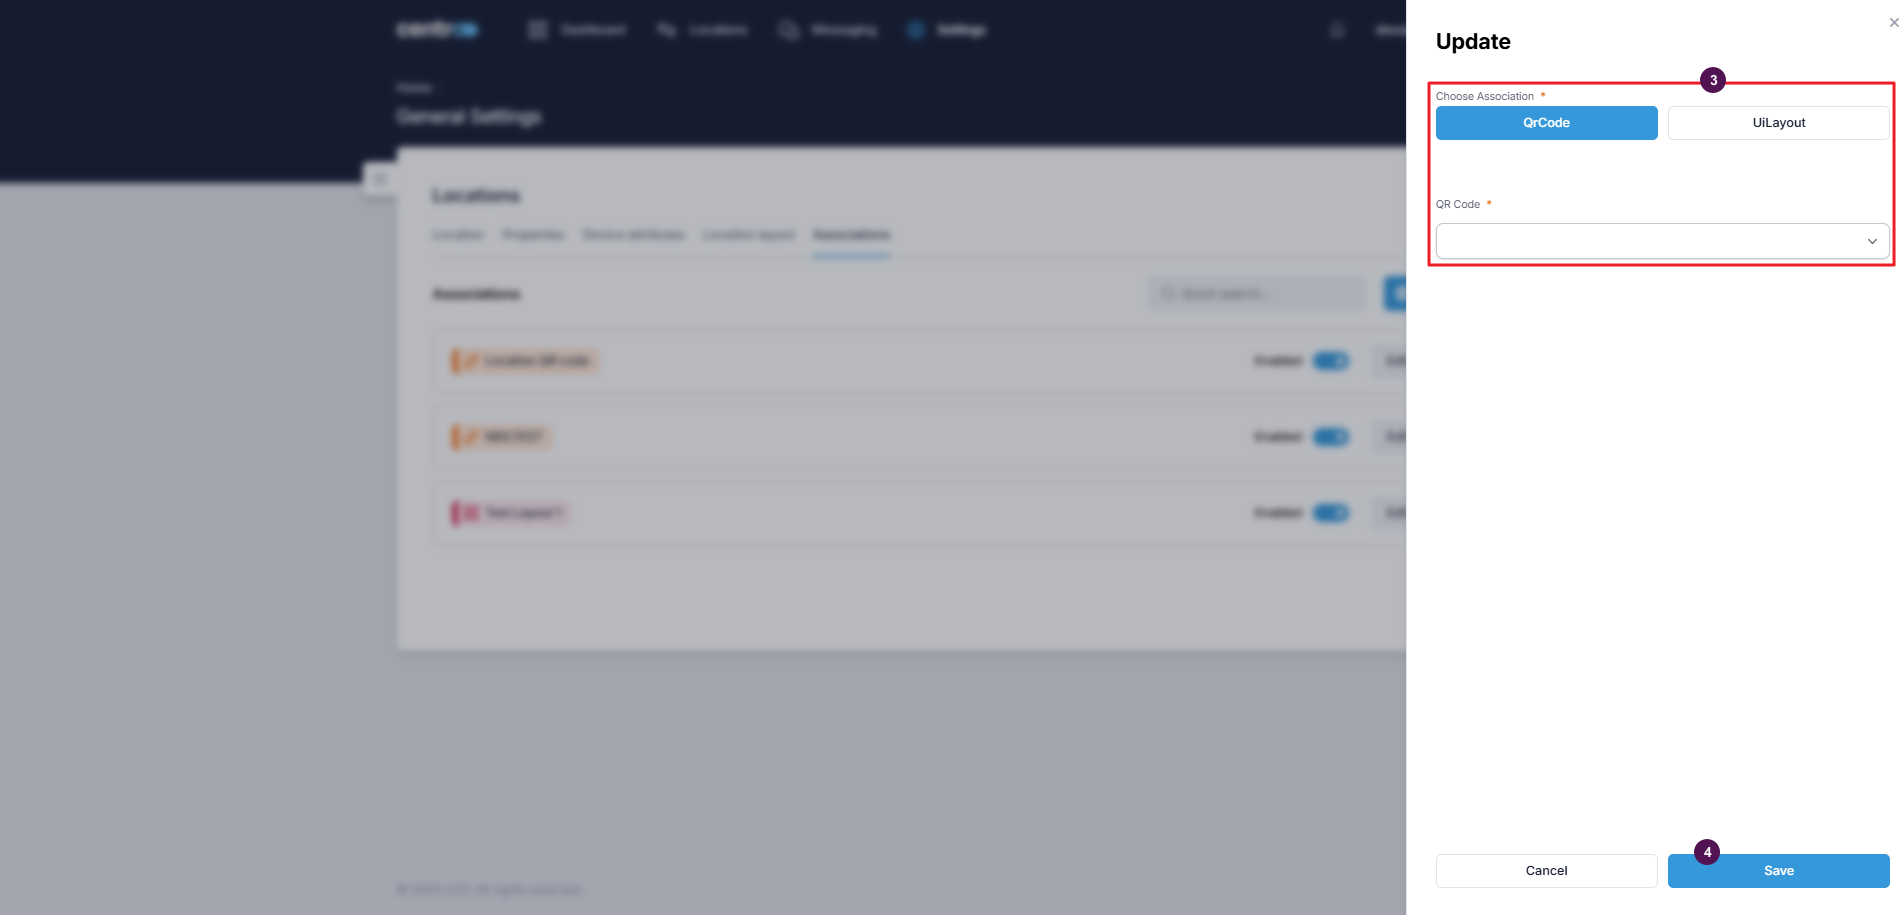
-
Make your changes.
-
Select Save.
Delete an association
-
On the Associations tab, select the three dots.
-
Select Delete.
Once a location is set up, service managers work with it day to day — see Working with locations.